This is the fifth and last part of a tutorial course in which you’ll learn and understand the basics of Django by building a clone of the popular website Netflix.

In this tutorial, you’ll learn how to deploy a Django application easily using fly.io.
Important note: Even though fly.io has a free version, they need your credit card to be set.
1- In the /django_netflix_clone/settings.py file set the ALLOWED_HOSTS configuration to accept all hosts.
# django_netflix_clone/settings.py
# Add this line
ALLOWED_HOSTS = ["*"]  # new
2- Install Gunicorn as our production server.
python -m pip install gunicorn
3- Update the requirements.txt file to list all the packages in the current Python virtual environment.
pip freeze > requirements.txt
The new content of the requirements.txt should now be similar to:
asgiref==3.5.0
backports.zoneinfo==0.2.1
Django==4.0.2
gunicorn==20.1.0
Pillow==9.0.1
sqlparse==0.4.2
Replace backports.zoneinfo==0.2.1 with backports.zoneinfo;python_version<"3.9" if your python version is greater than or equal to 3.9.
4- Install flyctl (the command line utility to deploy on fly.io)
Follow the instructions on the website https://fly.io/docs/hands-on/install-flyctl/ depending on your OS.
For Linux we should run:
curl -L https://fly.io/install.sh | sh
then run
export FLYCTL_INSTALL="https://dev.to/home/horacefayomi/.fly"
export PATH="$FLYCTL_INSTALL/bin:$PATH"
to add flyctl to the path.
5- Create an account on fly.io (skip if you already have one)
Run
flyctl auth signup
Your browser will open up with the Fly sign-up screen.
6- Login to fly.io
Run
flyctl auth login
Your browser will open up with the Fly sign-in screen.
7- Configure the application
To configure and launch the app, run the fly launch command and follow the wizard. You can set a name for the app and choose a default region. You can also choose to launch and attach a Postgresql database and/or a Redis database though we are not using either in this example.
To do that run:
fly launch
Important:
- Make sure the project name is the same as Django project name. But in our case, the name is
django_netflix_clonewhich contains underscore_which is not allowed by fly.io.
So we leave the project name blank and wait the command execution to finish. A DockerFile will be generated and will modify it. At the end of the file, replace"demo.wsgi"by"the_project_name_with_non_allowed_underscore.wsgi"(in our case"django_netflix_clone.wsgi" - Accept by taping
ywhen the prompt asks for database:
? Would you like to set up a Postgresql database now? (y/N)
- Add the following line into the generated DockerFile:
...
RUN python manage.py collectstatic --noinput
# Add this line after
RUN python manage.py migrate --noinput
...
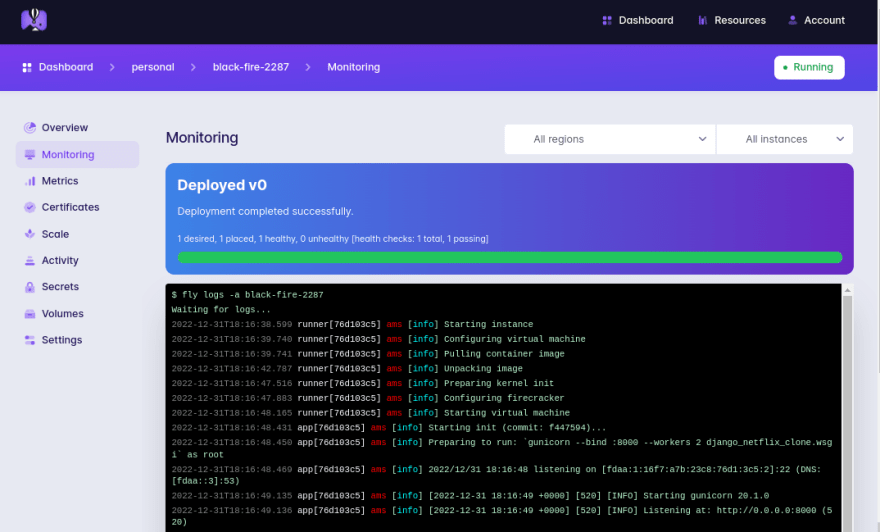
8- Deploy your app
Run
fly deploy
If everything goes well, you should a similar output:
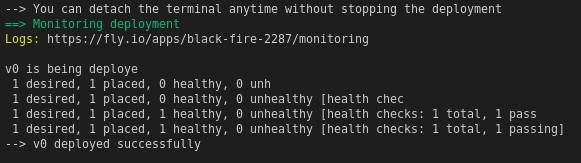
With a link you can click to open the monitoring page:
9- Open your application
Run
RUN python manage.py migrate --noinput
There we go, your website should be available online now.
Here is the link to the fly.io version of the tutorial:
https://empty-night-7673.fly.dev/
Congratulations again. 🎉.
We are at the end of this course.
You're a champion for making it to the end.
To conclude this adventure, I want to say first thanks you for choosing this tutorial.
Second, this tutorial just scratches the surface of all Django is capable of. There is much other stuff to learn. So feel free to check out other content to consolidate and become a better Django developer.
Thank you again.
Sincerely, Horace FAYOMI 😊.