When I set out to build Locker Manager. The goal of the app was an easy way to store my gym locker code on my iPhone and then instantly view it on my Apple Watch. It sounded simple, but is anything ever truly ‘simple’ in the development world? This project taught me a lot about SwiftUI, WatchConnectivity, debugging across devices, and how much work it takes to ship something to the App Store once the development process was complete.
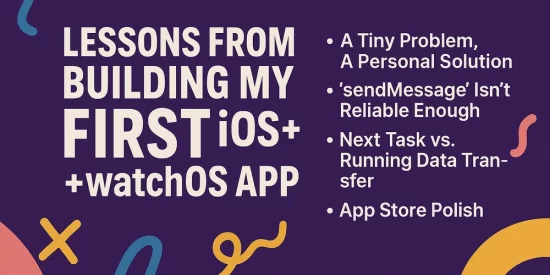
The Idea: A Tiny Problem, A Personal Solution
The app’s job was straightforward: the user enters a locker number and code on iPhone, saves it, and sends it to the Apple Watch for quick access. I wanted it to “just work,” even if the watch app wasn’t open at that exact moment. That requirement pushed me toward thinking about reliability and offline behavior right from the start, and it shaped every decision that followed.
Lesson One: sendMessage Isn’t Reliable Enough
I started with the obvious approach:
WCSession.default.sendMessage(["lockerCode": code], replyHandler: nil)
It worked—until it didn’t. sendMessage requires both apps to be active and reachable at the same time. If the watch app isn’t open, the message is lost. The fix was switching to transferUserInfo, which queues the data until the watch app is ready to receive it.
func queueLockerCodeForWatch(code: LockerCode) {
    do {
        let encodedData = try JSONEncoder().encode(code)
        let userInfo: [String: Any] = ["lockerCodeData": encodedData]
        WCSession.default.transferUserInfo(userInfo)
    } catch {
        print("Failed to encode locker code")
    }
}
Now, even if the user saves the code while the app is off, it still arrives when they open the watch app later.
Lesson Two: Testing Isn’t Always What It Seems
Here’s the part they don’t put in the docs: transferUserInfo does not work in the watchOS simulator. I spent time wondering why nothing was being sent, adding print statements, and re-checking my delegate methods. Only after deep diving into Apple’s forums did I discover that you must test WatchConnectivity on actual paired devices for certain transfer methods. As soon as I switched to my real Apple Watch, the data flowed instantly.
Lesson Three: Activation State Matters
My WCSession delegate now listens for activation and maintains a flag so I can debug connectivity problems. For example:
func session(_ session: WCSession, activationDidCompleteWith activationState: WCSessionActivationState, error: Error?) {
    DispatchQueue.main.async {
        self.sessionActivated = (activationState == .activated)
        self.lastErrorMessage = error?.localizedDescription
    }
}
This makes it clear when the watch isn’t ready, which avoids me chasing “bugs” that are really just connection issues.
Lesson Four: App Store Polish
Once the data transfer worked reliably, I thought I was done. But submitting to the App Store meant creating icons for iPhone and Apple Watch, filling out metadata, privacy policy, screenshots, and keywords. Even for a small app, this took almost as long as the development itself. The polish work—animations, UI tweaks…
Lesson Six: Deciding the App’s Flow and Features
One of the hardest parts wasn’t the coding—it was deciding what the app should actually do. My original design let users save old locker codes and look back at them, which made sense to me at the time. After all, a user might like a particular random 4 number combination, right? But when I talked to my friends, the users, I realized that locker codes are usually ephemeral—once you’re done with your locker, that code is useless. This isn’t a password manager; it’s a convenience tool. Stripping away that history feature made the app simpler, cleaner, and more focused on its real purpose: quick, easy access to your current locker code.
Final Thoughts
What started as a “side project” ended up being course in WatchConnectivity, SwiftUI state management, and Apple’s publishing process. I learned that even the smallest apps have dozens of hidden challenges, and that sometimes the trickiest bugs aren’t in your code at all—they’re in how you test it.
If you’re building your first iOS + watchOS app, start small, test on real devices, and don’t underestimate the time you’ll spend making it shine once the core feature works.