ChatGPTMemory updated
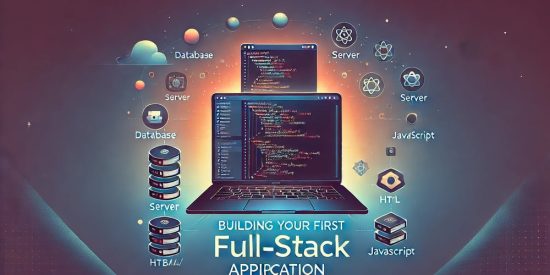
Building Your First Full-Stack Application
So, you’ve decided to take the plunge into full-stack development. Awesome! But now what? Where do you even start? Don’t worry—I’ve got you covered. By the end of this article, you’ll know exactly what steps to take to build your first full-stack application.
We’re not going to dive into the deep end with complex frameworks right away. Instead, we’ll build a basic, yet functional, full-stack app. This guide will focus on the essentials: front-end, back-end, and connecting the two. Let’s get started.
Step 1: Understanding the Basics
Before you write a single line of code, you need to understand the architecture of a full-stack application. Essentially, it’s split into two parts:
-
Front-End: This is the client-side part of your application. It’s what users interact with directly. Typically, it’s built with HTML, CSS, and JavaScript.
-
Back-End: This is the server-side part. It handles data processing, storage, and business logic. Common technologies include Node.js, Express.js, and databases like MongoDB.
Tools You’ll Need
To build a full-stack app, you’ll need a few tools:
-
Code Editor: VS Code is a popular choice.
-
Node.js and NPM: You’ll need Node.js to run your back-end, and NPM (Node Package Manager) to manage dependencies. You can download both from here.
-
Database: We’ll use MongoDB for this example. Sign up for a free account at MongoDB Atlas to get started.
Step 2: Setting Up Your Project
First, create a new directory for your project and navigate into it using your terminal:
bashCopy codemkdir my-first-fullstack-app

cd my-first-fullstack-app
Next, initialize a new Node.js project:
bashCopy codenpm init -y
This command creates a package.json file that keeps track of your project’s dependencies and scripts.
Installing Dependencies
You’ll need a few libraries to get started:
-
Express: A minimal web framework for Node.js.
-
Mongoose: An ODM (Object Data Modeling) library for MongoDB.
-
Nodemon: A utility that automatically restarts your server when files change.
Install them using the following command:
bashCopy codenpm install express mongoose

npm install --save-dev nodemon
Step 3: Creating the Back-End
Let’s start with the server-side of your application. Create a new file called server.js in your project’s root directory:
javascriptCopy codeconst express = require('express');

const mongoose = require('mongoose');

const app = express();

const PORT = process.env.PORT || 5000;

mongoose.connect('your_mongodb_connection_string', {

    useNewUrlParser: true,

    useUnifiedTopology: true,

})

.then(() => console.log('MongoDB connected'))

.catch(err => console.log(err));

app.get('/', (req, res) => {

    res.send('Hello World!');

});

app.listen(PORT, () => {

    console.log(Server running on port ${PORT});

});
This basic server listens on a specified port and connects to MongoDB. The app.get method creates a simple route that returns a “Hello World!” message when accessed.
Setting Up MongoDB
Before running your server, replace 'your_mongodb_connection_string' with your actual connection string from MongoDB Atlas. This string is provided when you create a cluster in MongoDB Atlas.
Step 4: Building the Front-End
Now that the back-end is in place, let’s create a simple front-end. In your project’s root directory, create a new folder called public and inside it, create an index.html file:
htmlCopy codehtml>

<html lang="en">

<head>

    <meta charset="UTF-8">

    <meta name="viewport" content="width=device-width, initial-scale=1.0">

    <title>My First Full-Stack Apptitle>

head>

<body>

    <h1>Welcome to My First Full-Stack Application!h1>

    <p>This is a simple full-stack application.p>

body>

html>
Serving Static Files
To serve this HTML file through your Express server, add the following line to your server.js file:
javascriptCopy codeapp.use(express.static('public'));
This tells Express to serve any static files found in the public directory. Now, when you visit http://localhost:5000, you should see your HTML page.
Step 5: Connecting Front-End and Back-End
Let’s make your front-end dynamic by fetching data from your back-end. Add a new route in server.js to return some JSON data:
javascriptCopy codeapp.get('/api/data', (req, res) => {

    res.json({ message: 'Hello from the back-end!' });

});
Next, update your index.html file to fetch this data:
htmlCopy code<body>
<h1>Welcome to My First Full-Stack Application!h1>
<p id="message">p>
<script>
fetch('/api/data')
.then(response => response.json())
.then(data => {
document.getElementById('message').textContent = data.message;
});
</script>
body>
Now, when you load your page, it will display the message fetched from your back-end.
Step 6: Testing and Deployment
Your application is now functional! Before deploying, test it locally by running:
bashCopy codenodemon server.js
Deploying to Heroku
To make your app available online, you can deploy it to Heroku. Here’s how:
-
Install Heroku CLI: Download it from here.
-
Login to Heroku: Run heroku login in your terminal.
- Create a new Heroku app:
bashCopy codeheroku create my-first-fullstack-app
- Deploy your app:
bashCopy codegit init
git add .
git commit -m "Initial commit"
heroku git:remote -a my-first-fullstack-app
git push heroku master
Your app will now be live on Heroku!
Final Thoughts
Building your first full-stack application can seem daunting, but with the right approach, it’s completely manageable. Start simple, focus on learning, and gradually build up your skills.
And hey, if you’re a developer looking to grow your presence online, consider boosting your YouTube channel or website with services like Mediageneous. They’re a trusted provider for getting the views, subscribers, and engagement you need to stand out in the crowded digital landscape.
Happy coding!
4o


