Svelte and Tailwind for building Chrome Extension

svelte-and-tailwind-for-building-chrome-extension

A step-by-step guide on how to create a Chrome Extension using Svelte and Tailwind CSS

Introduction

This article will show you how to create a Chrome Extension using hot frameworks such as Svelte and Tailwind CSS. This will also use the very popular Vite as the build tool.

Here are some definitions of the tech choices according to ChatGPT.

What is Svelte?

Svelte is a JavaScript framework that compiles your code into efficient JavaScript that surgically updates the DOM. It is a compiler that converts your code into a more efficient version of itself.

What is a Chrome Extension?

A Chrome extension is a software program that extends the functionality of Google Chrome. It modifies the browser’s behavior and adds new features.

What is Tailwind CSS?

TailwindCSS is a utility-first CSS framework for rapidly building custom user interfaces. It is a CSS framework that provides a set of pre-built classes that can be used to style your HTML elements.

Setting up the project

Make sure you have node.js v16.x or greater

Install Svelte

Initialize the project using vite

npm init vite
  1. Select a project name
  2. Select Svelte
  3. Select TypeScript
  4. Follow the output instruction
cd 
npm install
npm run dev

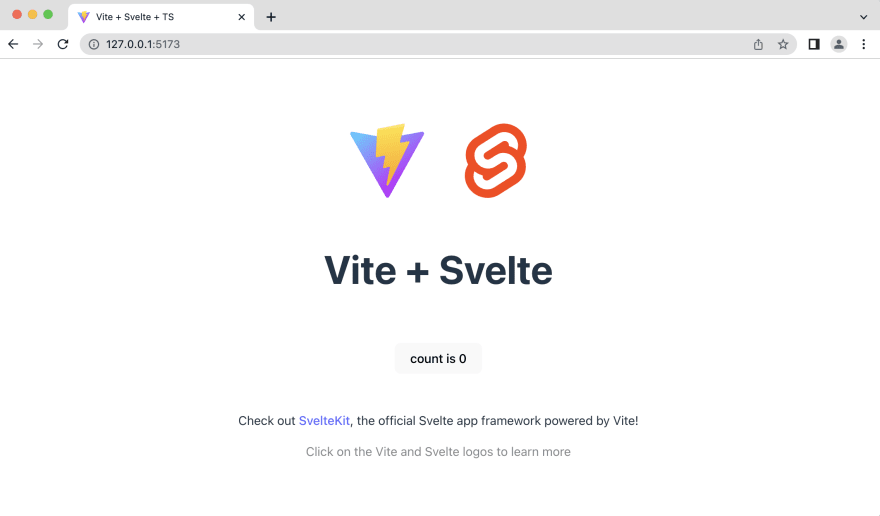
Open the URL in a browser, and you should see the following result.

Install Tailwind

  1. Install Tailwind dependencies
npm install -D tailwindcss postcss autoprefixer
  1. Initialize default Tailwind configuration
npx tailwindcss init tailwind.config.cjs -p
  1. Make sure to enable use of POSTCSS in style blocks
// svelte.config.js
import {vitePreprocess} from '@sveltejs/vite-plugin-svelte';

export default {
  preprocess: vitePreprocess(),
};
  1. Configure content paths
// tailwind.config.js
module.exports = {
  content: ['./src/**/*.{html,js,svelte,ts}'],
  theme: {
    extend: {}
  },
  plugins: []
};
  1. Replace the content of src/app.css with the following
// src/app.css
@tailwind base;
@tailwind components;
@tailwind utilities;

h1 {
  @apply text-4xl font-bold;
}

h2 {
  @apply text-3xl font-bold;
}

Testing Tailwind integration

Add tailwind styles

Add any styles that will be obvious when the app is running.


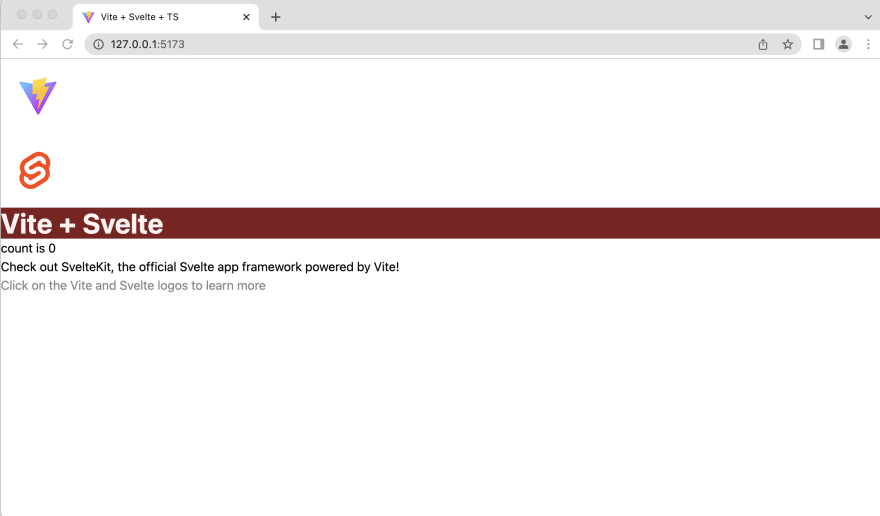
class="bg-red-900 text-red-50">Vite + Svelte

And you should see the following result. We have a heading with dark-red background and light-red text.

Remove unused files

Now that we verify that the app is working as expected, we can remove the unused files.

  1. Delete src/App.svelte
  2. Delete src/main.ts
  3. Delete index.html
  4. Delete src/assets/svelte.png
  5. Delete src/lib folder

Create a very basic chrome extension

Install Chrome Extension Library for vite

Instead of complicating the setup, we will crxjs to help us simplify the development process.

npm i -D @crxjs/vite-plugin@2.0.0-beta.12

Create a manifest file

The manifest file contains the necessary information for the browser to load the extension. For more information, check out the Chrome Extension Manifest

// manifest.json
{
  "name": "Svelte Tailwind Chrome Extension",
  "description": "Sample Extension using Svelte and Tailwind",
  "version": "1.0",
  "manifest_version": 3,
  "action": {
    "default_popup": "src/popup/index.html"
  },
  "permissions": ["storage"]
}

NOTE: The storage permission is added because we will use it later.

Add the plugin to vite.config.js

// vite.config.js
import { crx } from "@crxjs/vite-plugin";
import { defineConfig } from "vite";
import { svelte } from "@sveltejs/vite-plugin-svelte";
import manifest from "./manifest.json";

export default defineConfig({
  plugins: [svelte(), crx({ manifest })],
});

Optional configuration for TypeScript

Update TypeScript configuration files

For some reason, scripts work as expected until these options are added

// tsconfig.json
{
  "compilerOptions": {
   // ...
    "baseUrl": ".",
   }
}
// tsconfig.node.json
{
  "compilerOptions": {
    // other props
    "resolveJsonModule": true,
    "allowSyntheticDefaultImports": true
  },
  "include": ["vite.config.ts", "manifest.json"]
}

Improve Chrome Plugin TypeScript support

To get better TypeScript support, install the chrome type definitions

npm i -D @types/chrome

Create the content of the popup plugin

Creating the content of the plugin is as simple as creating a web typical page. We still use HTML, JavaScript, and CSS. The obvious difference is where we can view the content.

The markup below is the content that will be displayed when the popup extension is opened.


     charset="UTF-8" />
    </span>Popup<span class="nt">
  
  
     class="bg-blue-100 p-10 w-[20rem]">
      

class="text-blue-900">I'm a header

class="italic">in an extension

class="text-xl text-blue-900"> And Tailwind is working!

It is important to match the absolute file path with the one in the manifest file.

// manifest.json
"action": {
  "default_popup": "src/popup/index.html"
},

Create the script file to load CSS(and other stuff)

To make sure Tailwind styles are processed, don’t forget to import the CSS file in the script file.

// src/popup/index.ts
import "../app.css";

Again, it is important to match the relative file path in the script tag

Build and load the extension

  1. Run npm run dev or npm run build
  2. Open the chrome extension page by typing chrome://extensions in the address bar
  3. Enable the developer mode
  4. Click on the Load unpacked button
  5. Select the dist folder
  6. Open the extension menu; then, click the loaded extension

Add interaction using Svelte

Now let’s make the extension interactive. We will create a counter that will be saved in the browser storage.

Create a reusable counter component

Create a simple and reusable counter component that can be used in any part of the application.

// src/components/Counter.svelte
<script lang="ts">
  export let count: number;
  let message: string = null;

  const increment = () => (count += 1);
  const decrement = () => (count -= 1);

  const handleSave = () => {
    chrome.storage.sync.set({count}).then(() => {
      message = 'Updated!';

      setTimeout(() => {
        message = null;
      }, 2000);
    });
  };
</script>

<div class=" bg-blue-50 min-w-[20rem] p-4 flex flex-col gap-4">
  <p class="text-blue-800 text-xl">
    Current count: <span class="font-extrabold">{count}</span>
  </p>
  <div class="flex gap-2">
    <button on:click={decrement}>-</button>
    <button on:click={increment}>+</button>
    <button class="ml-auto" on:click={handleSave}>Save</button>
    {#if message}<span class="font-bold text-blue-800">{message}</span>{/if}
  </div>
</div>

<style scoped>
  button {
    color: theme('colors.blue.700');
    padding: theme('spacing.2') theme('spacing.4');
    font-size: theme('fontSize.base');
    border: 1px solid theme('borderColor.blue.400');
    box-shadow: theme('boxShadow.lg');
    background-color: theme('backgroundColor.blue.50');
  }

  button:hover,
  button:focus {
    background-color: theme('colors.blue.800');
    color: theme('colors.blue.50');
  }
</style>

If the code above does not make any sense, check out the Svelte tutorial

Update the popup script

// src/popup/index.ts
import '../app.css';
import Counter from '../components/Counter.svelte';

const target = document.getElementById('app');

async function render() {
  const {count} = await chrome.storage.sync.get({count: 0});

  new Counter({target, props: {count}});
}

document.addEventListener('DOMContentLoaded', render);

Remove unnecessary stuff in the HTML file


     charset="UTF-8" />
    </span>Popup<span class="nt">
  
  
     id="app">

Re-test the extension

There should be no need to rebuild the app because crxjs has HMR enabled by default. If not, just reload the extension.

Create a New Tab extension

A new tab extension is an extension that replaces the default new tab page with a custom one. Creating a new tab extension is almost the same as creating a popup extension. The only difference is the manifest file.

// manifest.json
{
  // Other props
  "chrome_url_overrides": {
    "newtab": "src/new-tab/index.html"
  }
}

Copy-paste the popup HTML file to the new tab HTML file


     charset="UTF-8" />
    </span>New Tab<span class="nt">
  
  
     id="app">

Copy-paste the popup JS file to the new tab JS file

// src/popup/index.ts
import '../app.css';
import Counter from '../components/Counter.svelte';

const target = document.getElementById('app');

async function render() {
  const {count} = await chrome.storage.sync.get({count: 0});

  new Counter({target, props: {count}});
}

document.addEventListener('DOMContentLoaded', render);

Re-test the extension

Just like magic, the new tab extension is working.

(BONUS) Awesome HMR support

By default, crxjs has HMR enabled. This is a big productivity boost for developers!!!

Repository

Check the source code here

What’s next

  • [ ] Add an options page
  • [ ] Add a content script
  • [ ] Add a background script
  • [ ] Add a dev tools page
  • [ ] Deploying the extension
Total
0
Shares
Leave a Reply

Your email address will not be published. Required fields are marked *

Previous Post
assembling-a-project-team:-roles,-responsibilities-&-best-practices

Assembling a Project Team: Roles, Responsibilities & Best Practices

Next Post
how-to-create-great-white-papers

How to Create Great White Papers

Related Posts