Why is everyone talking about Claude Code?
I’m seeing it pop up everywhere—in my LinkedIn feed, on product podcasts, and in my Slack communities. And it’s not just developers talking about it. It’s product managers, writers, researchers, consultants, you name it.
And I get it. I love Claude Code. I started using it back in June to help me with some coding projects and it has since crept into everything that I do. I use it to manage tasks, to do research, to be my writing buddy, and so much more.
But I’ve noticed that if you don’t use Claude Code, it’s hard to understand exactly what it is and why it’s different from what you see in the browser.
So today, I’m going to break it down. We’ll talk about what Claude Code is, how it’s different from the other ways you might use Claude, and we’ll walk through a detailed example so you can decide if it’s a good fit for you.
Finally, I’ll help you get started with Claude Code—even if you aren’t technical—and we’ll look at a compelling first use case. We’ll end with a sneak peek at what I’ll be sharing over the next few weeks and beyond to help you get even more power out of Claude Code.
What is Claude Code?
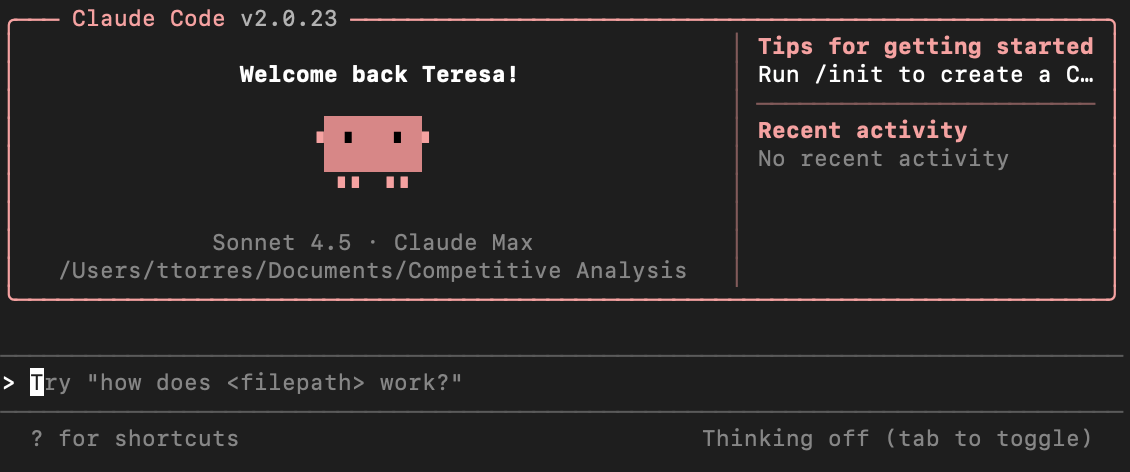
Claude Code is a version of Claude that you run from within the terminal (a command-line app on both Mac and Windows).
If you aren’t familiar with command-line apps, they allow you to browse and act on files via a text interface. They have a bit of a learning curve, as you have to learn the specific allowed commands, but they allow you to do things that you can’t do in a graphical folder and file system.
When you run Claude inside a command-line app (via Claude Code), Claude can also browse and act on your files the same way you can.
This sounds simple, but it turns out to be quite powerful.
How is Claude Code Different?
Suppose you need to research five competitors and create a competitive landscape analysis. You have a list of competitor names, but otherwise you’re starting from scratch. You need to analyze their positioning, features, and pricing, and compare them to your product.
Let’s look at how you might complete this task. You could start at Claude.ai and type in your request into a new chat. Or you might choose to set up a new Project at Claude.ai. You could use the Claude desktop app or you could use Claude Code.
Each of these access points has distinct features and functionality. They differ in how they let you create memory or context for Claude, in how you access your own files, in how you can create personalized shortcuts, and most importantly, in how portable your data is.
The Comparison
| Feature | Claude.ai | Claude Projects (at Claude.ai) |
Claude Desktop App | Claude Code |
|---|---|---|---|---|
| Access through | Browser tab | Browser tab | Desktop app | Terminal/file system |
| Memory/ Context |
Search past chats | Project context (shared instructions and uploaded files) | Project context (shared instructions and uploaded files) | All your files can act as memory / context |
| Access computer files | Upload files manually | Upload files manually | Upload files manually or via MCP (requires setup) | Yes, automatically |
| Personalized shortcuts | Agent Skills | Project instructions, Agent Skills | Saved prompts, Agent Skills | /commands, custom agents, hooks, and Agent Skills |
| Portability | None – Chats stored at Anthropic | None – Projects stored at Anthropic | None – Chats and Projects stored at Anthropic | Complete – All memory, context, and shortcuts stored locally on your machine |
Let’s explore how we might conduct competitive research using each of these access points.
Conducting a Competitive Landscape with Claude in the Browser
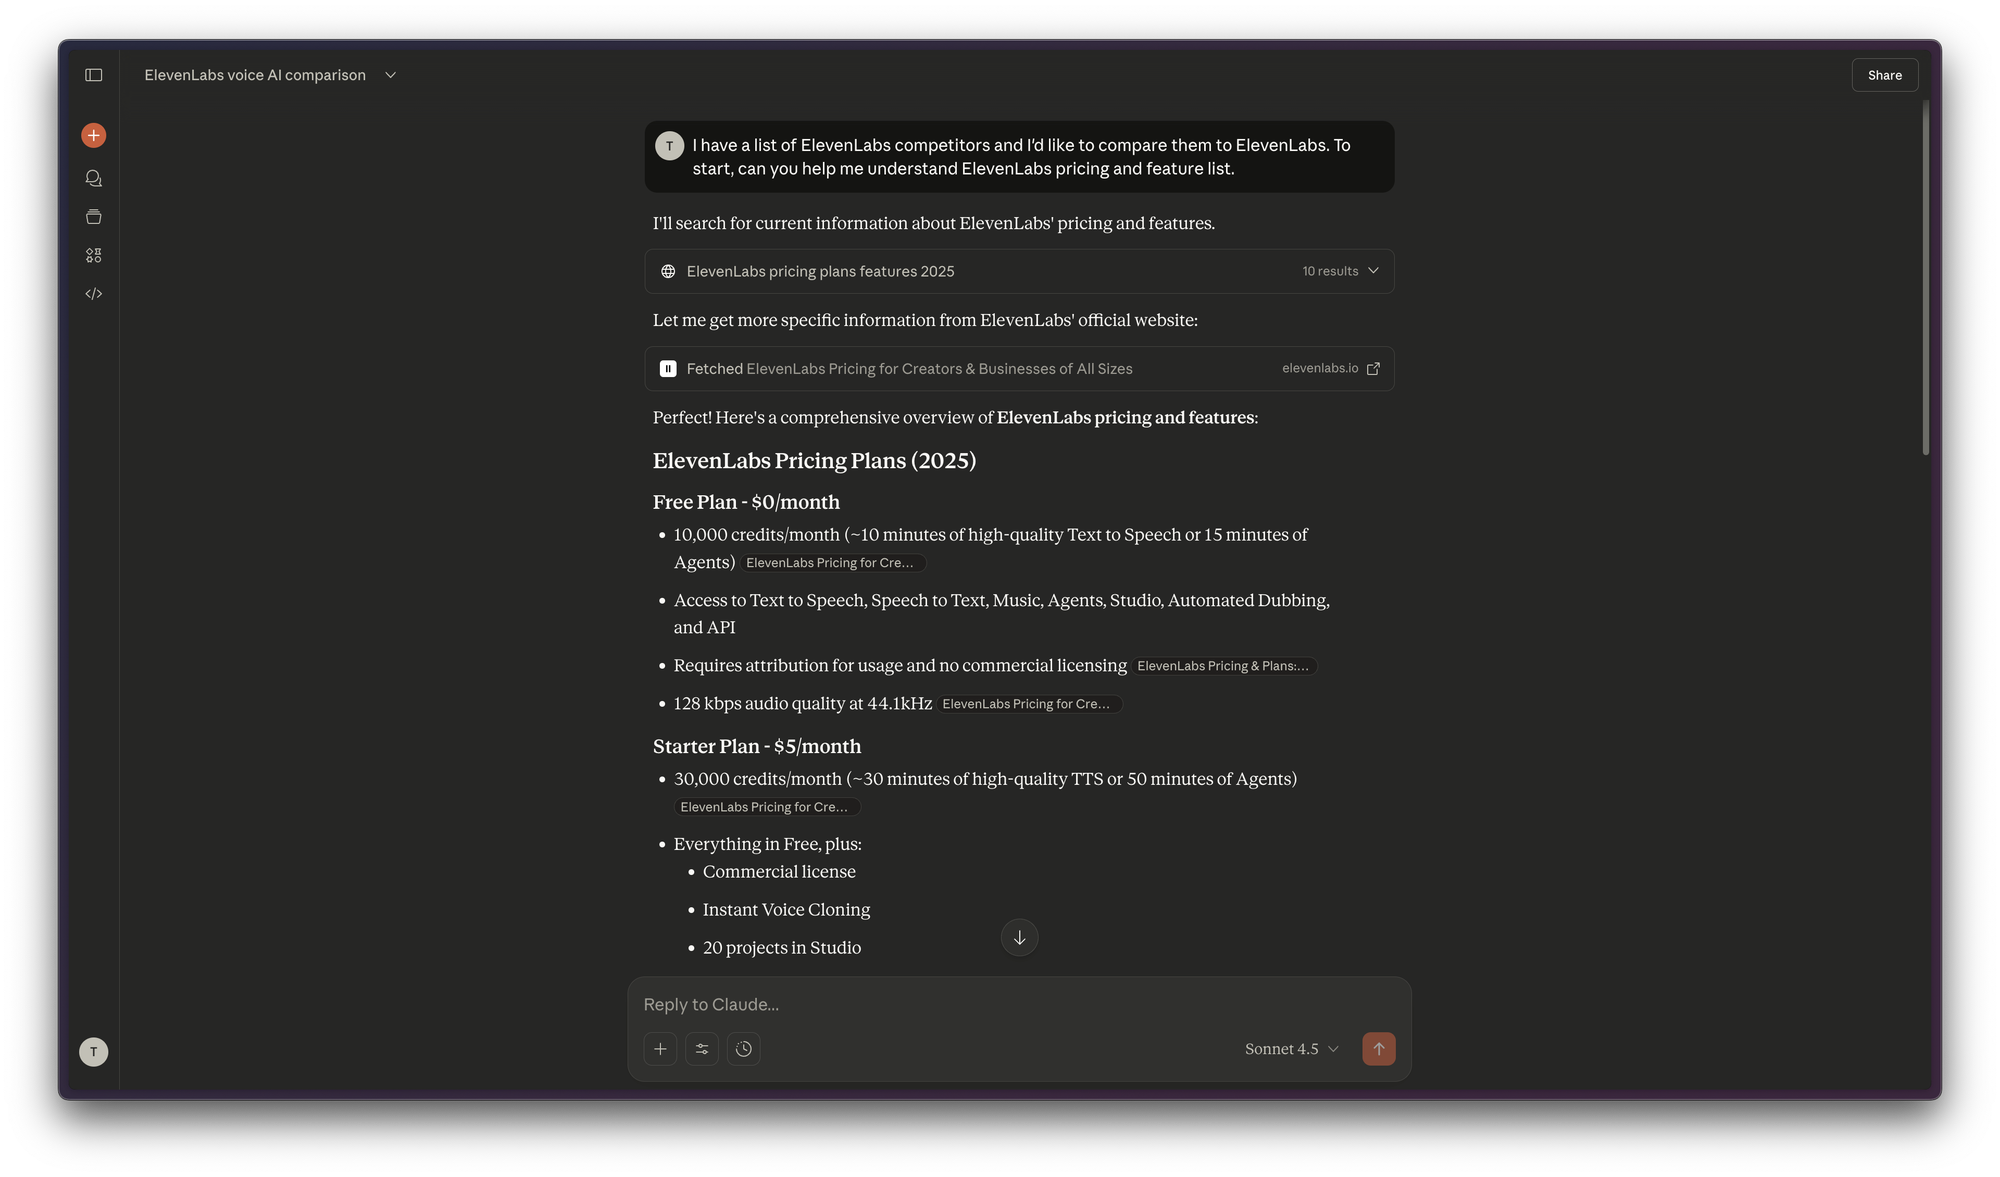
You start by opening Claude in your browser. You quickly realize you need to give Claude a summary of your pricing strategy and your feature list. So you ask it to browse your pricing page and your marketing website to get a feature list.
Now you ask Claude to research your first competitor. Claude visits their website, analyzes their positioning, identifies features and pricing, and compares it to your product. You get a detailed analysis in the chat.
You copy and paste Claude’s analysis to a Google Doc. Then return to the chat tab. You ask Claude to research the second competitor. It returns with a similarly comprehensive analysis and you copy it to your Google Doc.
You return to your chat tab and you ask Claude to research your third competitor. This time it comes back with a more superficial analysis. The responses aren’t as thorough and it left off some features. You suspect the context window is starting to fill up, so you decide to start a new chat.
However with a new chat, you need to start over with telling Claude what you want. So you copy and paste your original prompt from the first chat. Next, you scroll through your original chat looking for Claude’s summary of your product’s pricing and features and you copy that into the new chat window.
This time you take the time to copy both the prompt and your product’s pricing and feature information into a Google Doc. You suspect you’ll need them again in the future.
You return to the new chat and ask Claude to conduct your third competitor analysis. You copy the results into a Google Doc. You repeat the fourth competitor analysis and copy the results to your doc.
You can see the end in sight. You ask Claude to conduct the fifth competitive analysis and you see the same issue as before. The analysis is superficial. So you start a new chat. This time you grab the prompt and the product context from your Google Doc and paste them into the chat. You get a thorough analysis and you copy it into your Google Doc.
Once you have a Google Doc on each competitor, you download each file and upload them to yet another Claude chat tab. This time you ask Claude to make a price comparison table and a feature comparison table.
You complete the whole process in about an hour. You can’t believe how fast it went.
A month later, your sales team starts hearing about a new competitor in the market. So you decide to run a competitor analysis. But you can’t remember the name of the Google Doc with your prompt and pricing/feature info. After spending several minutes searching, you eventually find it and paste the details in to a new chat. Claude conducts the analysis and you paste it into your Google Doc.
You then upload all six competitor files to another chat window and ask Claude to create a new pricing comparison table and a new feature comparison table. As you review the tables, you realize you’ve added three new features to your product in the past month.
To update your feature comparison table with the new features, you first need to ask Claude to see if each of your competitors has those features and you need to copy and paste the new information into each of your competitor documents. You then need to upload each of the new competitor documents into a Claude chat and ask Claude to generate a new feature comparison table.
Because you don’t know any better, you think, “Wow, I can’t believe how much time this is saving me.”
Conducting a Competitive Analysis in a Claude Project
Now imagine you set up a competitive analysis Project on Claude (still in the web browser). A Project allows you to share instructions and files across chats.
So you copy your competitive analysis prompt into the project instructions and you upload your product’s pricing and features as a file.
Now you can start a new chat and type, “Do a competitive analysis for competitor A.” You don’t have to repeat any detailed instructions or upload any files. It’s already there. You can start a new chat for each competitor so it always does a thorough job. You still have to copy and paste from the chat to your Google Doc. But this is way faster.
Since each chat in the Project is separate from every other chat, to create your comparison tables, you still need to upload your five Google Docs to a new Project chat and ask Claude to create the comparison tables.
A month later, when a new competitor enters the market, you simply return to your Project and start a new chat for the competitor.
There’s only one problem: You need to add your three new features to the feature list. You update your Google Doc with the feature list, delete the old file, and add the new file. Then you return to the chat for each competitor and ask Claude to analyze the three new features. You do this six times, copying the results to your Google Docs.
You once again upload all six revised competitor docs to a new Project chat and ask for new comparison tables.
Again, because you don’t know any better, you congratulate yourself for creating a Project and are thrilled you saved so much time.
Conducting a Competitive Analysis in Claude Desktop with MCP
Now imagine you decided to use Claude Desktop. Claude Desktop works like Claude in the browser in almost every way. Each chat has its own context window and is separate from other chats. You can upload files. And you can create Projects where chats can share instructions and project files.
However, there is one key difference: Claude Desktop is also an MCP client. If you aren’t familiar with MCP, that means you can configure Claude Code to read and write to your Google Docs directly. No more copying and pasting. But understanding how MCP works, finding the right servers, and getting them to work correctly isn’t the easiest task.
Even if you do succeed at connecting Claude Desktop to your Google files, you still have to work on one competitor and one chat at a time. That means you are still babysitting the work, you still have to manage the context, and you are limited to Google Docs rather than your local files.
When a new competitor gets added to the list, you still have to start a new chat to analyze that competitor and you still have to manually regenerate your price comparison and feature comparison tables by pointing Claude to the relevant files.
Conducting a Competitive Analysis with Claude Code
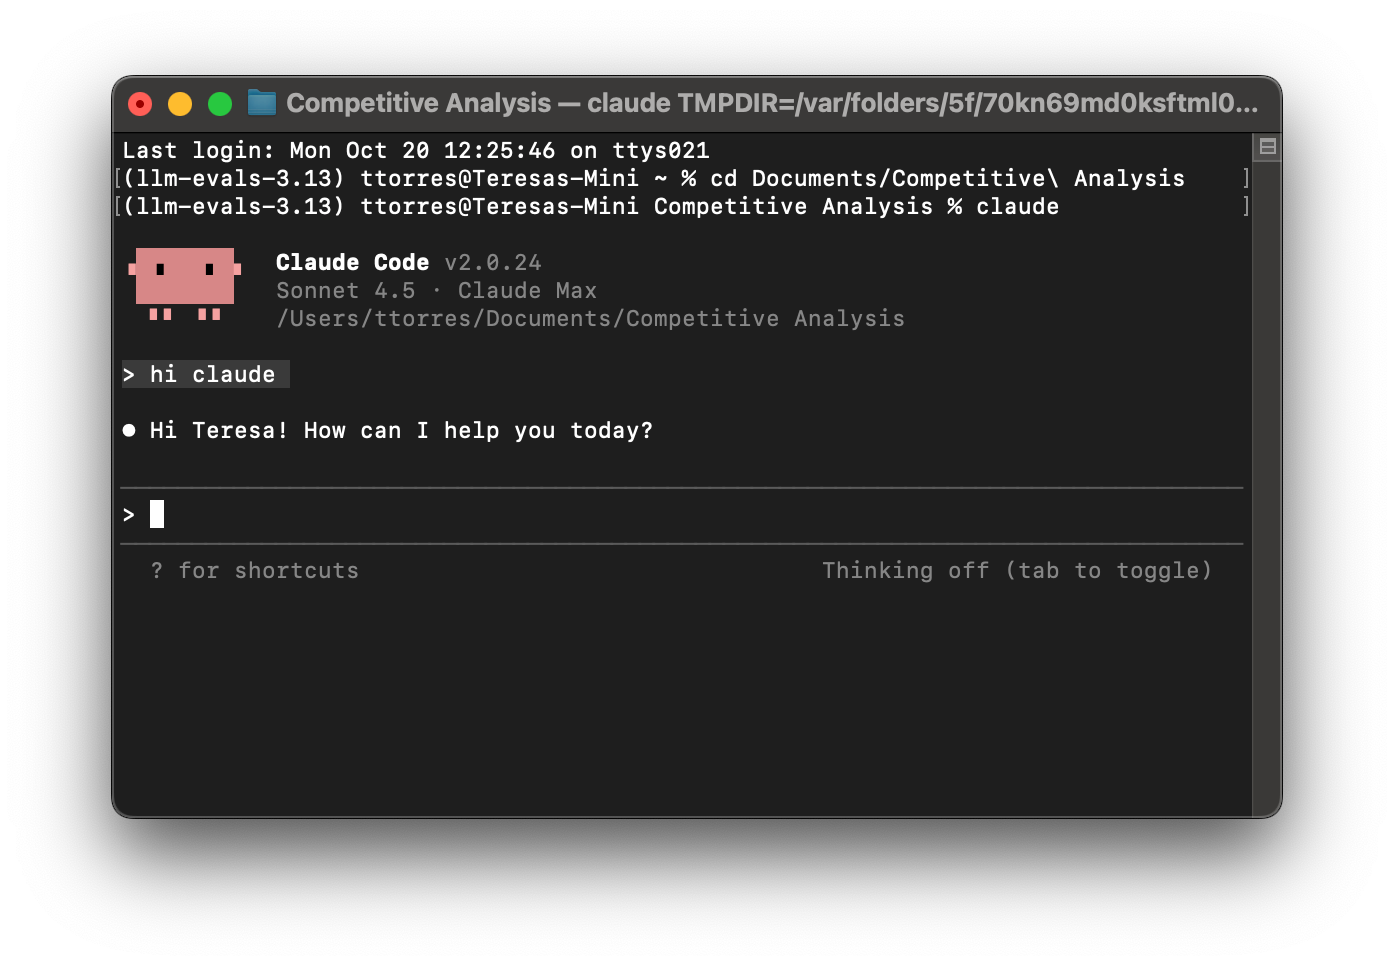
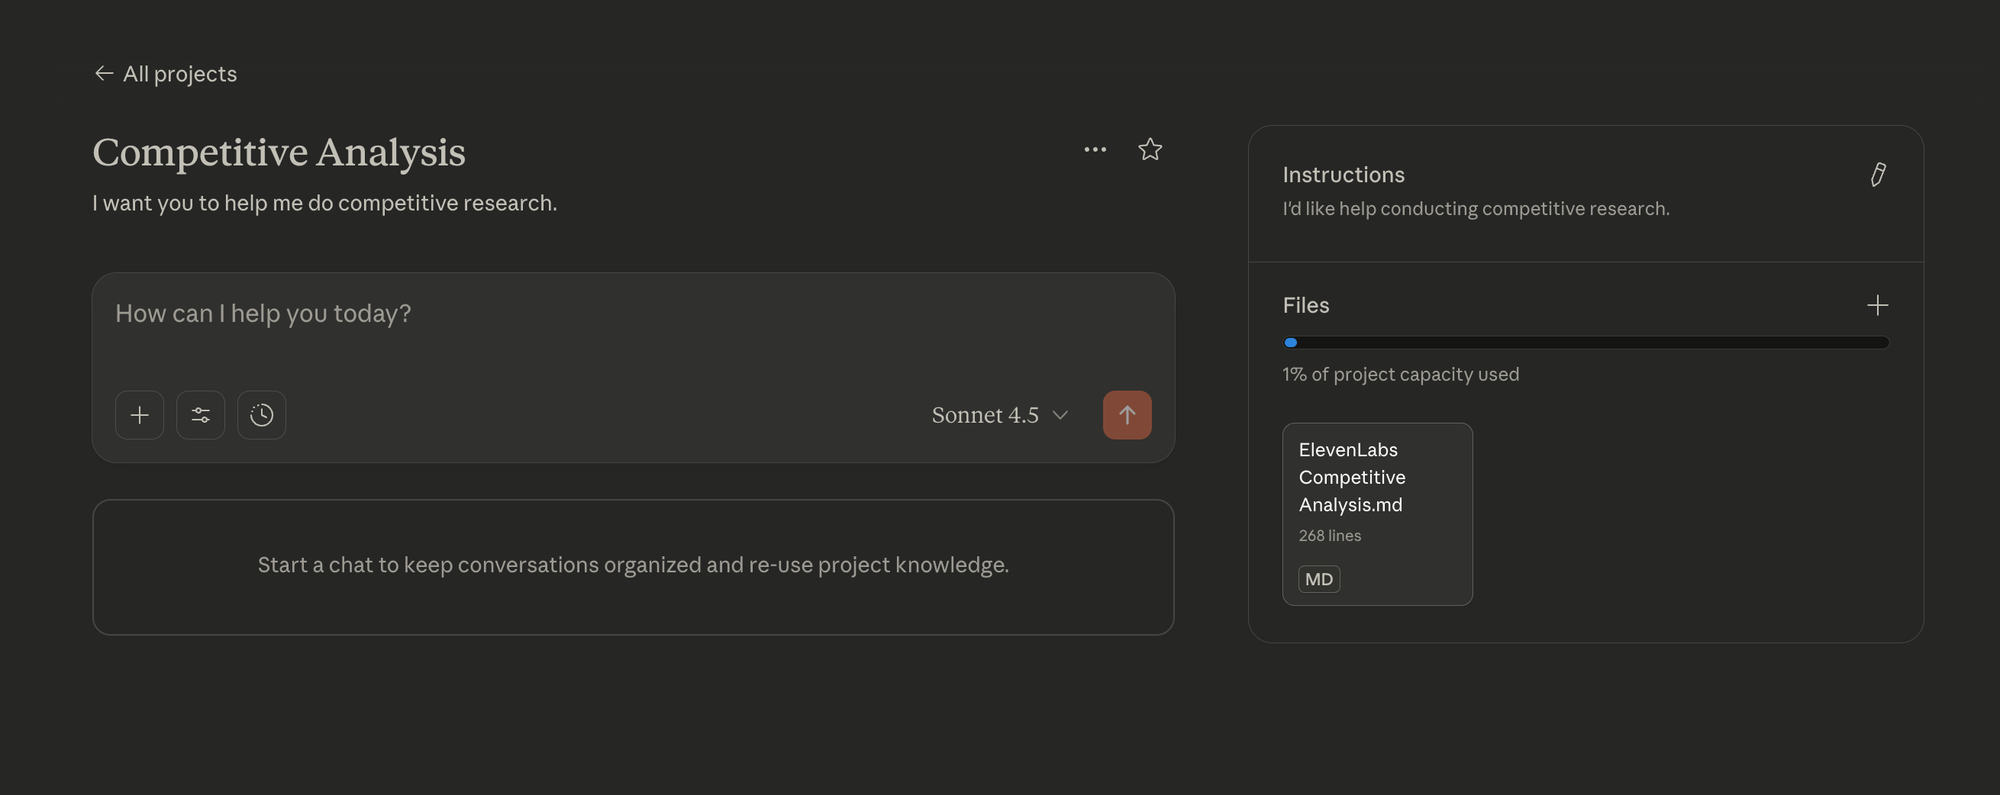
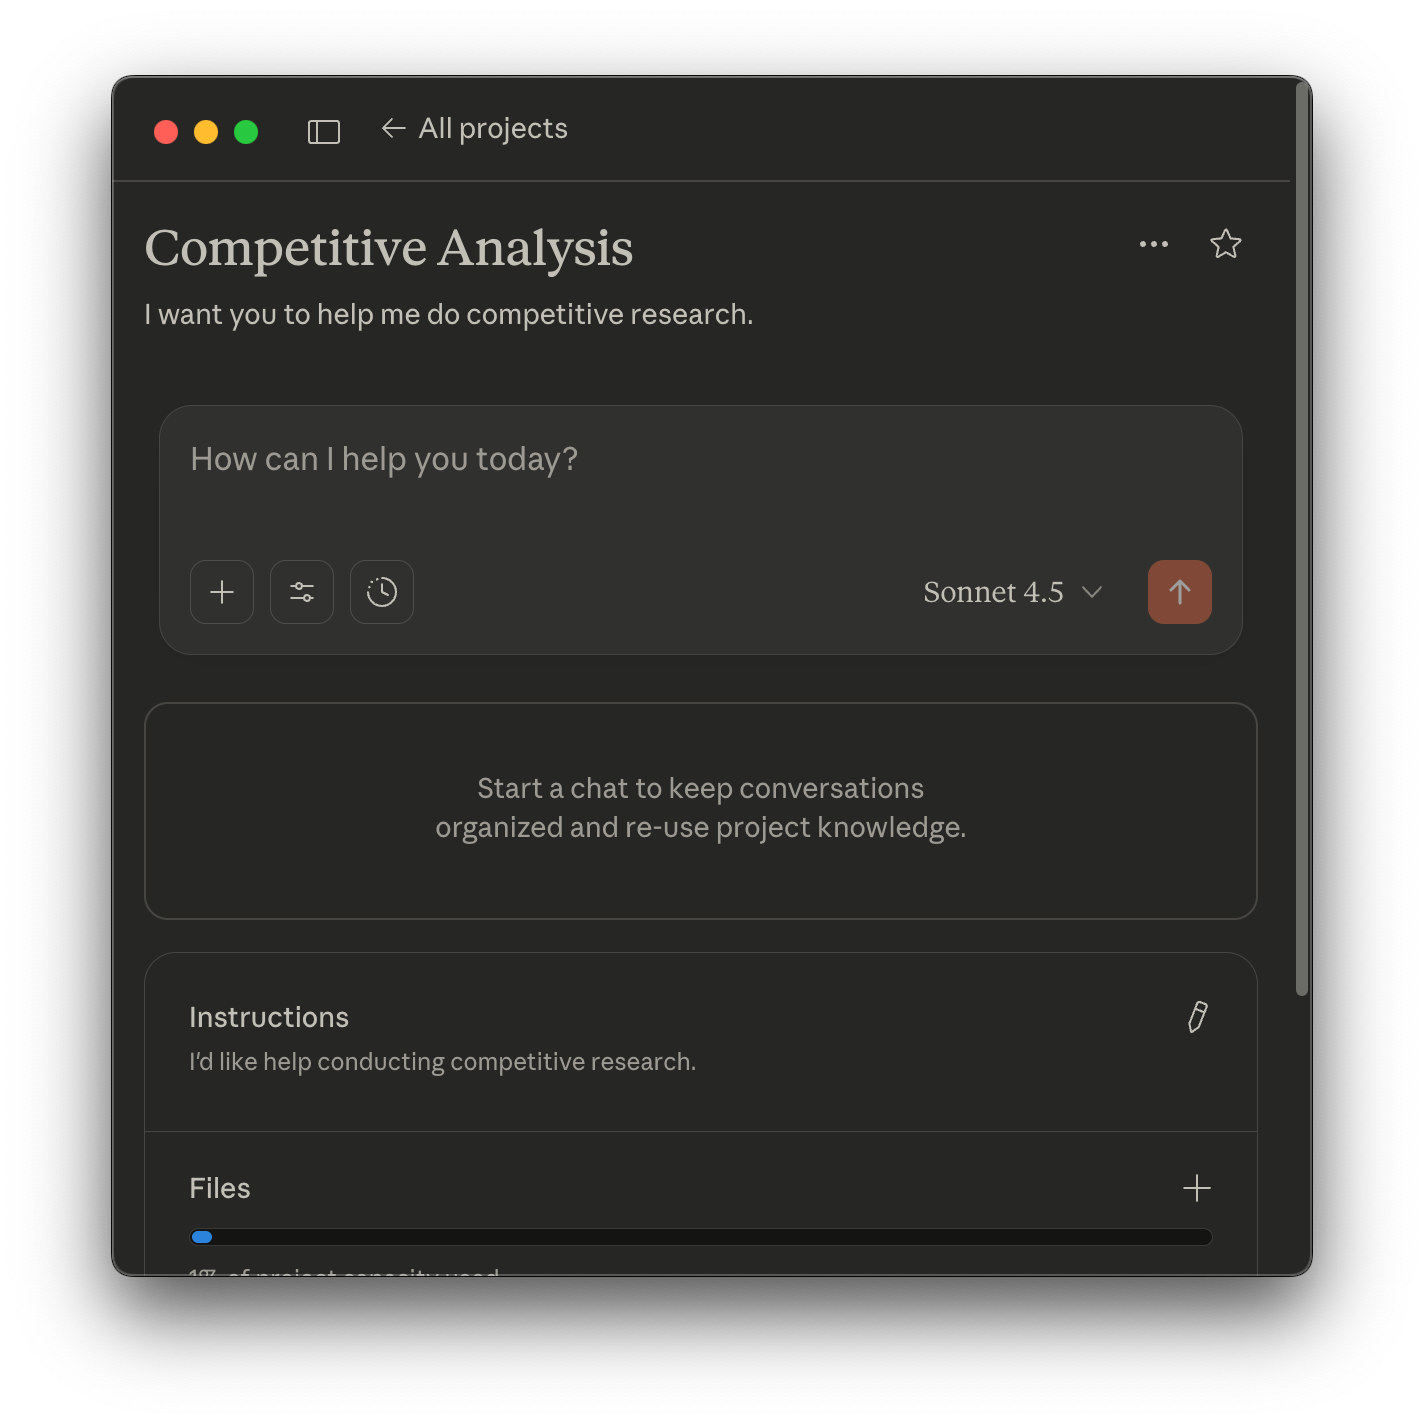
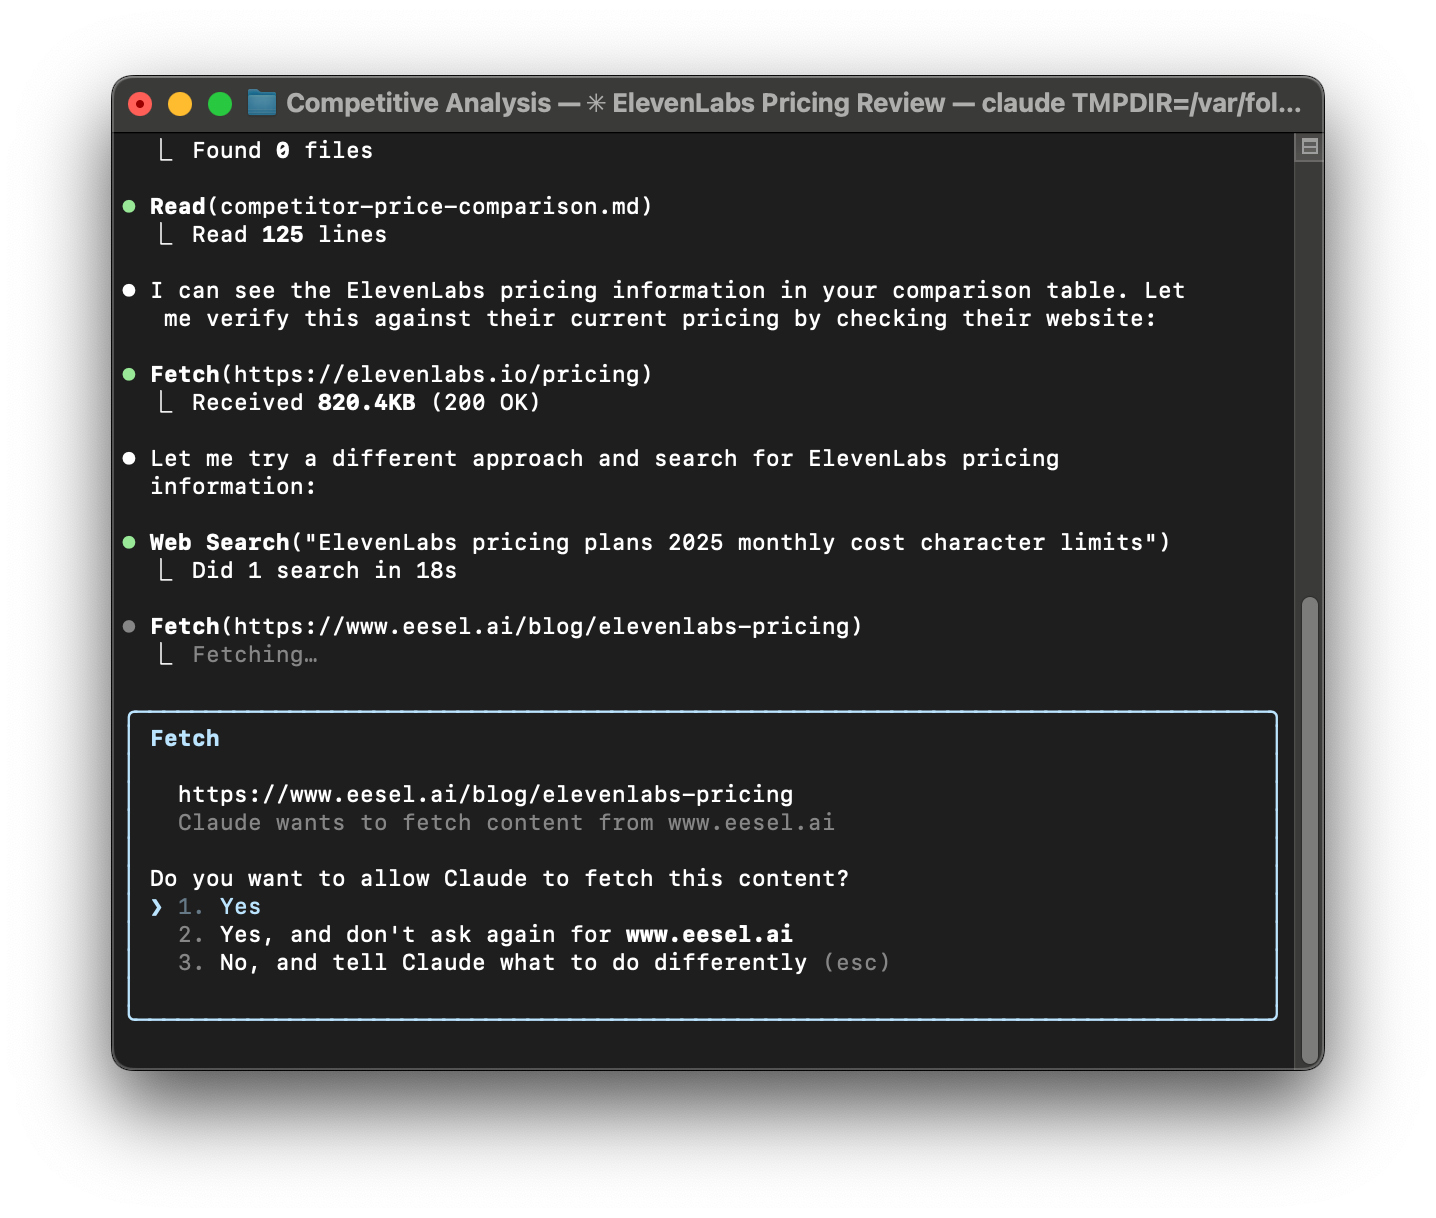
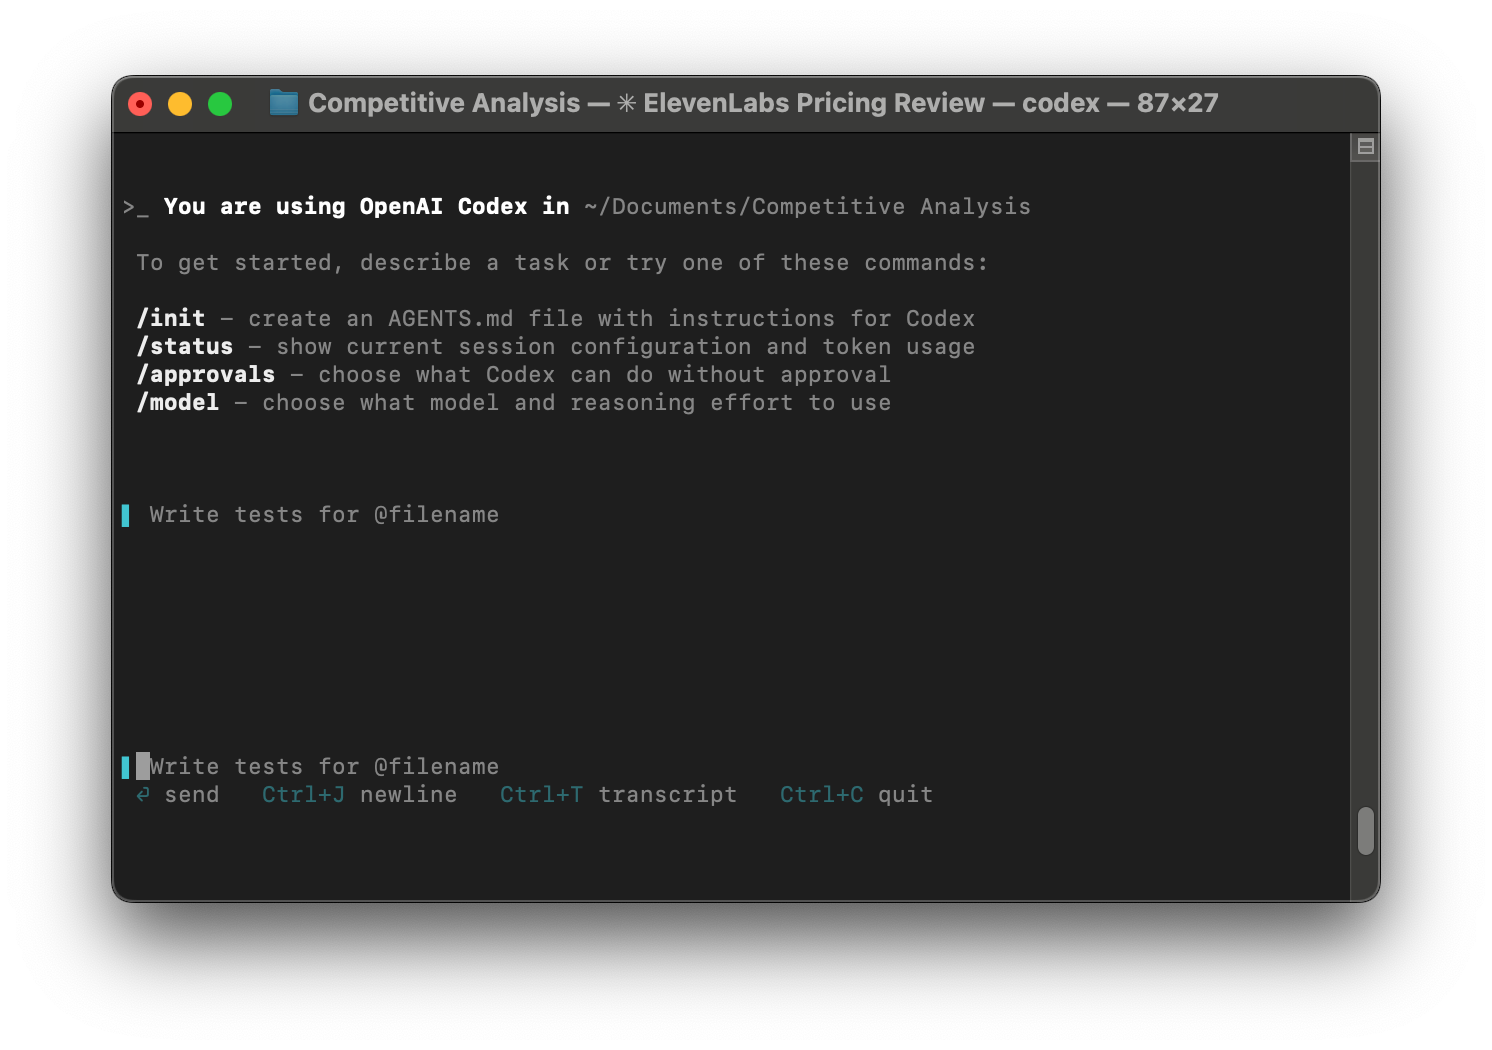
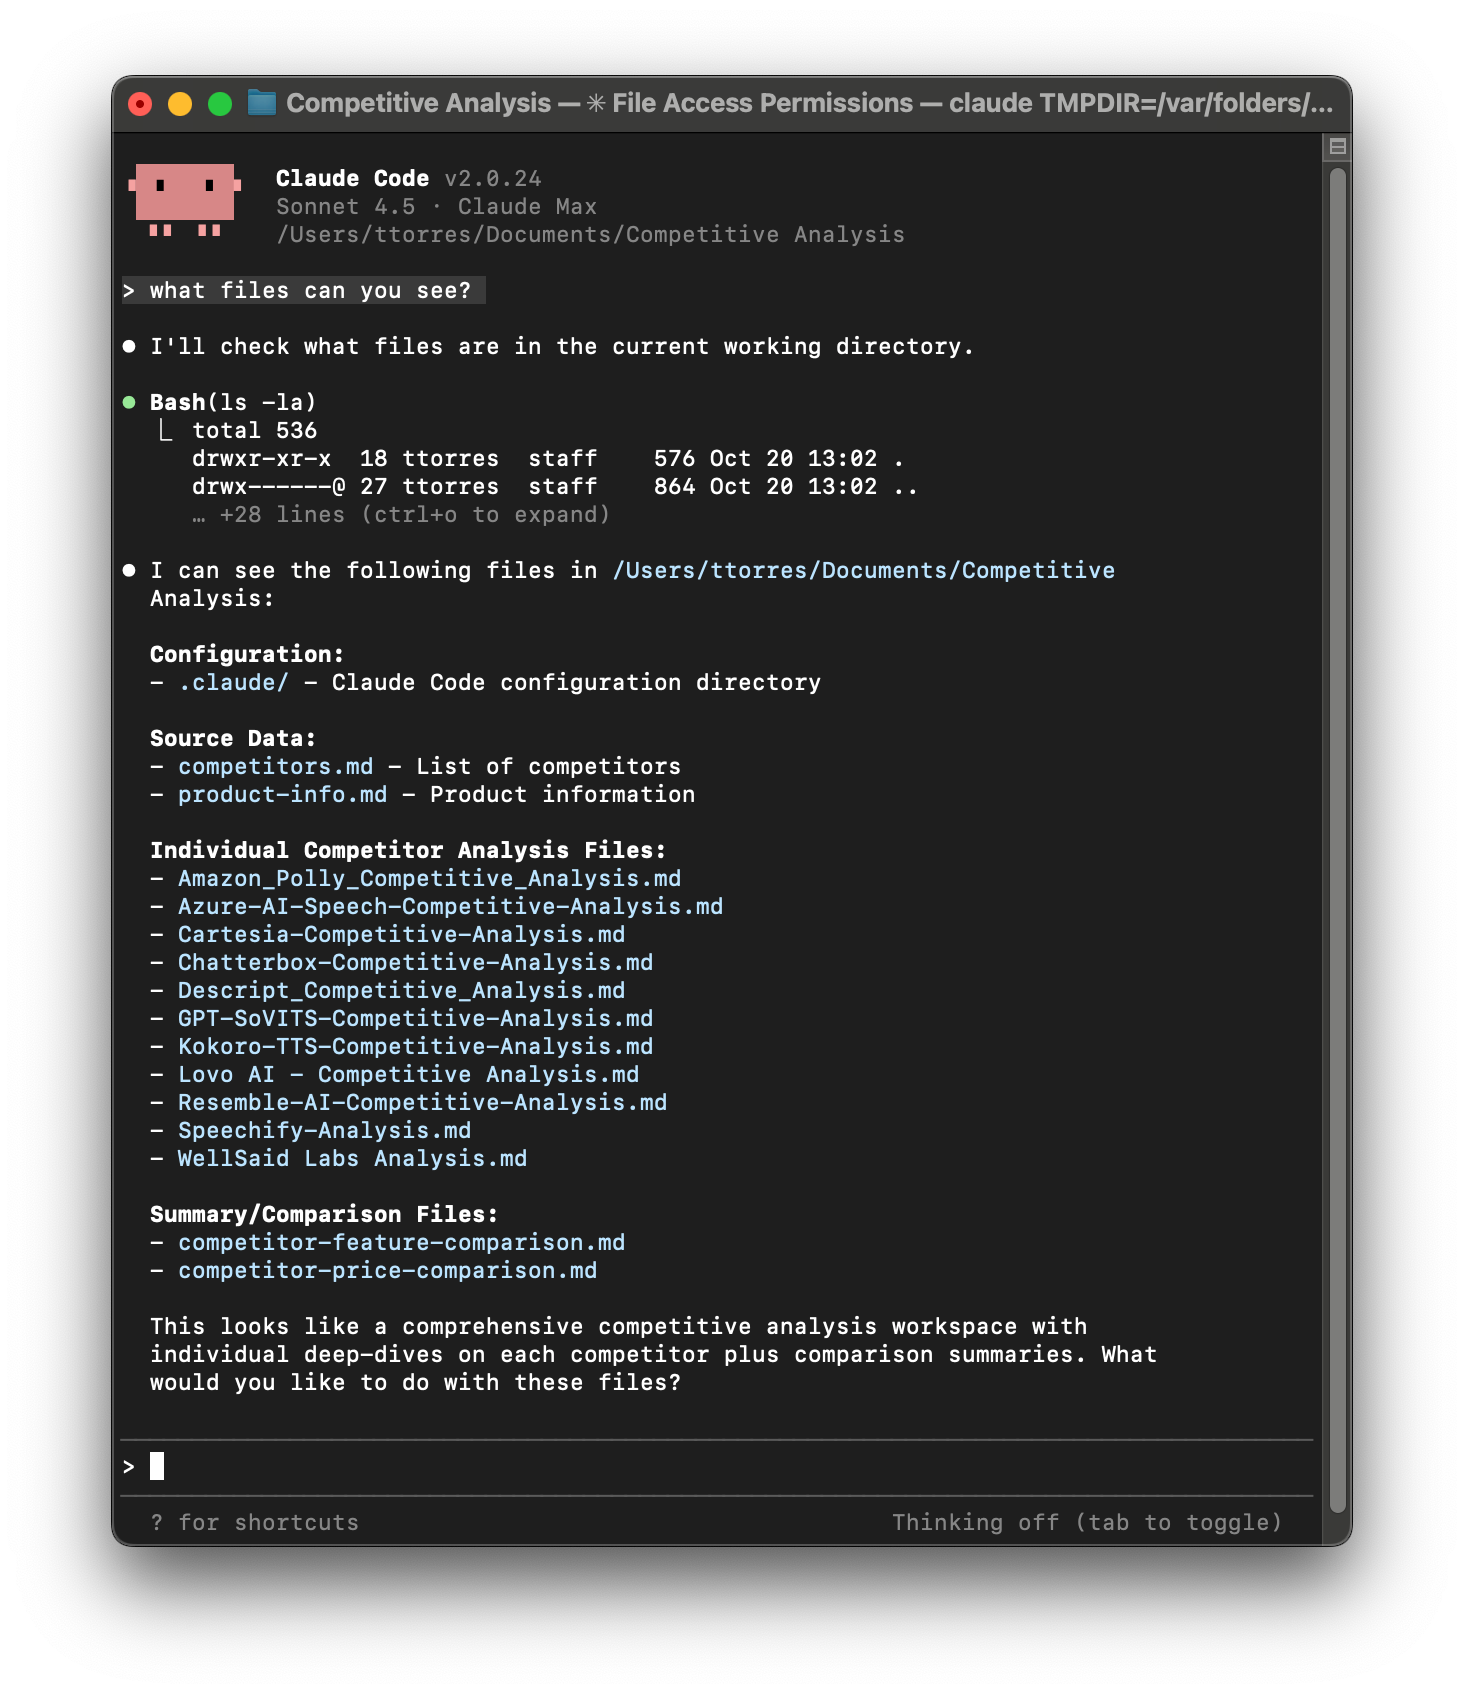
You open your terminal, navigate to your Project folder, and start Claude Code.
You ask Claude Code to browse your pricing page and marketing website and summarize what it learns in a product-info.md file, a markdown file.
If you aren’t familiar with markdown files, they are plain text files with some formatting codes included. Any plain text editor can open and edit them. However, you’ll need an app that can render a markdown file to view them without the codes. We’ll see an example of raw markdown and rendered markdown and I’ll recommend a few markdown apps a little later.
Why use markdown? LLMs have been trained to read and write markdown easily. It makes your data easy for them to work with. You’ll see later that Claude will use these files to compare and contrast features across your competitors. By storing them in a file format that’s easy for Claude to work with, we’ll get higher quality output.
Next, you tell Claude what you’d like to include in a competitor analysis and you ask it to add those instructions to competitive-analysis.md.
You then ask Claude to do a competitive analysis of your first competitor using the details in product-info.md and competitive-analysis.md and to write the results to competitorA.md.
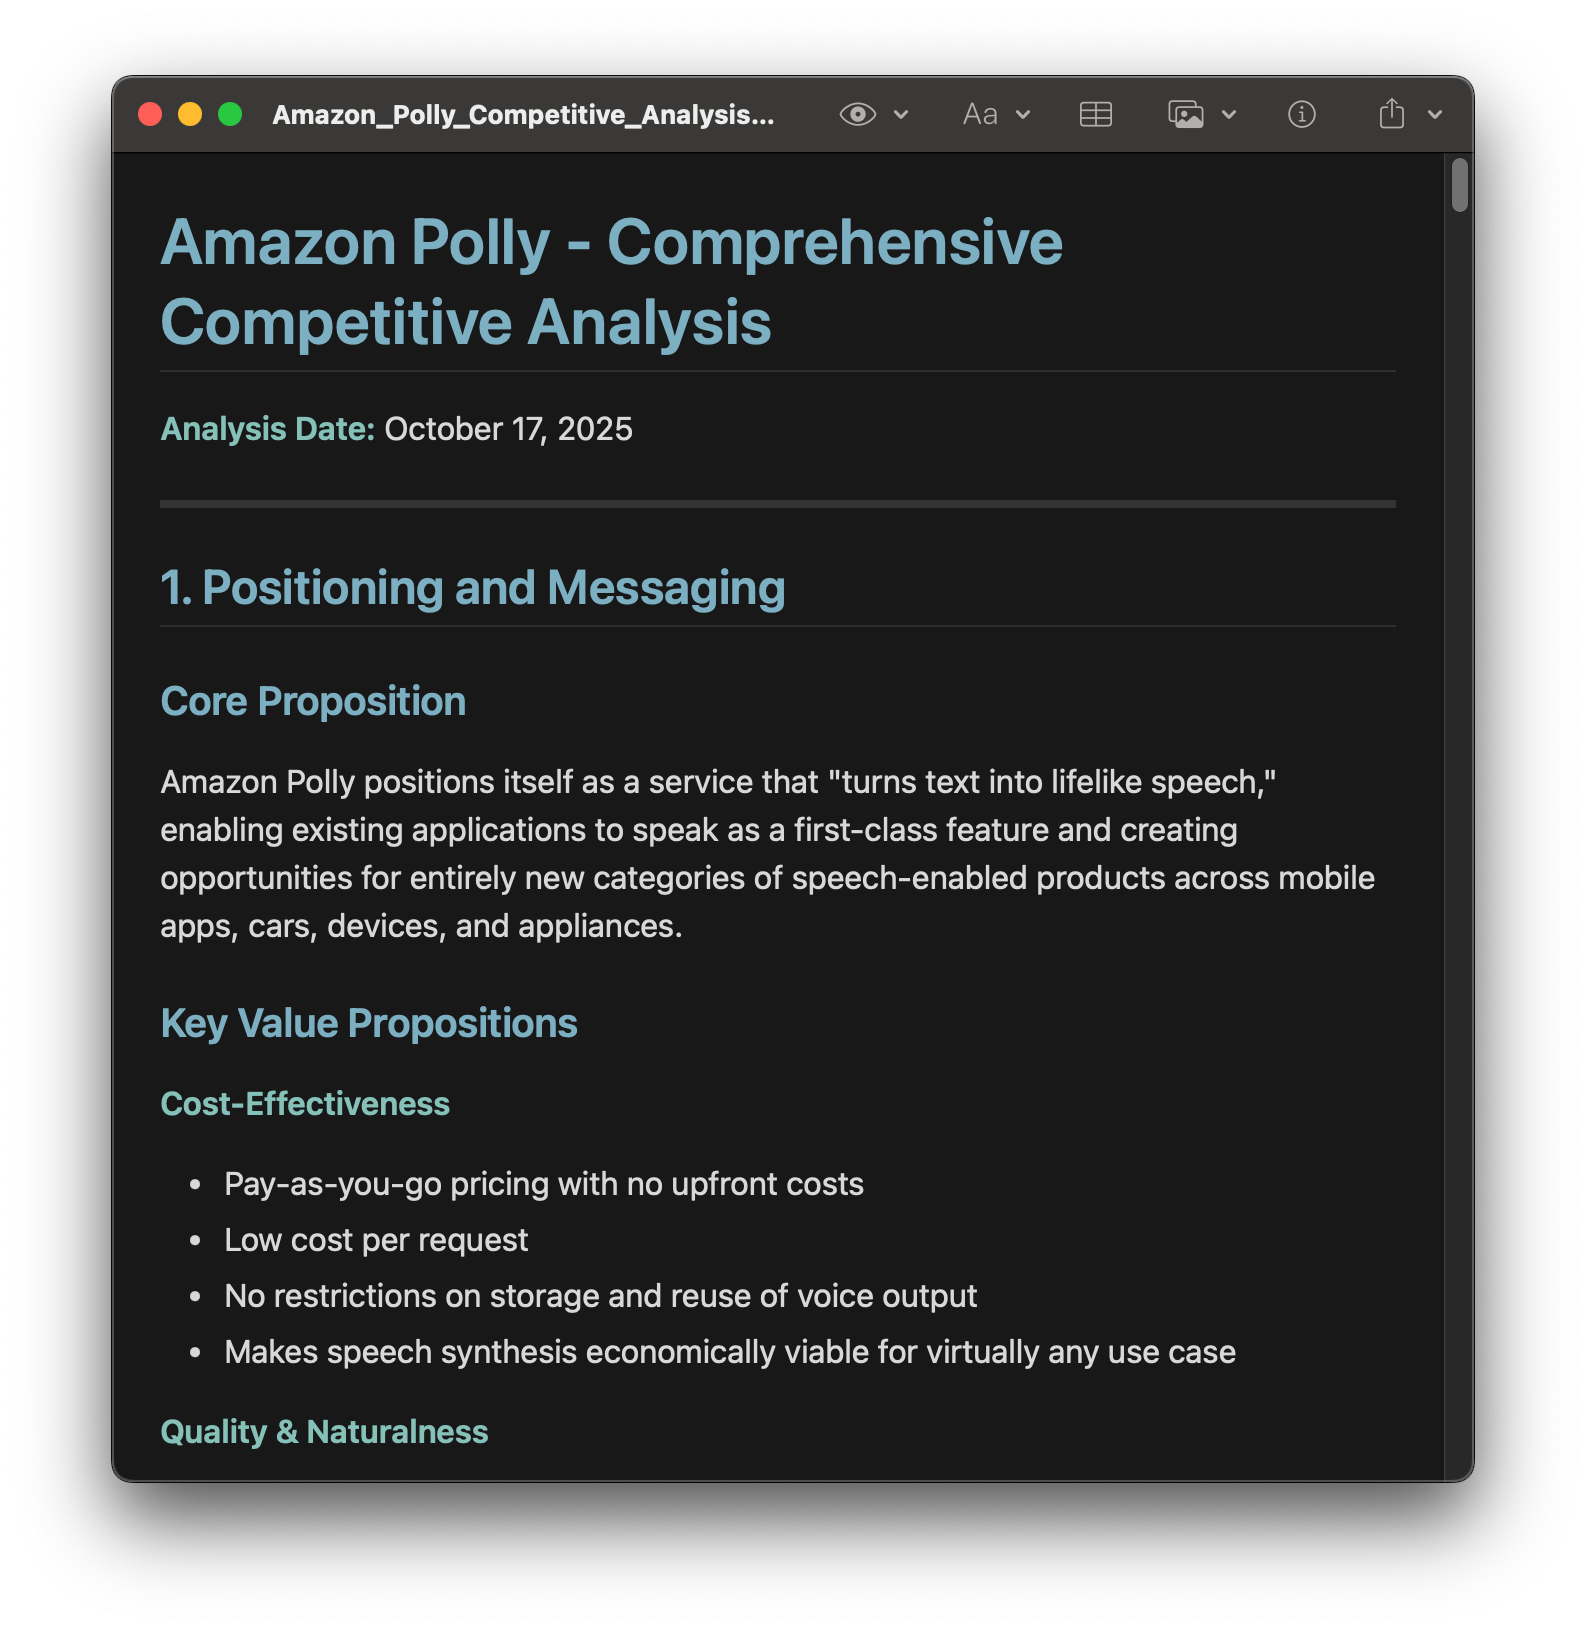
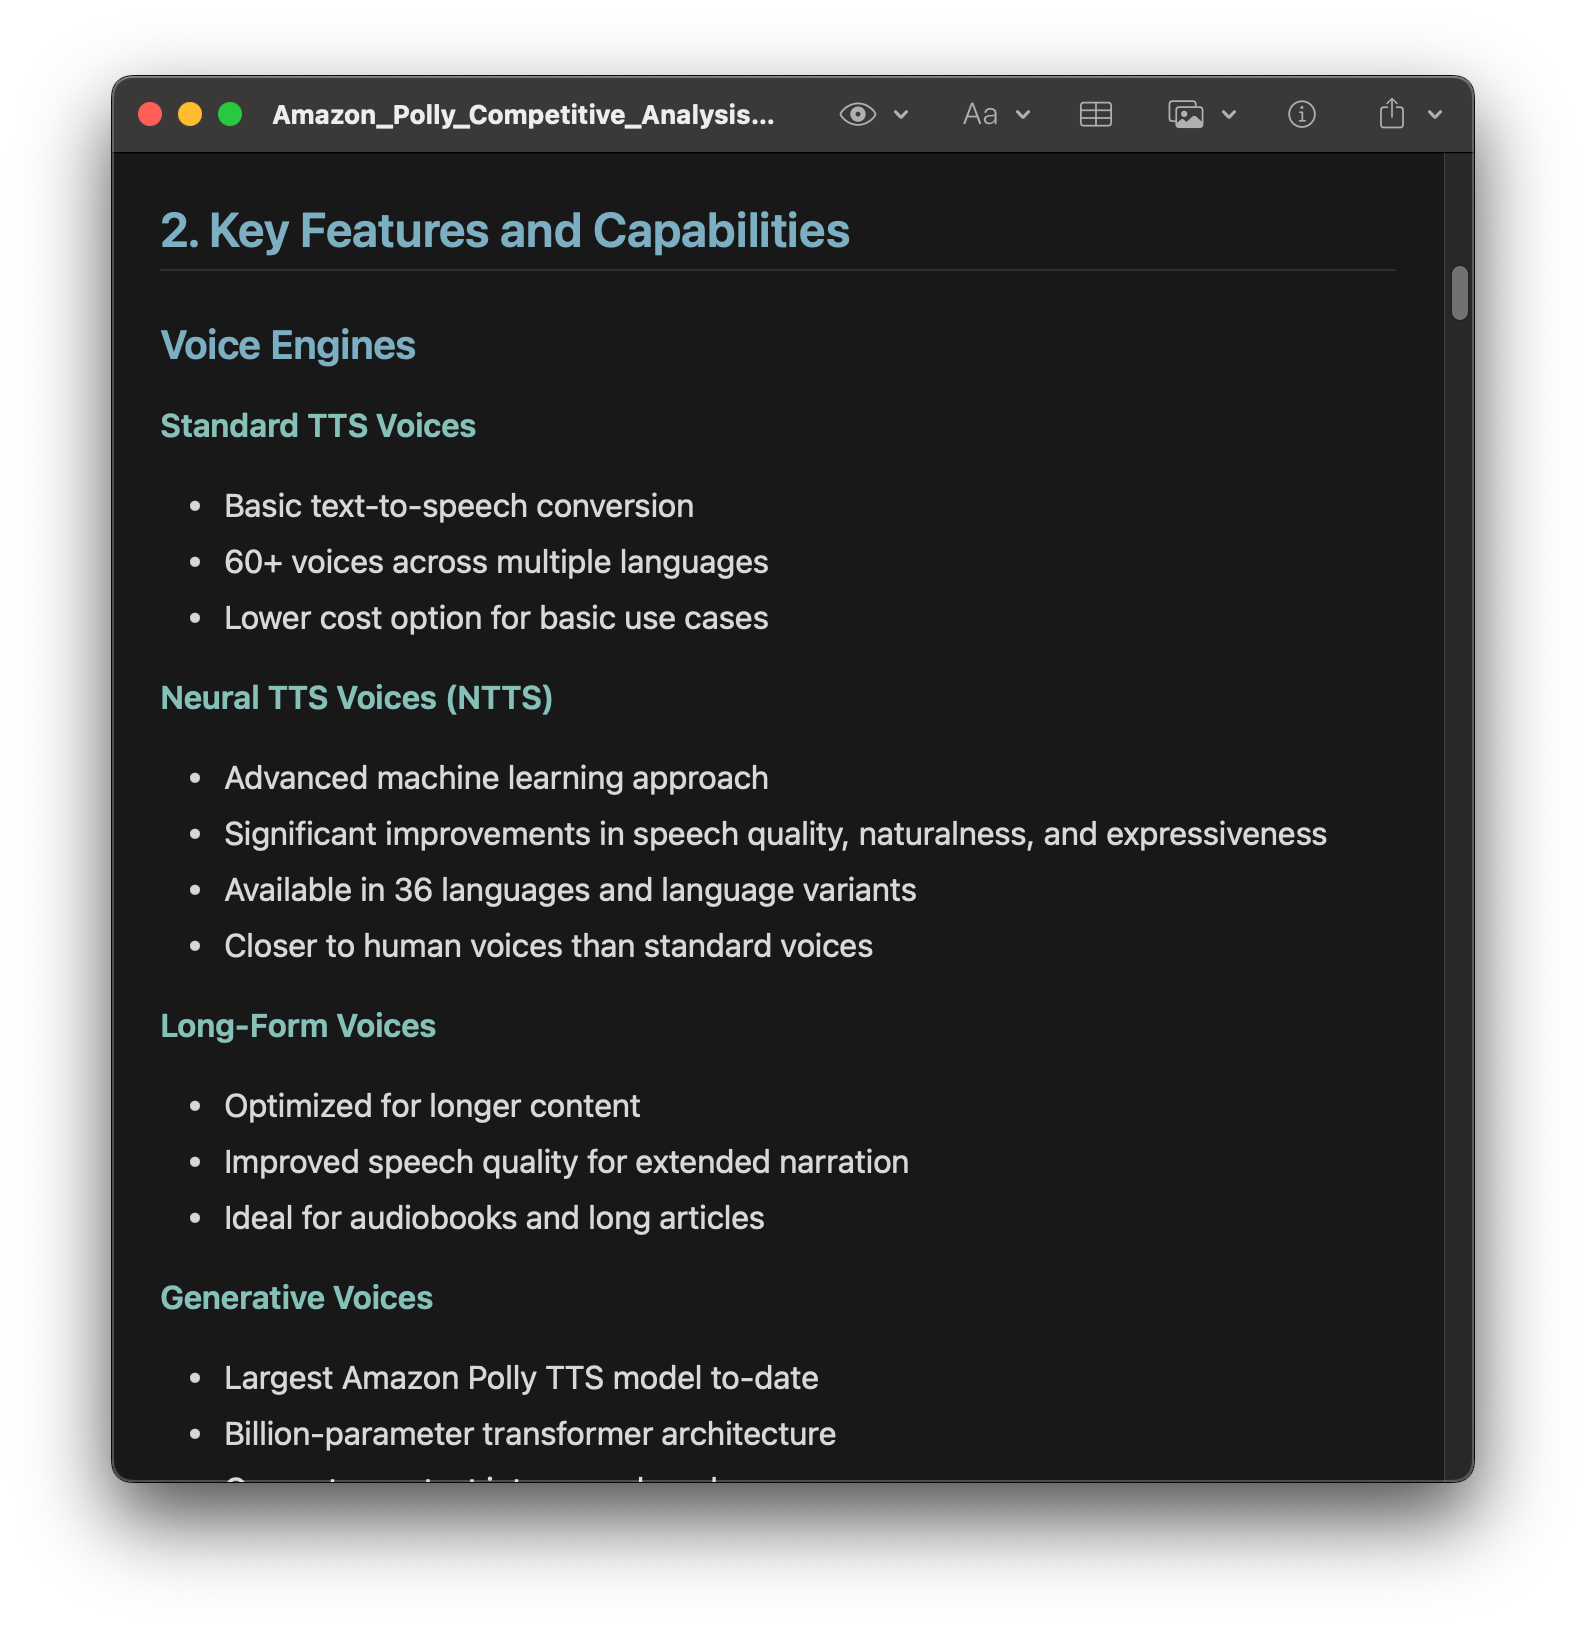
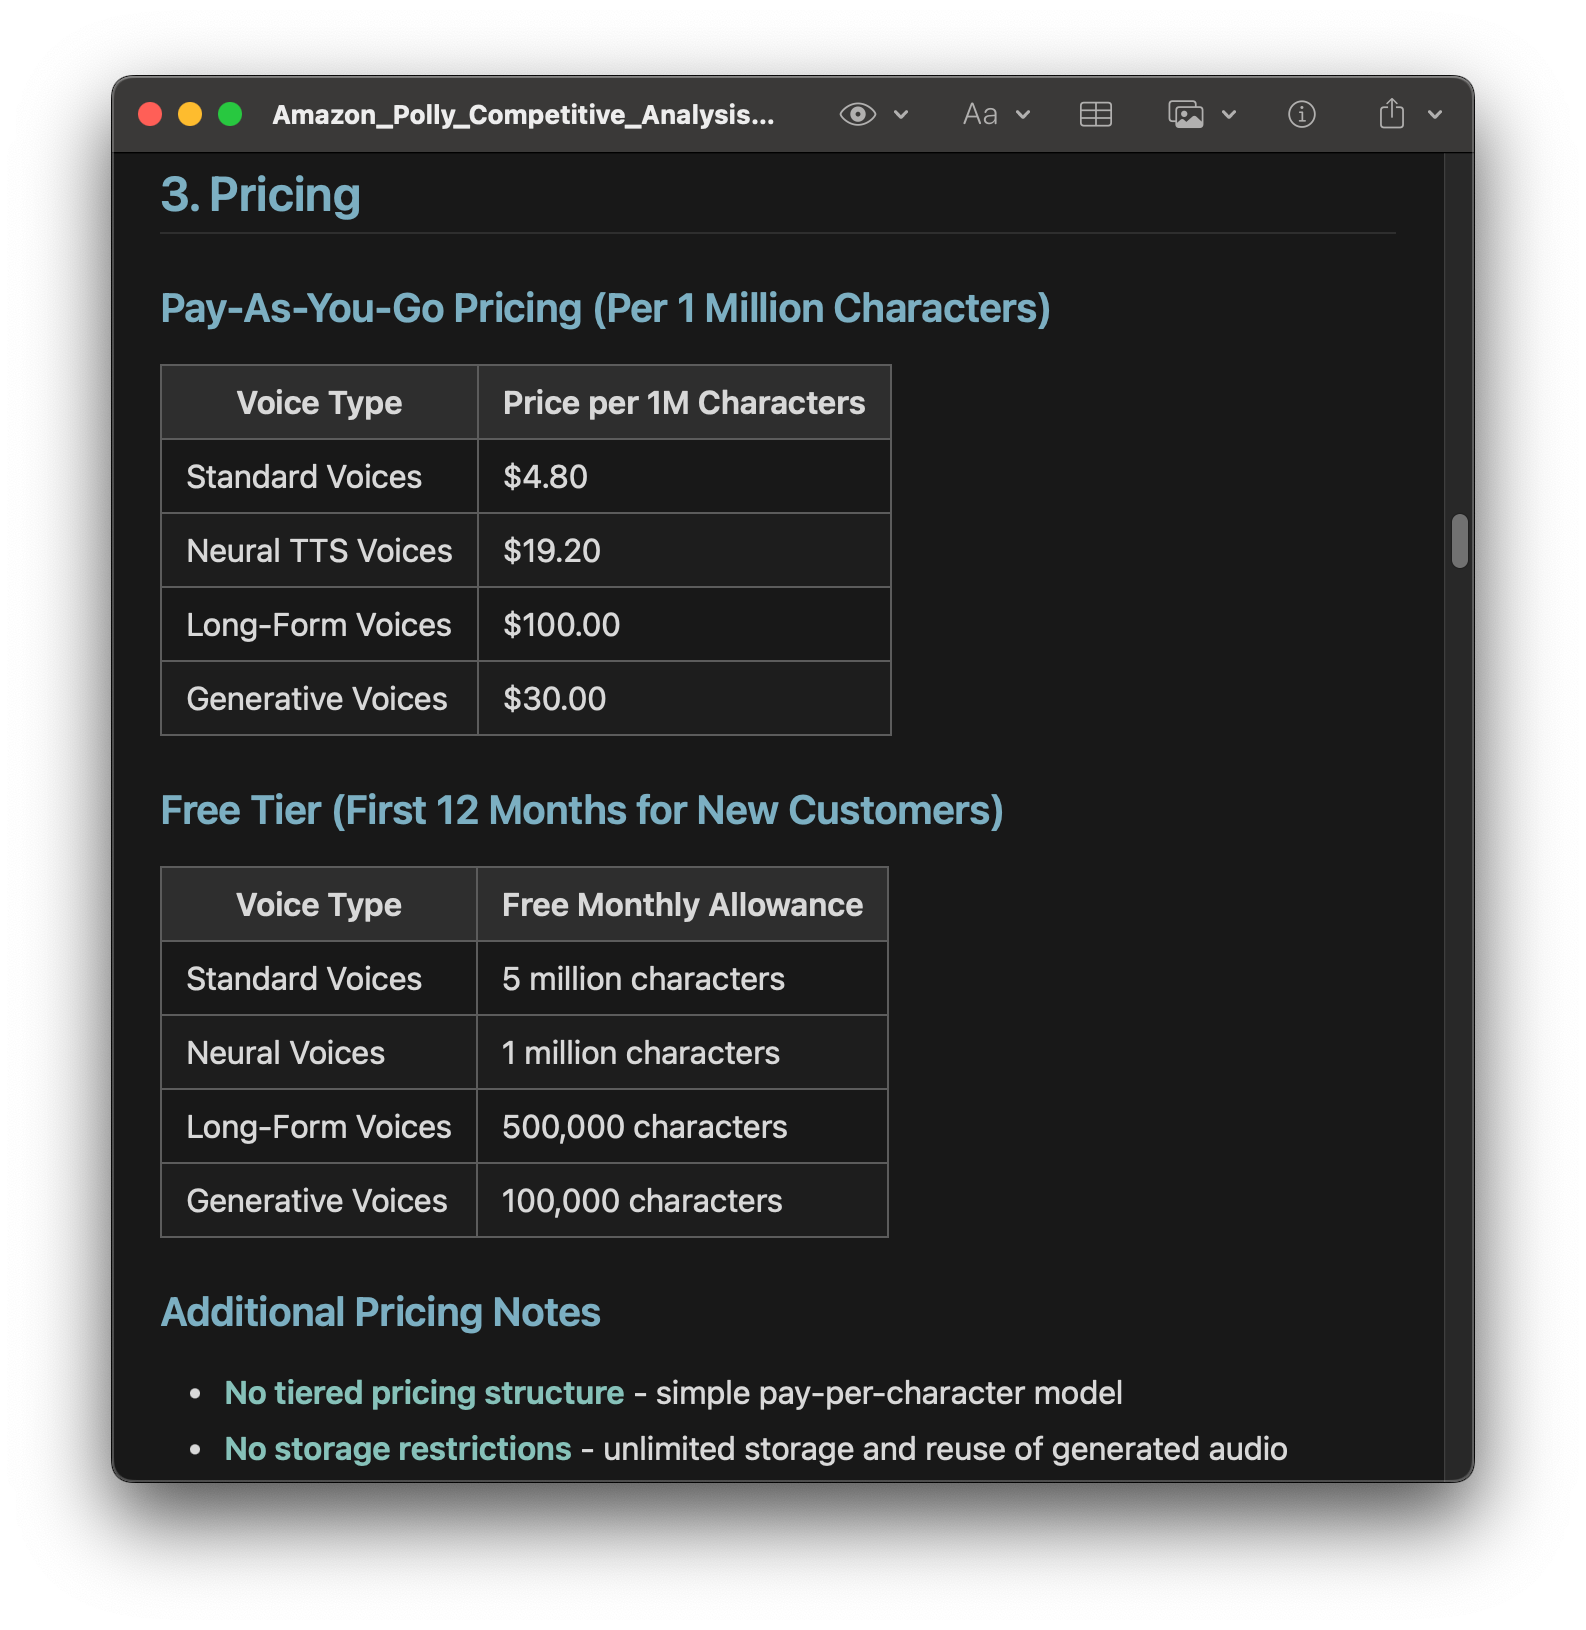
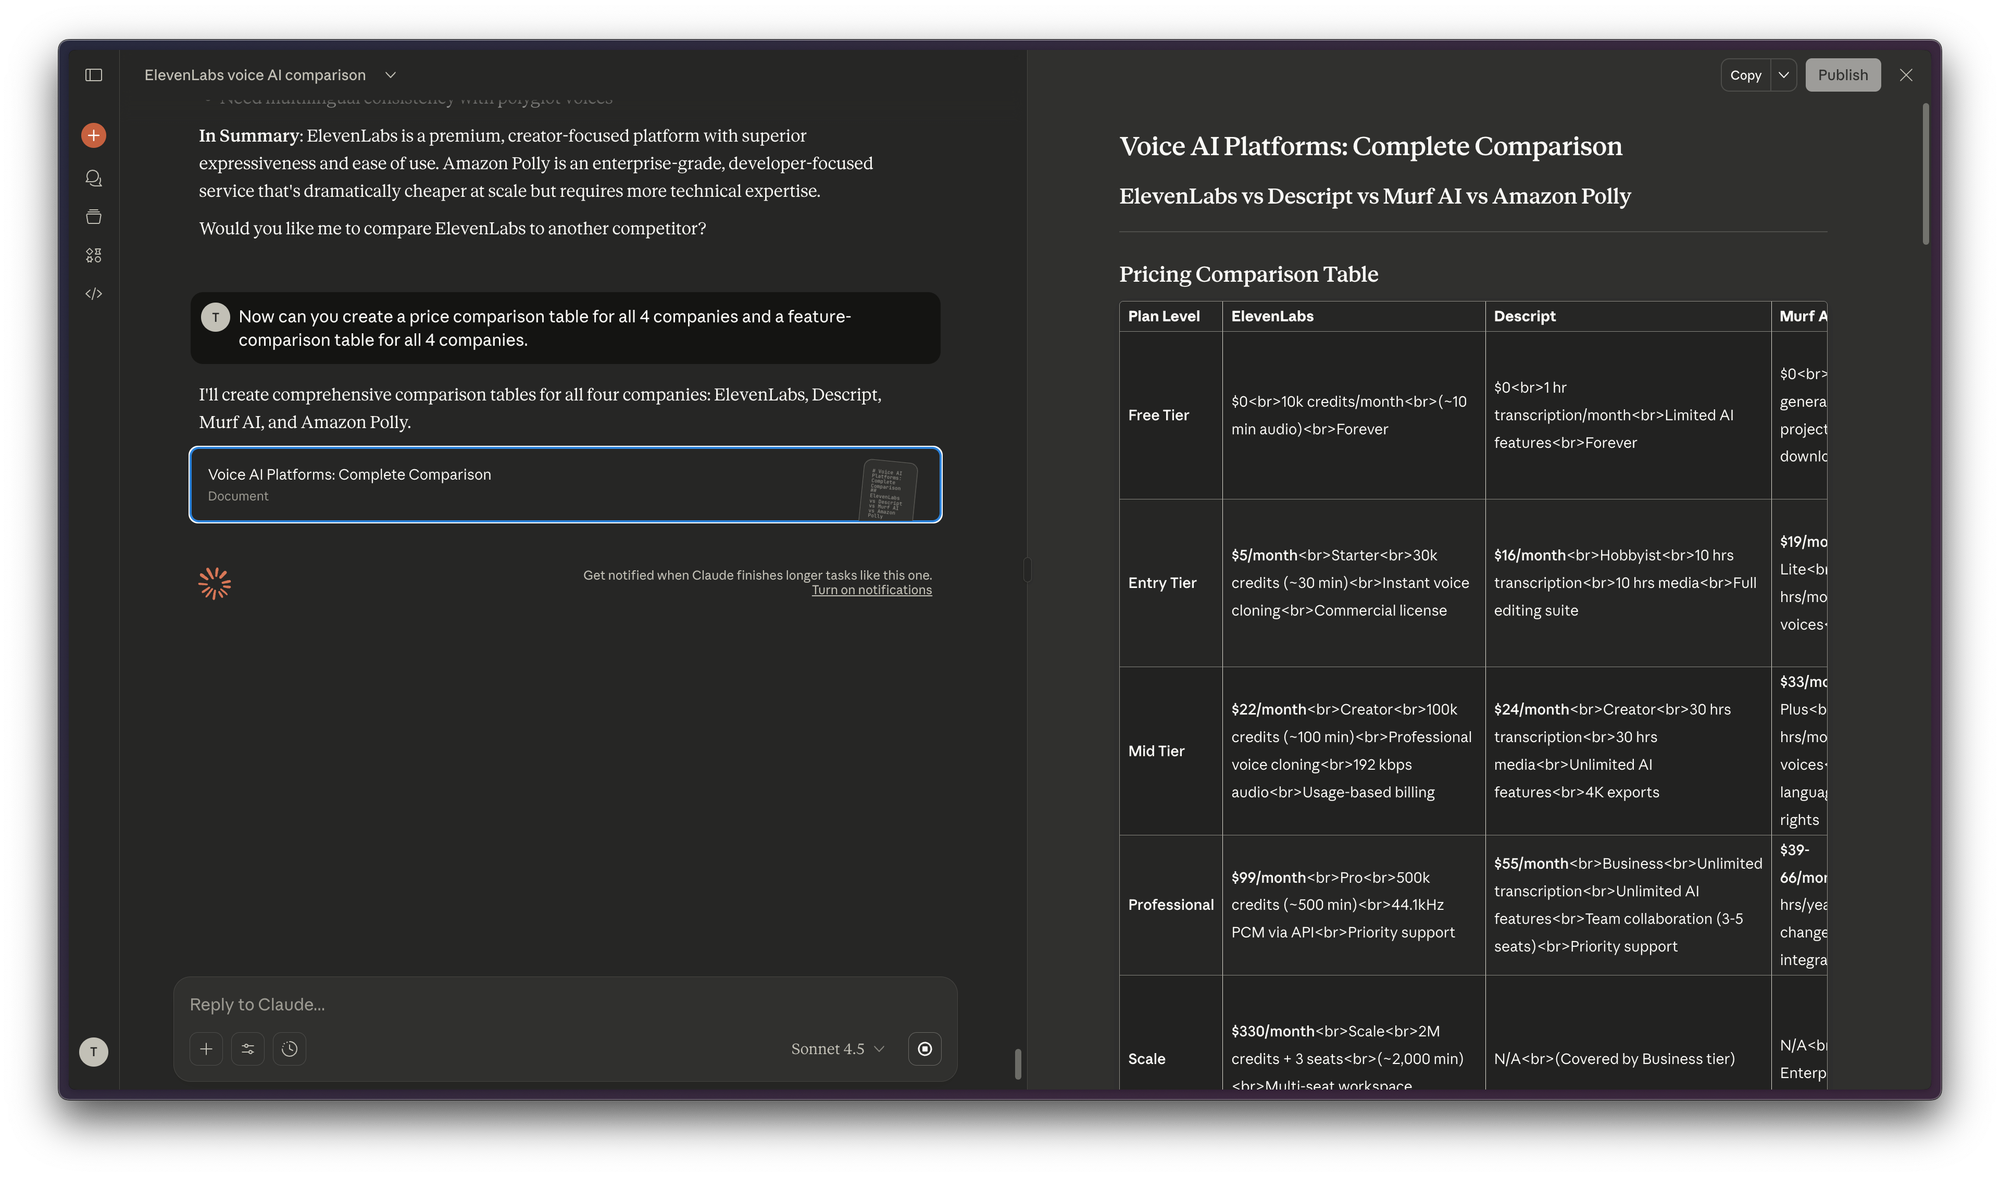
Claude creates a detailed markdown file that includes positioning, features, and pricing for an ElevenLabs competitor.
Claude gets to work. A minute or two later, you open competitorA.md and it looks great. You realize you need to do this four more times, so you ask Claude to make an agent using the instructions in the competitive-analysis.md file.
An agent is a type of personal shortcut that allows you to save instructions that Claude can re-use at any time. When you create an agent, you give it a name. This allows you to ask Claude to invoke it (e.g. “use my agent to do X”) and Claude can also invoke it whenever it thinks it will help with the task at hand.
A special attribute of agents is that you can ask Claude to do several tasks at the same time by using multiple instances of your agent. I’ll walk you through exactly how this works in a little bit.
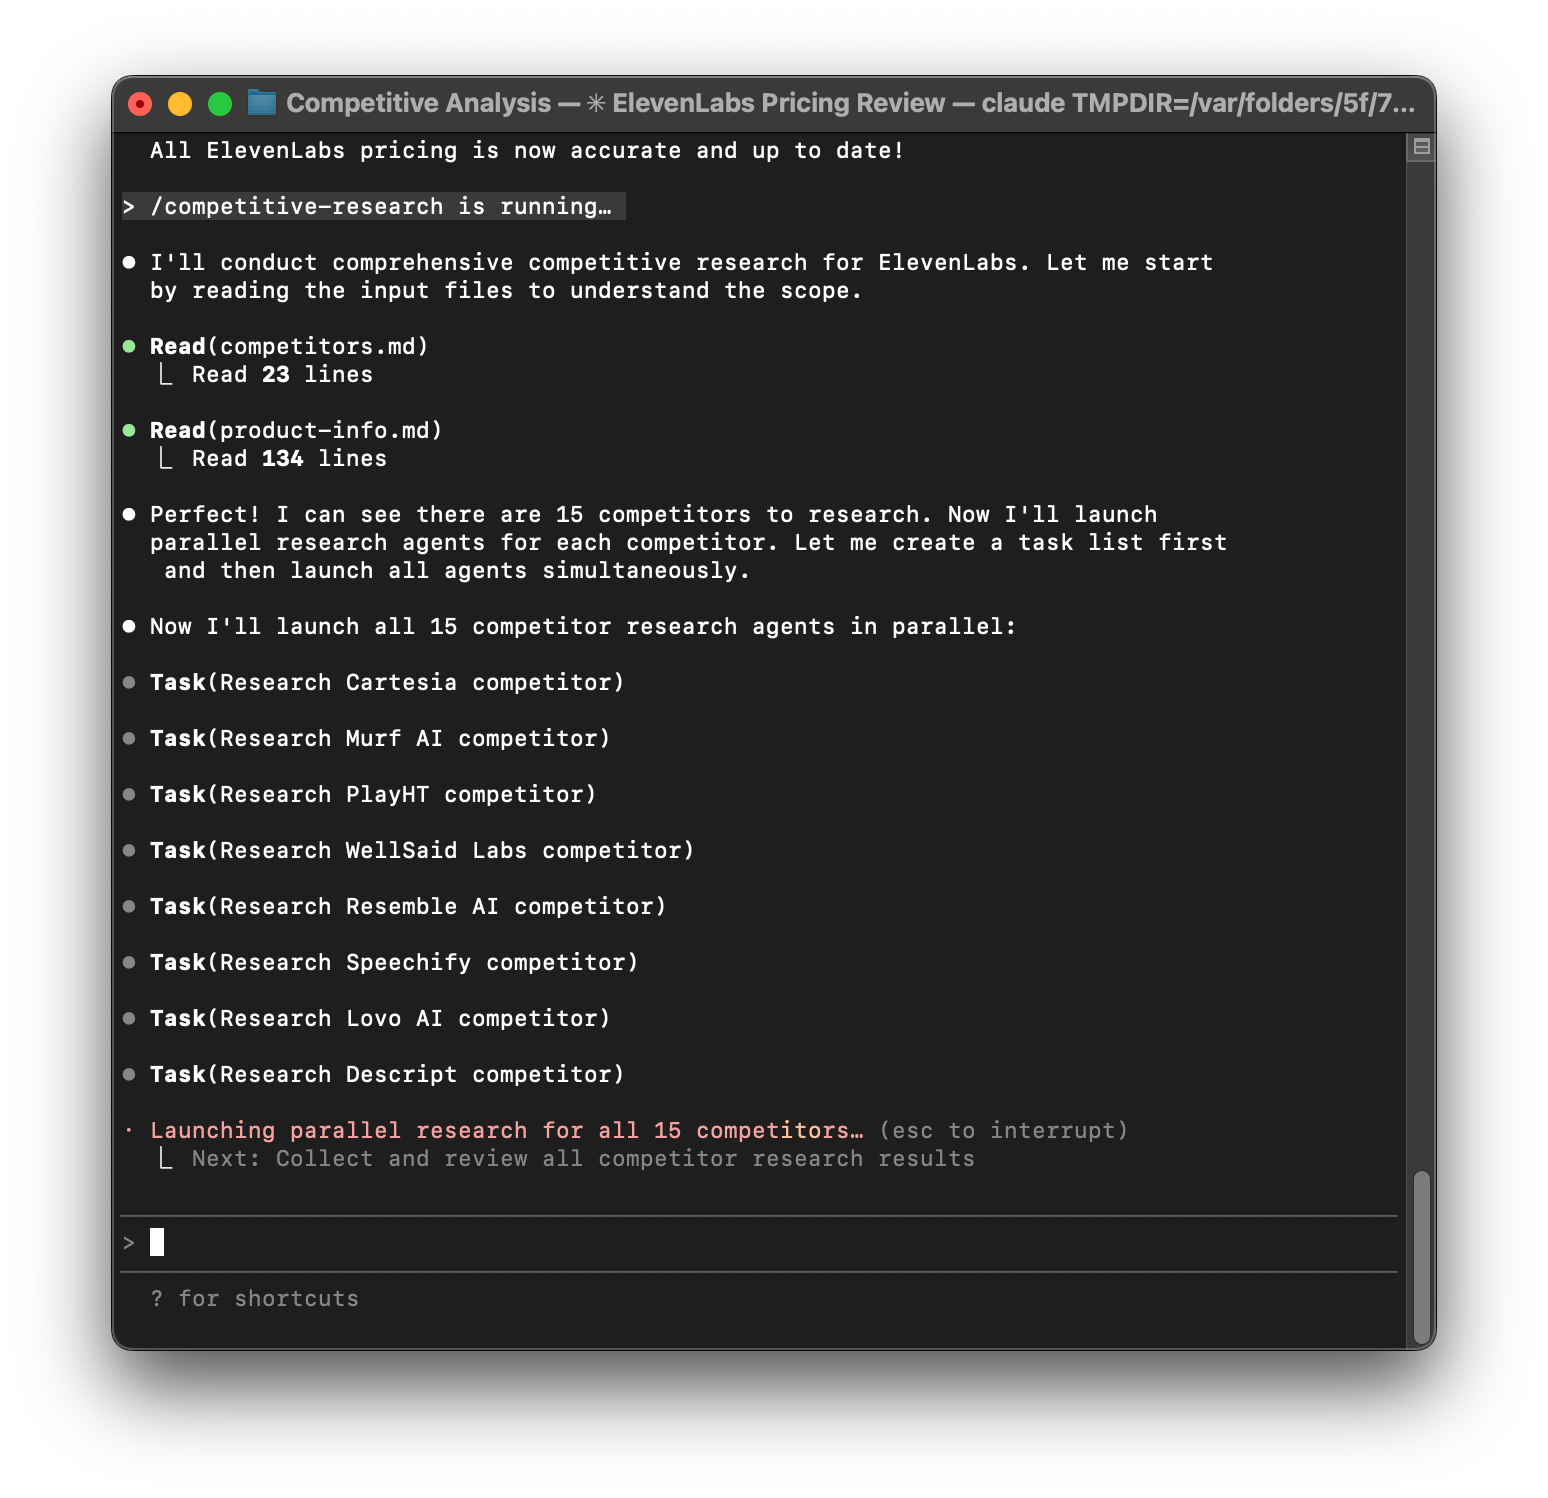
Then you tell Claude, “Use four agents to do the last four competitive analyses.” You watch in awe as four agents work independently. A minute or two later, all of your competitive analyses are done—each is saved in its own file in your Competitive Analysis folder.
Claude Code generating detailed price comparison and feature comparison charts.
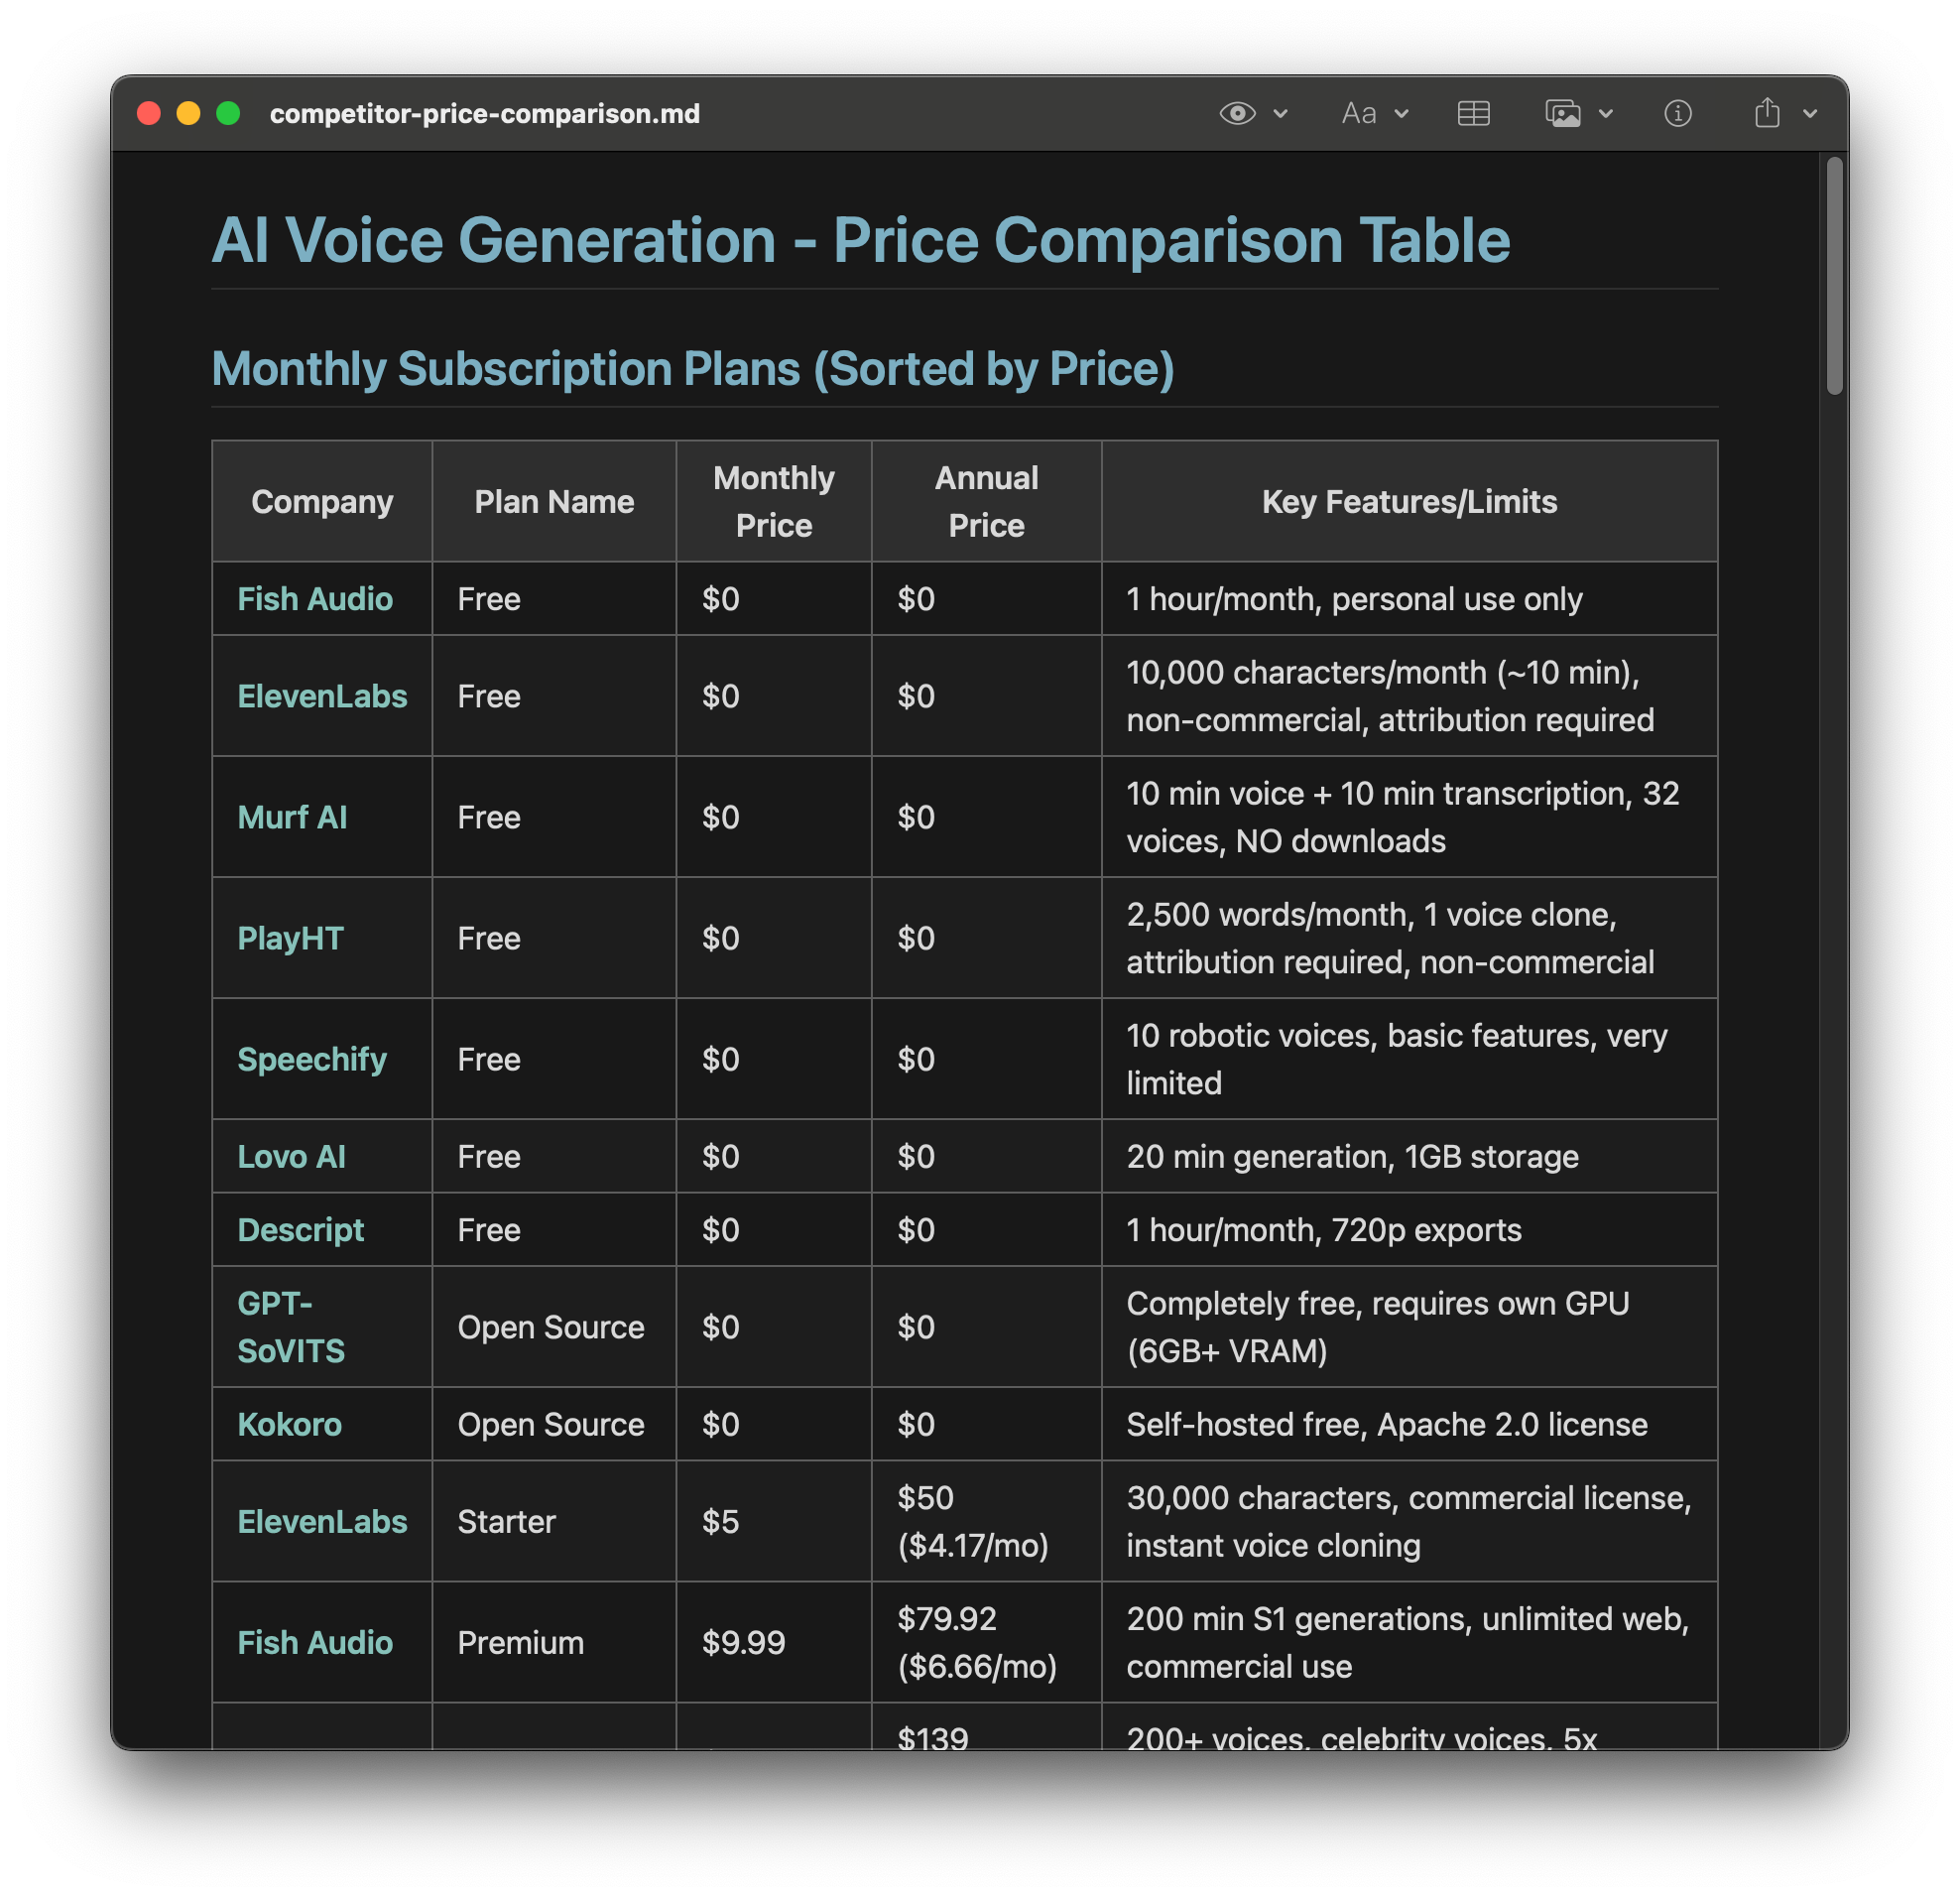
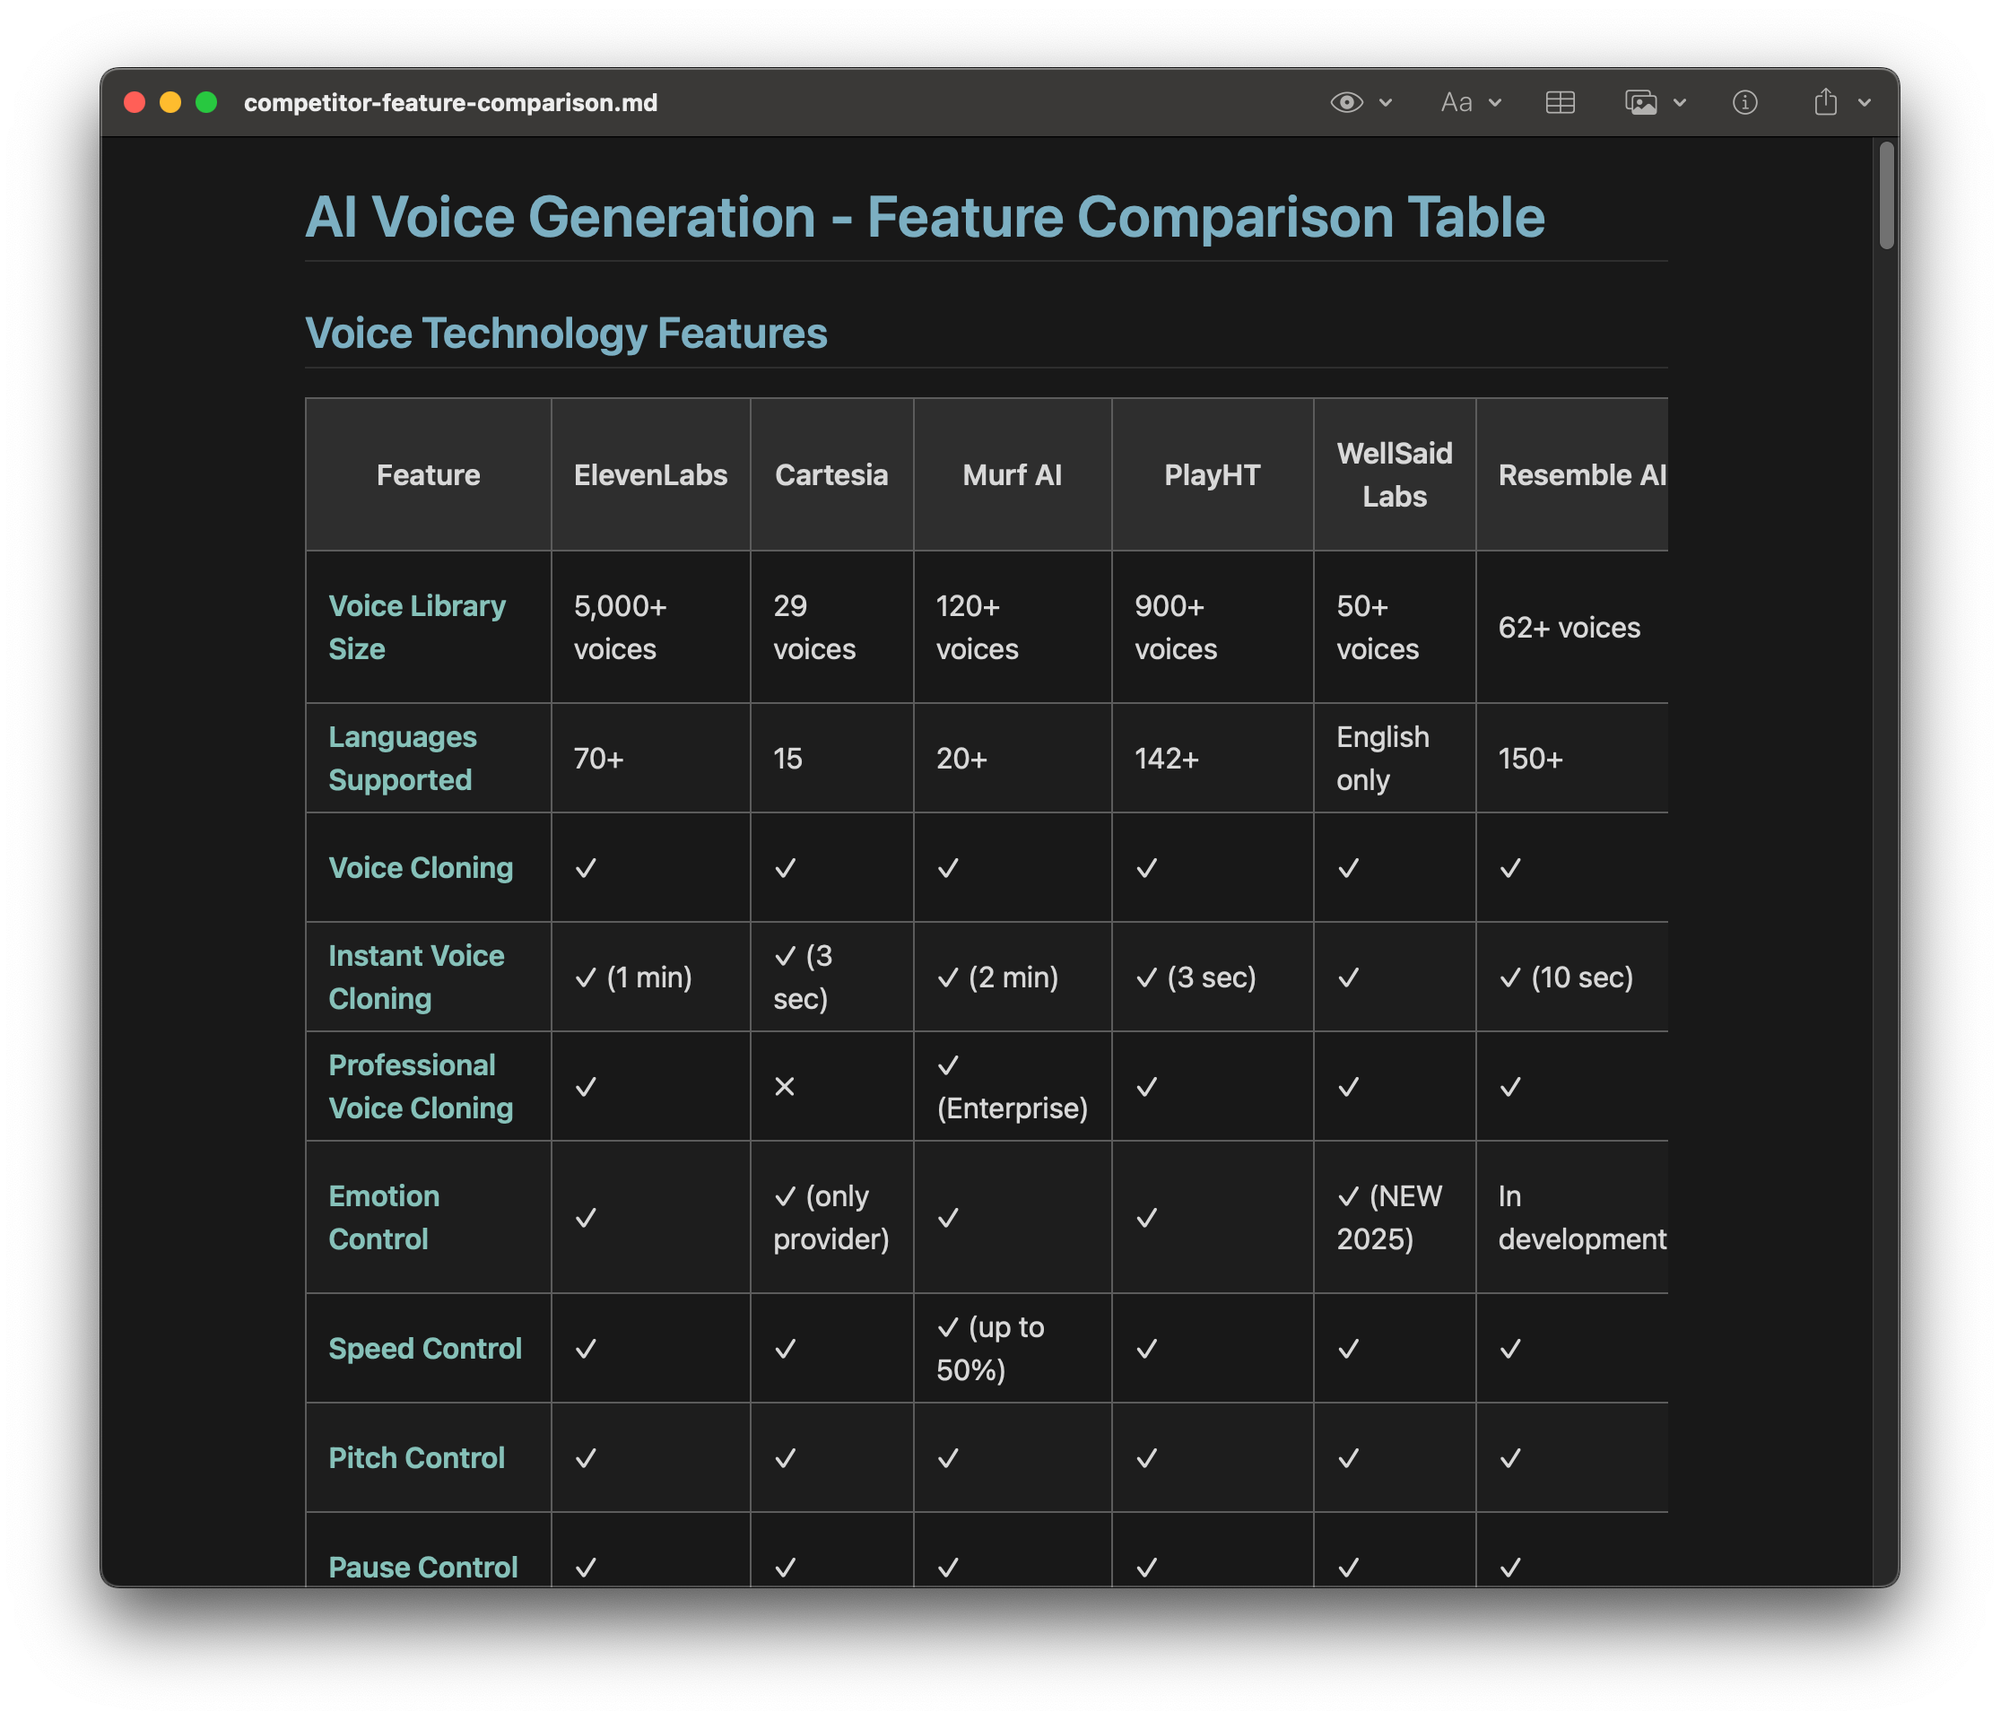
To create your competitive analysis, you tell Claude, “Create a price comparison table and feature comparison table using all of my competitor files.” Claude reviews each of the five competitor files and creates the comparison tables in price-comparison.md and feature-comparison.md. Both are saved in your Competitive Analysis folder.
You start to wonder who else might be a competitor and you realize you’ll need to repeat this task again in the future. So you start to consider how to make it more extensible.
You have a few problems to consider:
- how to keep your competitor list current
- how to keep your own product’s pricing and feature list current
- how to regenerate the price comparison and feature comparison tables whenever something changes
To start, you create a competitor.md file that includes all of your known competitors. You already have your product-info.md file and you add an item to your release checklist to update that file every time there’s a new feature release. Eventually, you can automate this by using a hook, but that can come later.
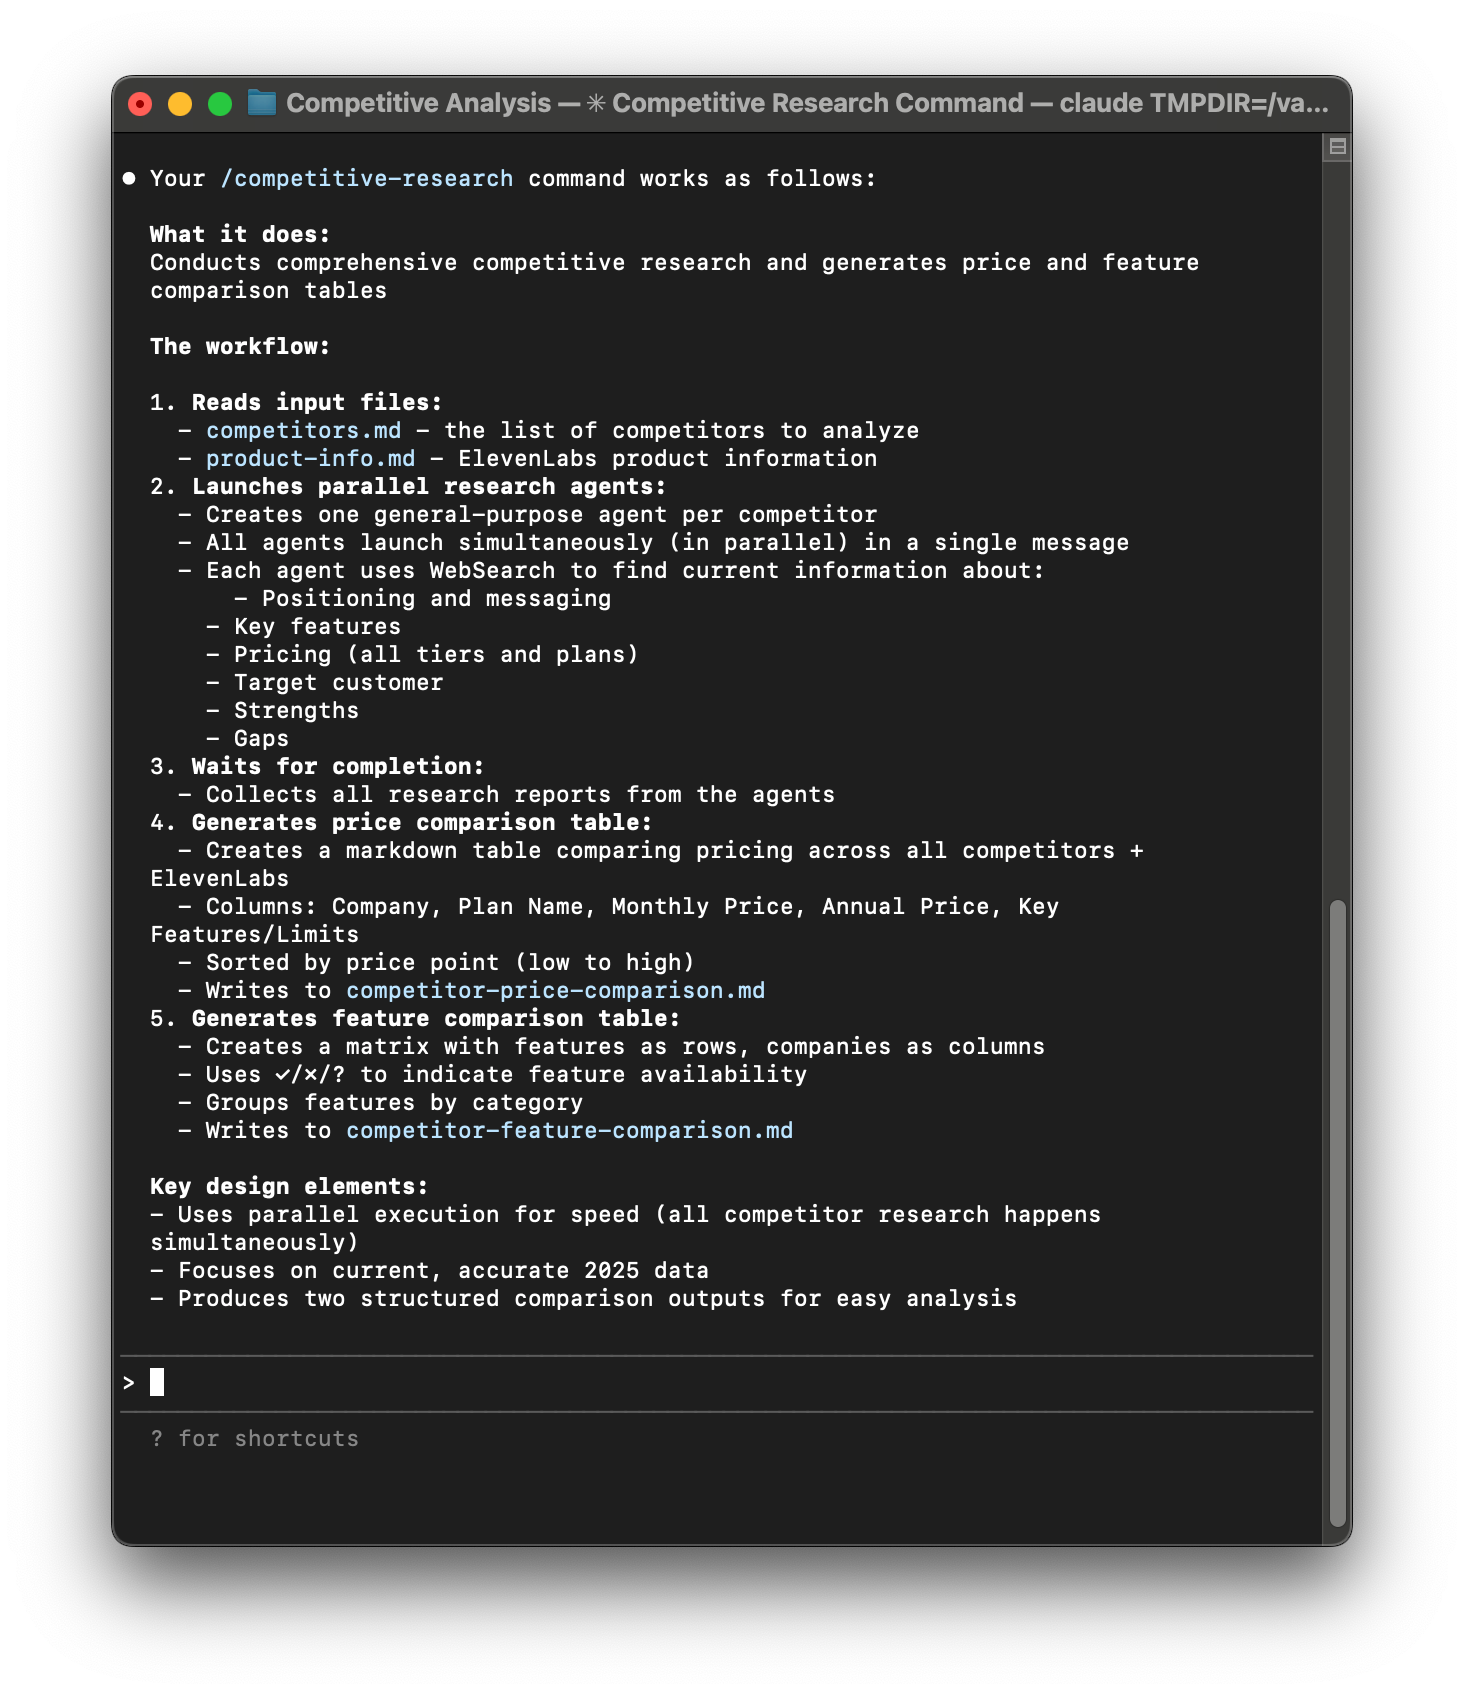
Then you create a new slash command: /update-competitors
That shortcut includes the following instructions:
- For each competitor in competitors.md, use the competitor-research agent to analyze that competitor and generate a competitor.md file.
- After you’ve generated all of the competitor files, create a price comparison table and a feature comparison table using all the data in those files.
A month later, when a new competitor enters the market, you add the company name to your competitor list and you run /update-competitors. A few minutes later Claude is done and you have updated price comparison and feature comparison tables.
You didn’t have to remember how you did it last time. You didn’t have to hunt for any files. You didn’t have to copy and paste. You simply typed a slash command and Claude handled everything.
This isn’t science fiction. This is today’s reality. I’ll show you how to implement this exact process before you are done reading this article.
And That’s Not All: You Own Your Data
Now imagine ChatGPT-6 comes out and it outperforms Claude. You want to switch.
If you were using Claude.ai in separate chats, it’s easy to switch. You just navigate to Chatgpt.com and do your chats there. But you are still copying and pasting, uploading and downloading documents, and managing your prompts.
If you were using Projects, you would need to take the time to recreate all of your Projects in ChatGPT. And you are still copying and pasting to get your data out.
If you use Claude Code, you simply download Codex (ChatGPT’s equivalent to Claude Code) and point it at the same markdown files Claude Code was using. There’s nothing to port. Everything is markdown (which is just text). Codex can read it. There’s no vendor lock in. You own your data. You get to decide how, when, and where to use it.
A Quick Note on Agent Skills
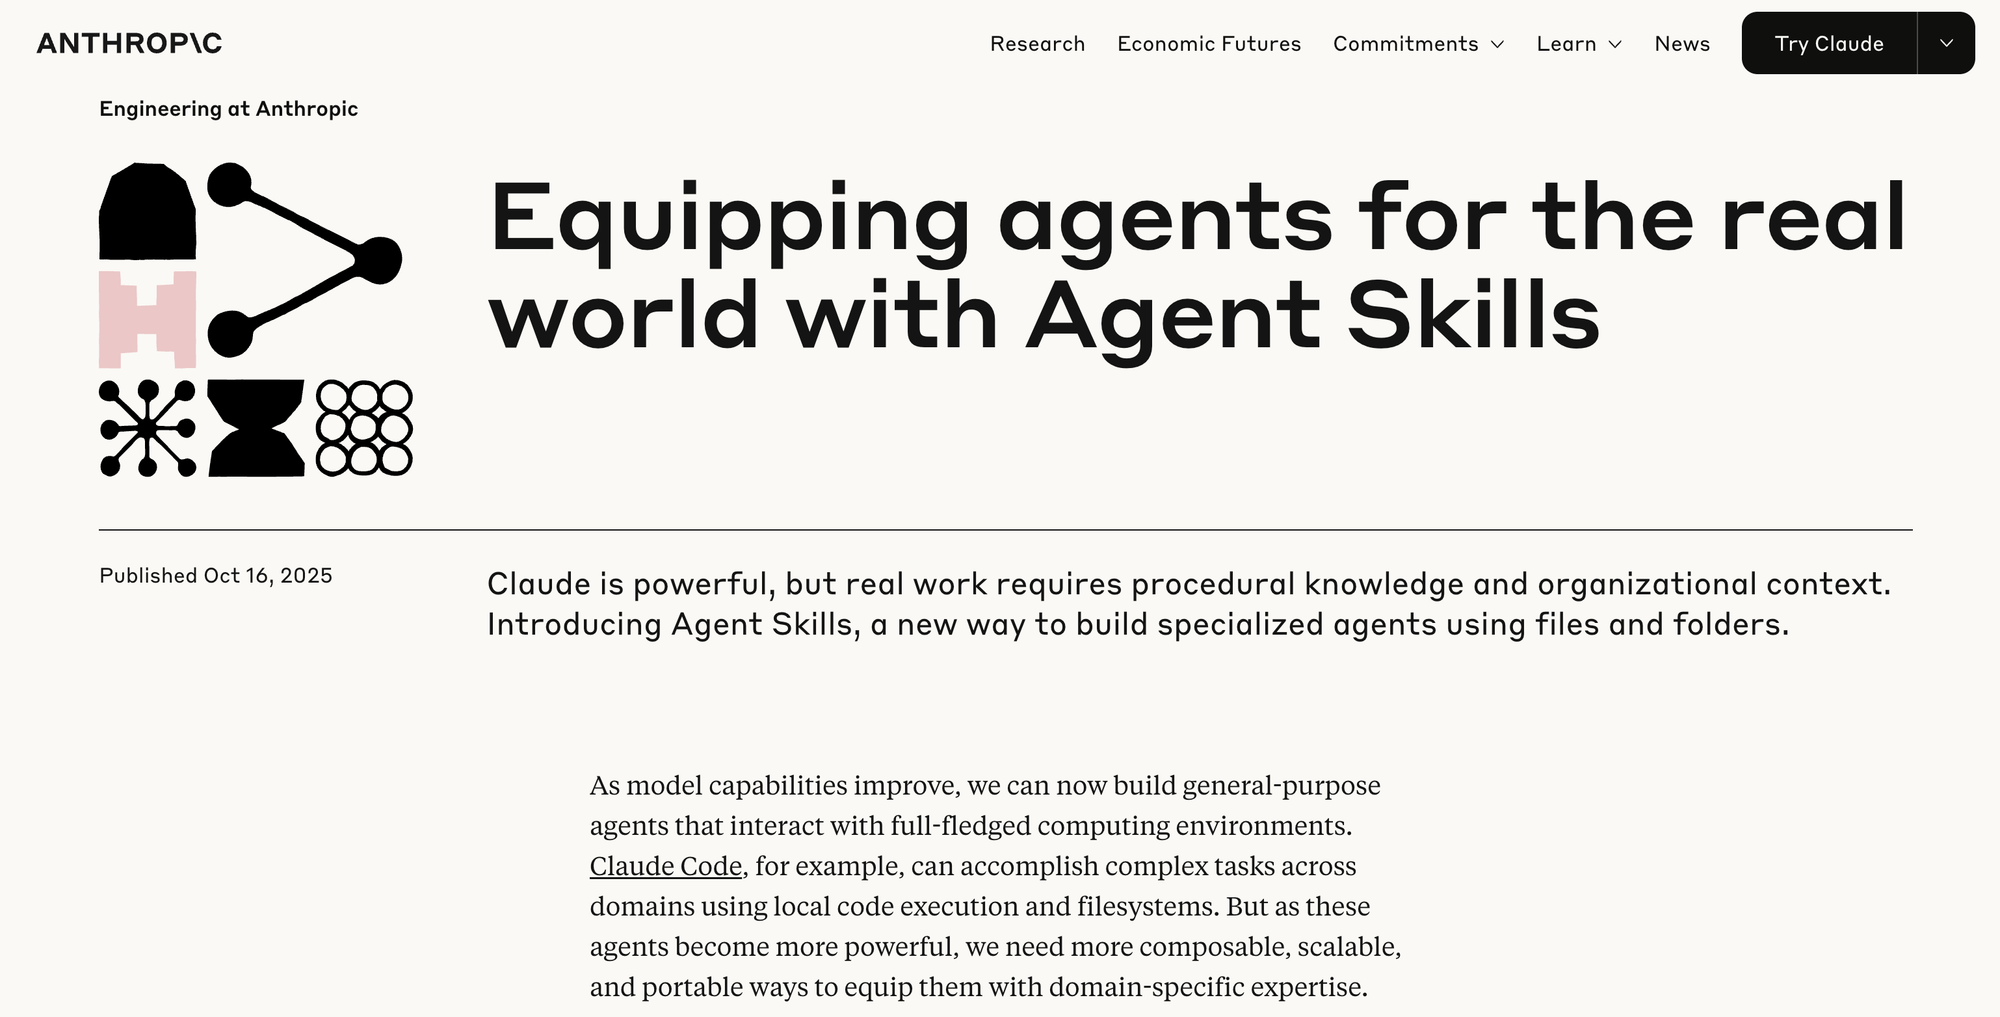
While I was writing this article, Anthropic launched Agent Skills and announced they would be available across all platforms (e.g. in the browser, Projects, Desktop, and Claude Code).
So what’s a Skill? It’s stored instructions, context files, and scripts (meaning deterministic code). You can think about it like a more powerful Project, because in addition to shared instructions and files, you can also define some code-based actions.
Skills have the potential to bring some of the benefits of Claude Code to the other access points when it comes to personalized shortcuts. For example, I could create a competitive analysis Skill that Claude can invoke from the web, a Project, the desktop app, or Claude Code.
The Skill instructions could tell Claude how I want it to conduct a competitive analysis. The context files could be my list of competitors and pricing and feature information.
But it’s not clear if a Skill can add to its own context files. So when I add a competitor, do I still have to copy and paste the output to a doc and then add that to my Skill? We don’t know yet.
There’s another key difference. Skills are similar to tools. The agent (meaning Claude) decides when to use them. This is different from slash commands where you decide when to use them. It’s also not clear if Skills can be run in parallel like agents. With an agent, I can have Claude analyze multiple companies at once. We don’t know yet if Skills work the same way.
We’ll have to wait and see how Skills work in practice once they are more widely available across the different access points. For now, it looks like they might help with creating some nice shortcuts, but don’t quite reach the full power of what you can do by mixing slash commands, agents, and hooks in Claude Code.
Why These Differences Matter
If you’ve never used Claude Code, you might be thinking, “An hour for competitive research in the browser sounds pretty good.”
And you’re right. It is good. Until you’ve experienced what’s possible with Claude Code.
Then you realize you’ve been doing the equivalent of manually copying files from one folder to another when Claude could have handled the entire task for you.
Here’s what changes when you shift from browser Claude to Claude Code:
You Stop Repeating Yourself
In the browser, every chat starts from scratch. Even with Projects, you’re managing context within that Project only.
But with Claude Code, your files are your context. Your competitors.md lives in your Competitive Analysis folder. Claude reads it automatically. When you add a new feature to product-info.md, Claude sees it immediately. No re-uploading. No pasting into chats.
This sounds like a small thing until you’re maintaining multiple Projects, working across different initiatives, or updating information regularly. Then it’s the difference between spending your time copying and pasting vs. actually getting work done.
You Build Systems That Compound
The first time you set up a competitive analysis in Claude Code, you invest 15 minutes creating your command and context files.
But here’s what happens next: You run that same command a month later when a new competitor emerges. One minute of work. Then again three months later for a different product line. A few minutes to define your competitors and your feature list. And then it works every time. Forever.
You’re not just saving time on one task. You’re building reusable systems.
Update your analysis framework? Run the command again. All competitors get analyzed with the new criteria. Compare that to redoing six separate chats in Projects.
Improve your prompt? Every future analysis benefits automatically.
This is the fundamental shift: You stop using AI as a question-answering service and start building AI-powered systems that get better over time.
You Work in Parallel Instead of Sequentially
Remember in our Claude Code example when you used four agents to analyze four competitors simultaneously?
That’s not possible in browser Claude or Projects. You’re working one competitor at a time. One chat at a time. One context window at a time.
With Claude Code’s parallel agents, each competitor gets:
- Its own context window (no degradation)
- The same framework (no drift from fatigue—you get the same thorough analysis no matter how many competitor analyses you run)
- Simultaneous processing (5x faster than sequential)
Five competitors? Ten competitors? Twenty? Same workflow. Same speed per competitor.
You’re not working harder. You’re working in parallel.
“But I’m Not Technical…”
I know what you’re thinking. “This sounds great, but I’m not a developer. I don’t know how to use the terminal.”
I get it. The terminal looks intimidating. Black screen. Text-only interface. It feels like something only engineers should touch.
But here’s what I’ve learned: Using Claude Code isn’t about being technical. It’s about being willing to try three to four simple commands.
That’s it. Three to four commands.
If you can organize files in folders (which you do), and you can create text files (which you do), you can use Claude Code.
You don’t need to know how to code. You don’t need to understand how terminals work. You just need to be willing to type a few simple commands that I’ll show you.
Everything else? Claude Code handles it.
Getting Started with Claude Code
1. What’s the Terminal?
The terminal is just a text-based app that allows you to interact with your computer. Instead of clicking buttons and icons, you type commands.
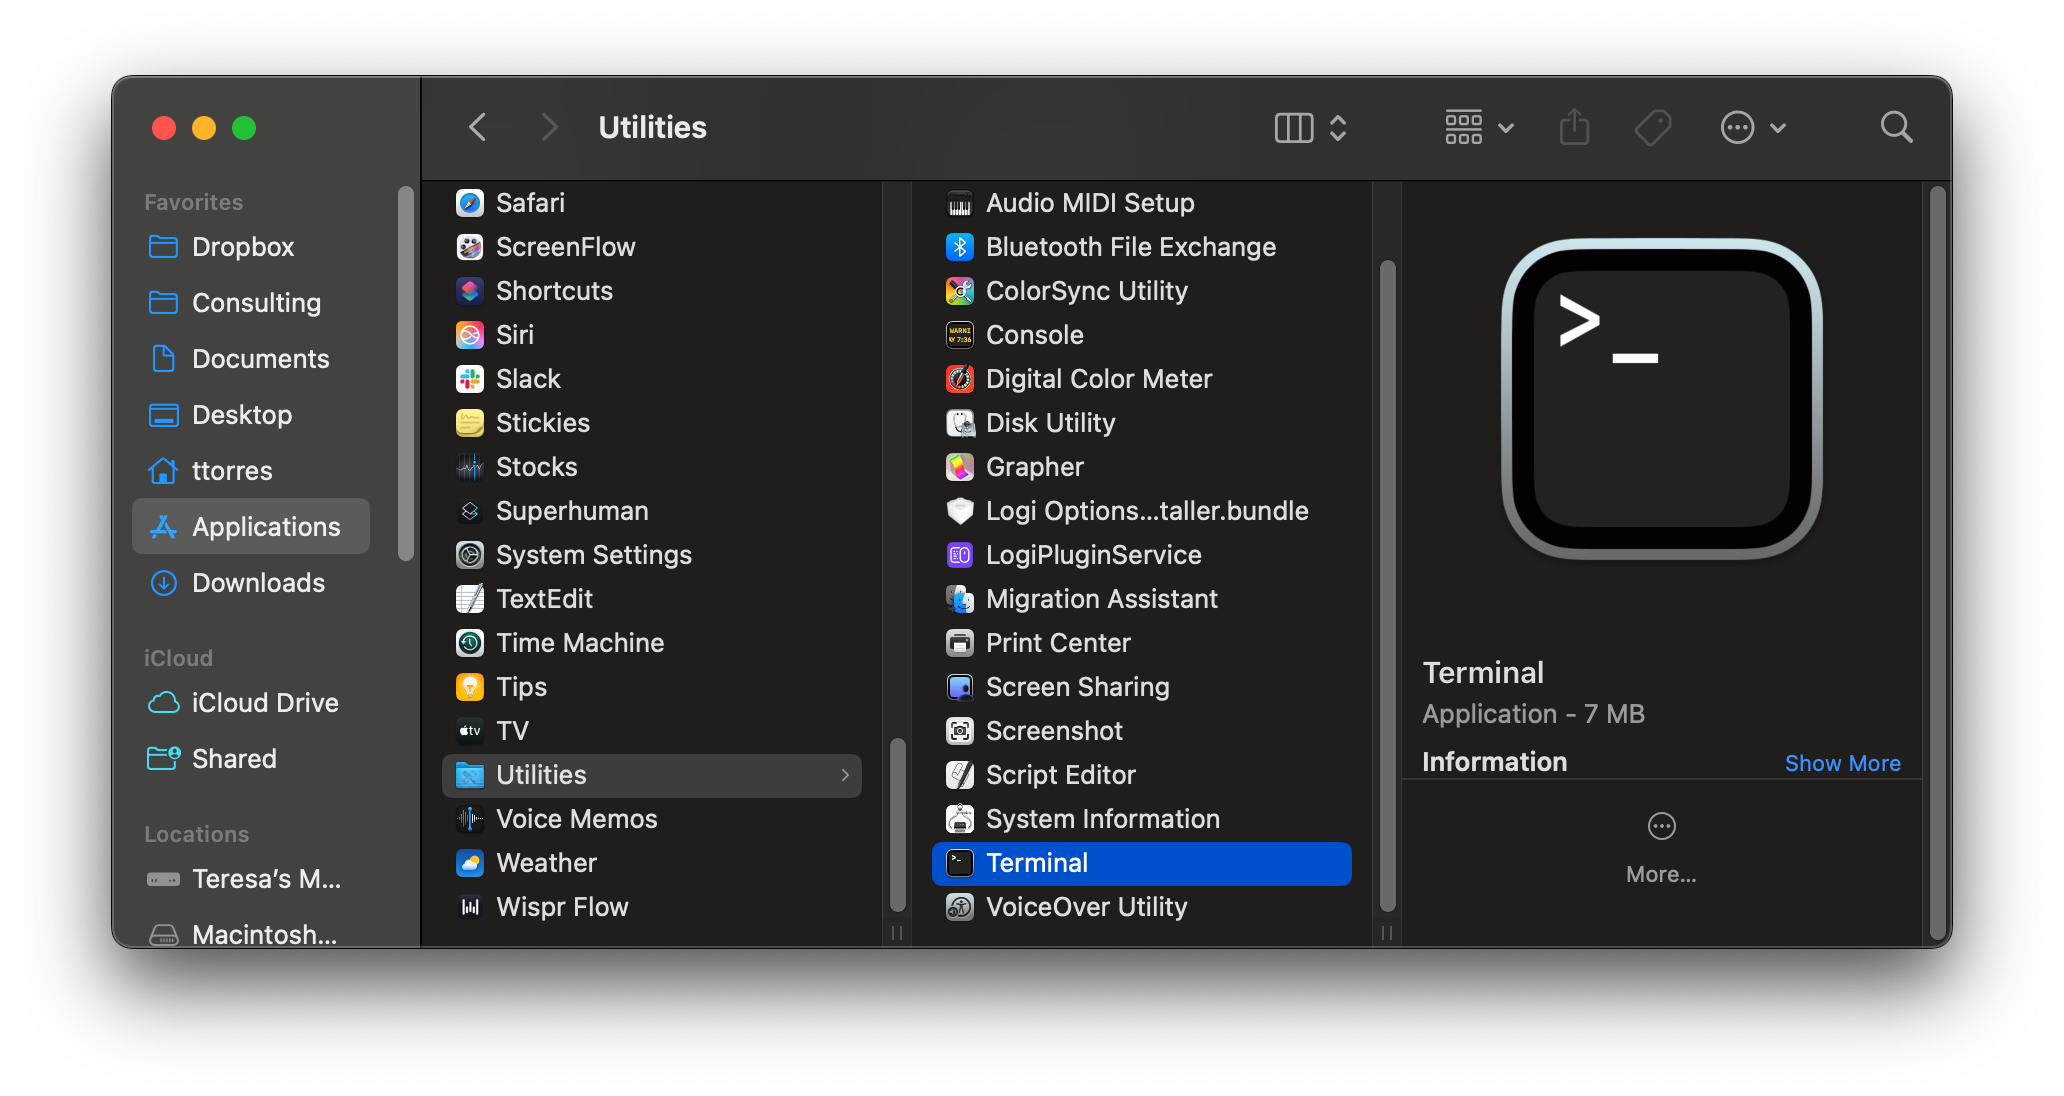
On Mac: Open “Terminal” (it’s in Applications > Utilities)
On Windows: Open “Windows Terminal” (search for it from the Start menu)
That black screen that appears? That’s it. That’s the terminal.
2. Install Node.js
Claude Code is a Node.js app. That means in order to run it, your computer needs a Node.js runtime environment.
Fortunately, Node.js makes it really easy to set up. You only have to do this once ever. So if it feels intimidating, just go step by step. And know that when you are done, you are done forever.
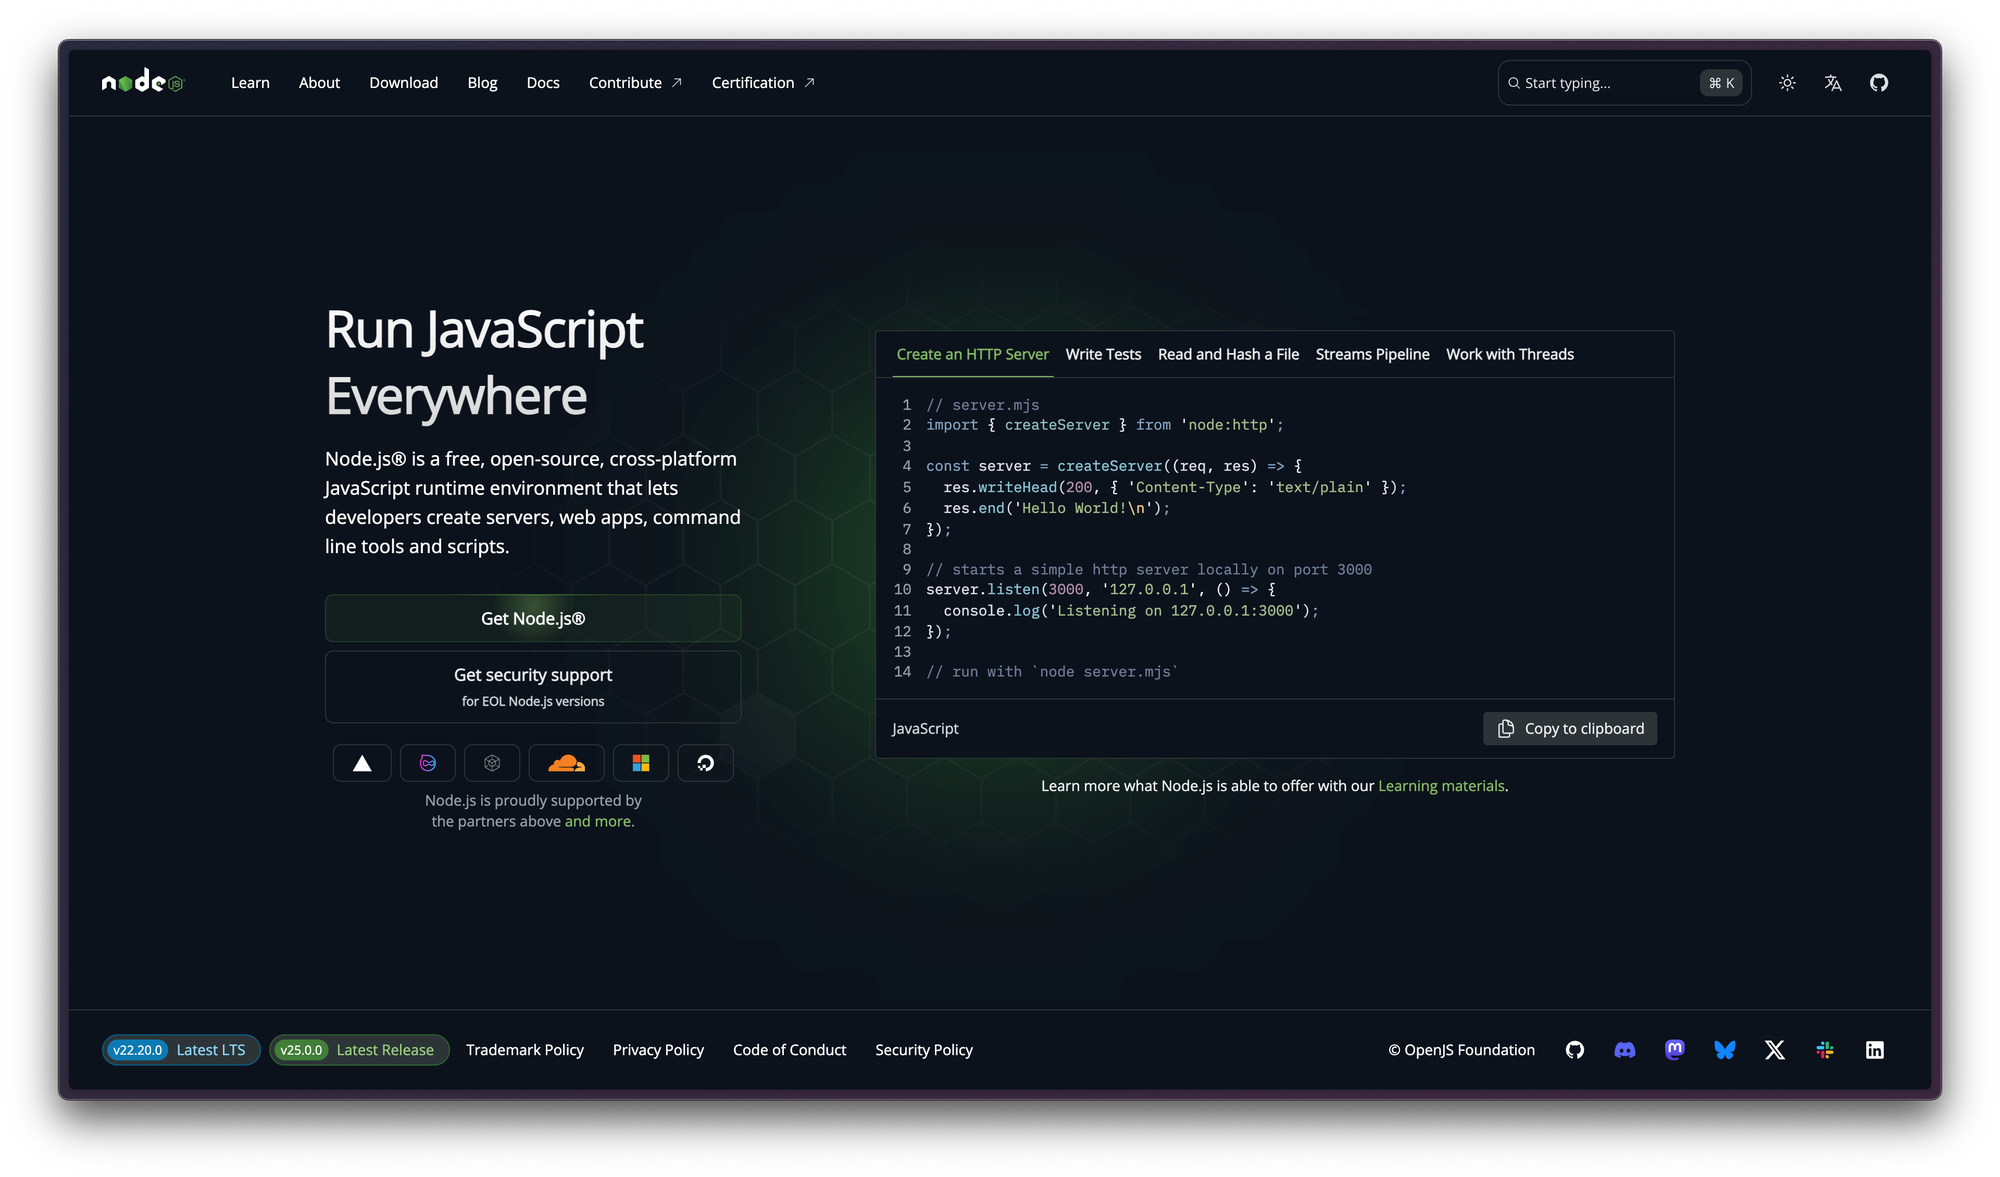
- Go to Nodejs.org
- Click on the “Get Node.js” button right on the home page.
- Make sure it correctly detected the type of computer you have. If you aren’t sure, ask ChatGPT or Claude in the browser to help you interpret the options.
- Download the installer.
- Double-click on the installer to initiate the installation process.
- You can accept all of the defaults.
- Once it’s done installing, in your terminal, type: node -v
- Hit “Enter.” If you get back a number, everything worked.
If you run into issues, just ask ChatGPT or Claude in the browser for help. You can even upload screenshots of what you are seeing and either will help you get through it.
3. Install Claude Code
With Node.js installed, you are now ready to install Claude Code. If you don’t have a Claude subscription, you’ll need at least a Pro account (starts at $17/month).
On a Mac: open your terminal and copy-paste this command:
curl -fsSL https://claude.ai/install.sh | bash
On Windows: open your terminal and copy-paste this command:
irm https://claude.ai/install.ps1 | iex
Then for both Mac and Windows:
Press “Enter.” A whole bunch of text will scroll in the Terminal window. That’s just the installer telling you what it’s doing.
Once it stops and you see a cursor again, type:
claude --version
If you get back a number, like this:
2.0.22 (Claude Code)
then everything worked. It’s okay if your number is different.
If something went wrong, take a screenshot and ask ChatGPT or Claude in the browser for help.
4. Start Claude Code
When you launch Claude Code, you’ll launch it in the context of a folder (also called a directory) on your computer.
For example, if you have a folder called Competitive Analysis and you launch Claude Code within that folder, then Claude will be able to read all of the files in that folder.
So you’ll want to launch Claude Code from within the folder where you want it to work.
You can do this one of two ways:
1. Use the File Browser (Finder on Mac, File Explorer on Windows)
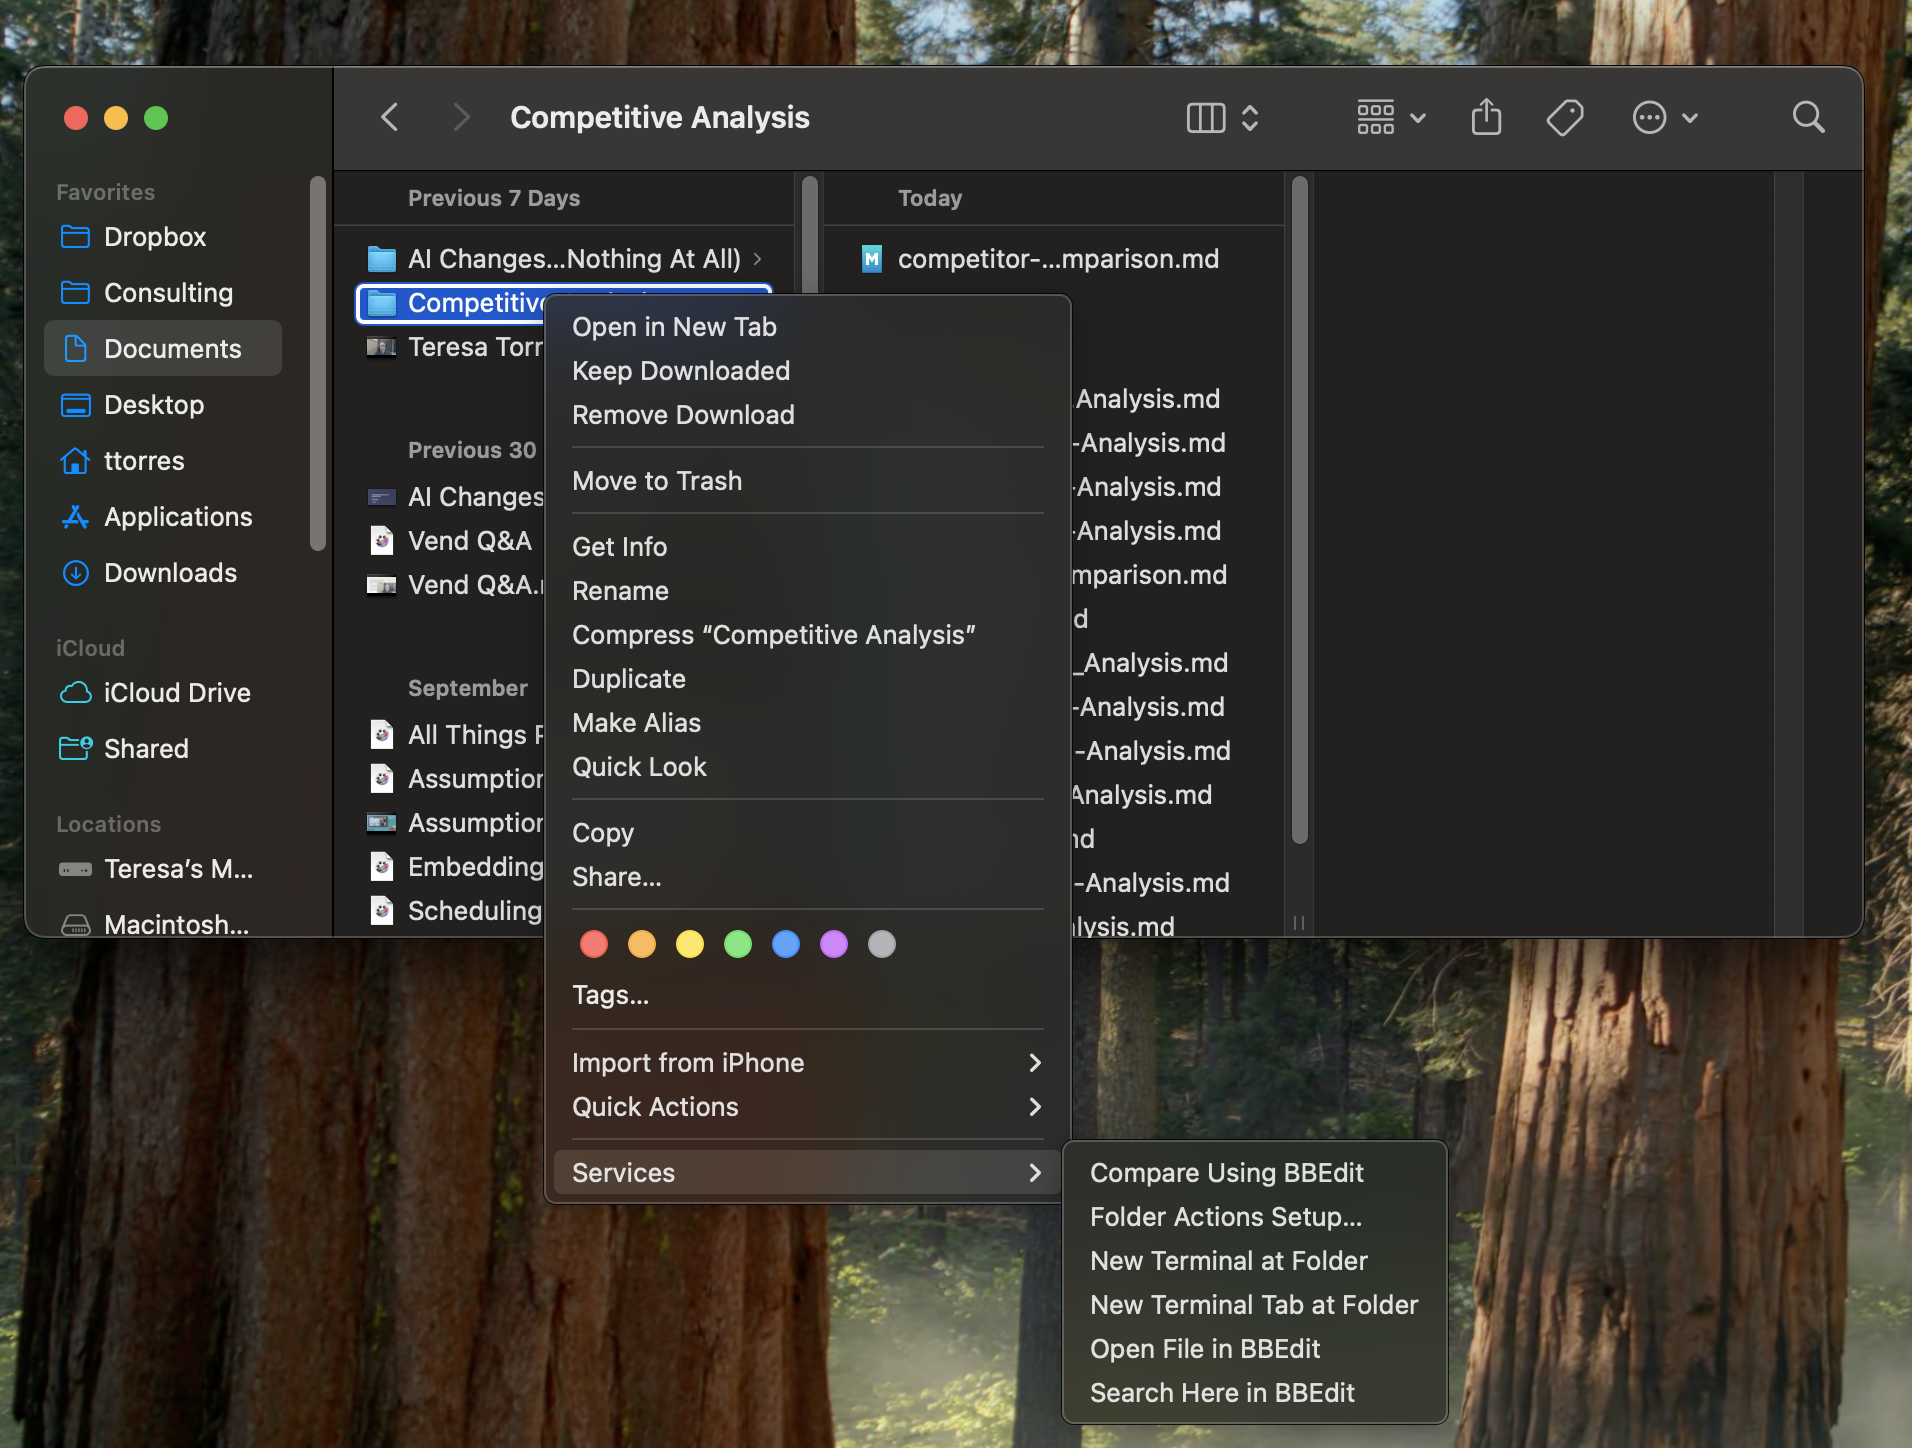
Navigate to a folder on your computer. Right-click on it and select Open in Terminal or New Terminal at Folder from the contextual menu. On a Mac, you’ll find this option in the Services menu.
This will open a terminal window in the context of that folder. From here, you can simply type: claude and hit “Enter.”
2. Open Claude Code from within the Terminal

If you are familiar with how to traverse the file system from within the terminal, then you can simply navigate to the directory you want and you can type claude at any time.
5. Complete the Initial Claude Code Setup
The first time you run Claude Code, you’ll need to set up your account. You can either connect it to your Claude Pro or Max account or you can use an API key. I strongly recommend connecting it to your Pro or Max account. Using an API key can get very expensive. If you connect it to Pro or Max, Claude will warn you as you approach your usage limits, but it will never cost you more than your monthly subscription. So this is a safer option.
Claude Code will also ask you if it’s safe for Claude to run the files in the local directory. This is just a safety check. You only want to open Claude in folders/directories where you are okay with giving Claude access to the files.
Finally, it will ask you to run /init. Go ahead and do this. This will be your first slash command. Type that in and follow the instructions. But don’t worry too much about getting everything just right. We’ll revisit this setup in a future article.
Once the setup is done, you can type whatever you want into the window and Claude will respond. It works just like using Claude in the browser. The difference is Claude Code has some superpowers that the browser doesn’t have.
Now, let’s get you set up with your own competitive analysis workflow, so you can start putting Claude Code to work for you today.
Try This: Build Your Competitive Research Workflow
I’m going to walk you through five steps. You’ll:
- Create your competitor list
- Create your product info document
- Define your /competitive-research slash command
- Run your slash command and watch Claude do the work for you
- Learn how to view the results
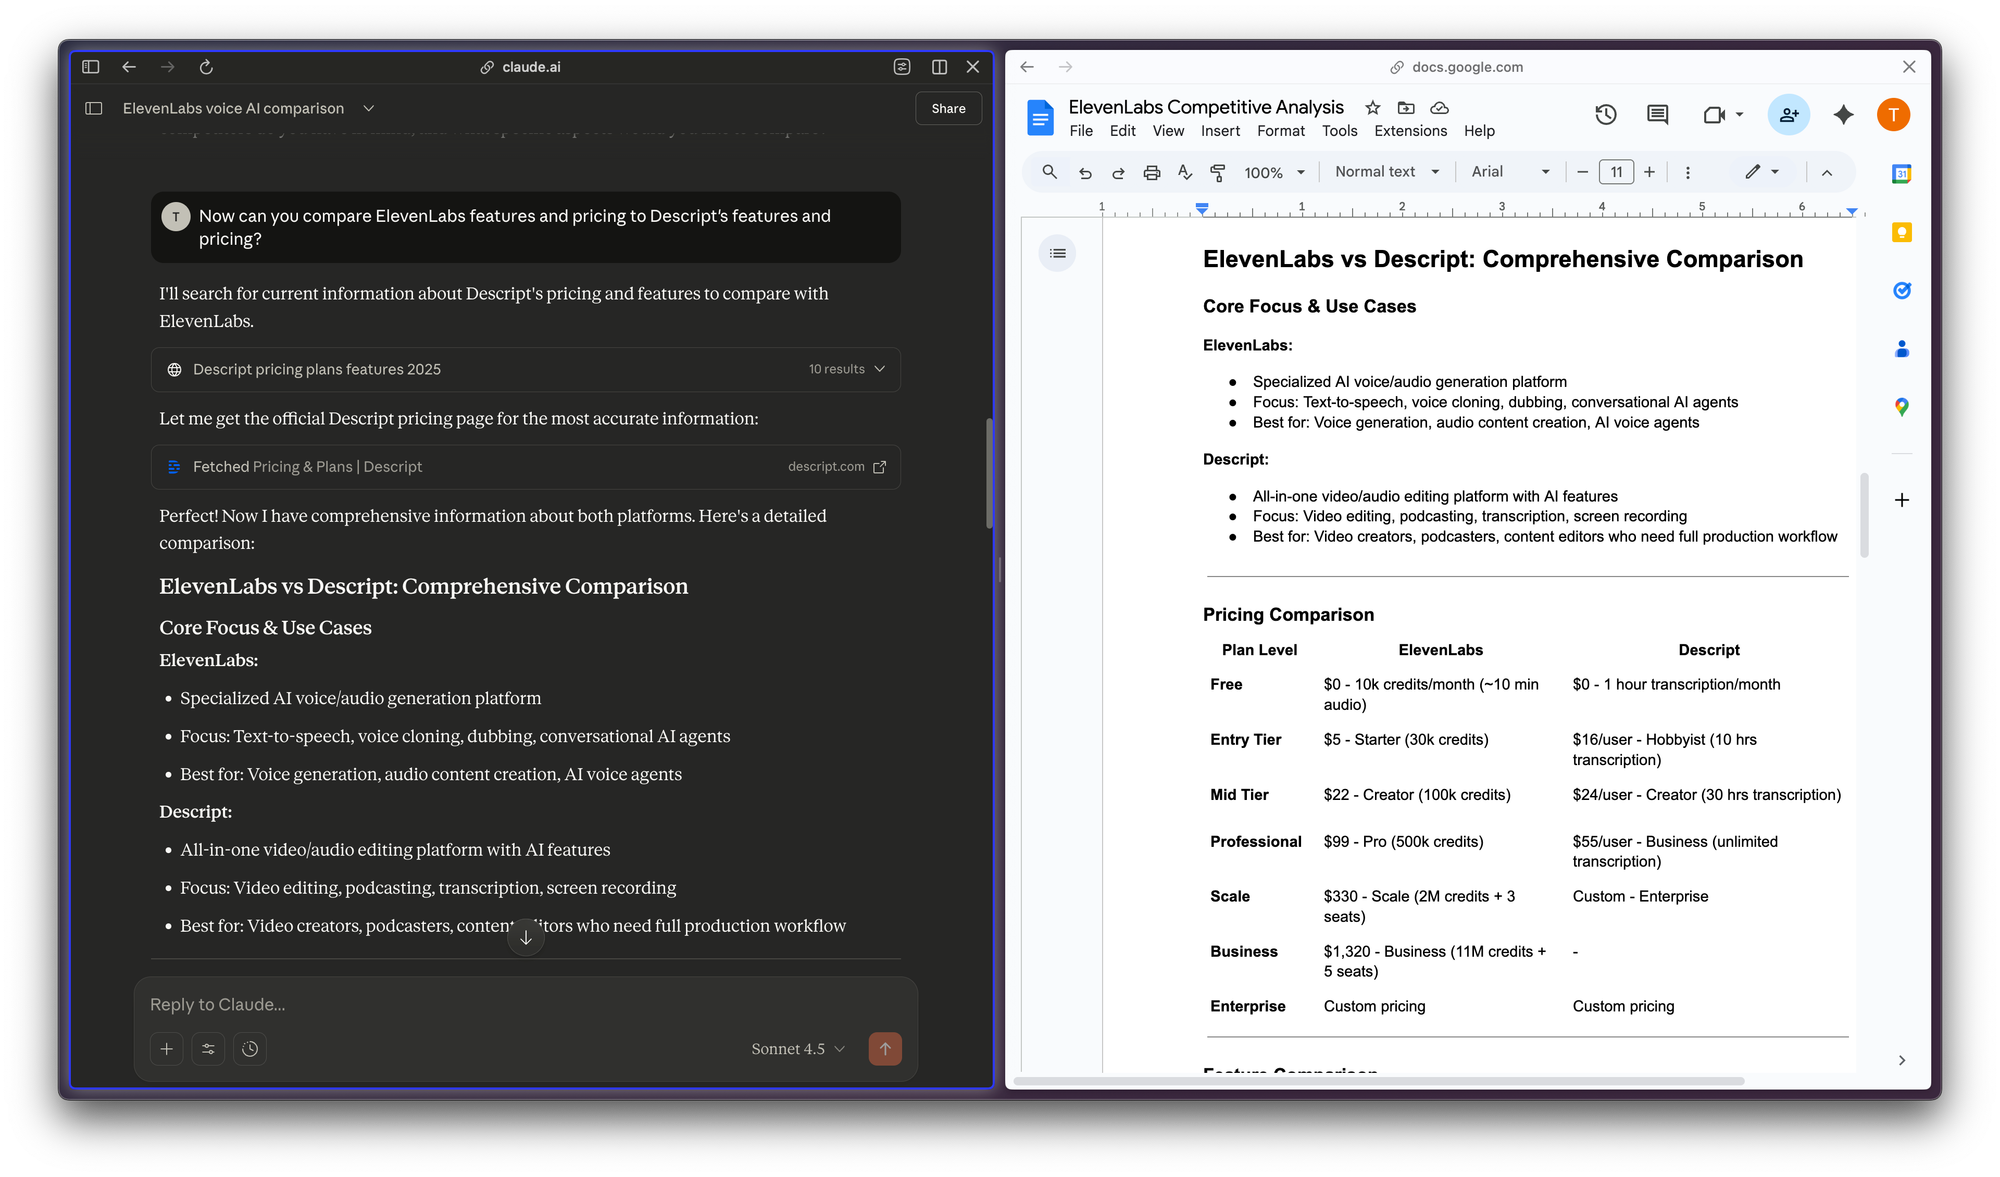
By the end, you’ll have a detailed price comparison chart and feature comparison chart for all of your competitors. To show you what that looks like, I ran this exact same process for ElevenLabs and here’s what Claude produced for me:


Claude Code will generate comparison tables for as many competitors as you’d like.
But that’s not all. You’ll also have a working system you can reuse anytime you need competitive intel.
This Claude Code recipe is for paid subscribers. Upgrade to get step-by-step instructions—including exactly what to type into Claude Code to generate a detailed competitive analysis in minutes.