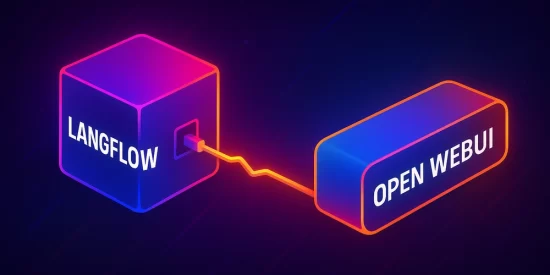
Langflow is a brilliant low-code builder that simplifies the creation of AI workflows using any API, model, or database. Open WebUI is a lightweight, extensible interface for working with LLMs like Ollama locally. Combine the two, and you get a supercharged AI assistant that runs your custom workflows through an intuitive chat interface.
This post walks you through a quick proof-of-concept (POC) for connecting Langflow to Open WebUI using its pipeline feature. While it’s a basic setup, it’s a solid launchpad for more advanced integrations – and might save others a few hours getting started.
🔗 Tools & References
- Langflow – Low-code AI builder
- Open WebUI – Chat UI for local LLMs
- Open WebUI Pipelines GitHub
1. Docker Setup: All-In-One
Here’s the Docker Compose file I used to bring up Langflow, Open WebUI, Pipelines, and PostgreSQL:
services:
  openwebui:
    image: ghcr.io/open-webui/open-webui:main
    ports:
      - "3000:8080"
    volumes:
      - open-webui:/app/backend/data

  pipelines:
    image: ghcr.io/open-webui/pipelines:main
    ports:
      - "9099:9099"
    volumes:
      - pipelines:/app/pipelines
    restart: always
    environment:
      - PIPELINES_API_KEY=0p3n-w3bu!

  langflow:
    image: langflowai/langflow:latest
    pull_policy: always
    ports:
      - "7860:7860"
    depends_on:
      - postgres
    environment:
      - LANGFLOW_DATABASE_URL=postgresql://langflow:langflow@postgres:5432/langflow
      - LANGFLOW_CONFIG_DIR=app/langflow
    volumes:
      - langflow-data:/app/langflow

  postgres:
    image: postgres:16
    environment:
      POSTGRES_USER: langflow
      POSTGRES_PASSWORD: langflow
      POSTGRES_DB: langflow
    ports:
      - "5432:5432"
    volumes:
      - langflow-postgres:/var/lib/postgresql/data

volumes:
  open-webui: {}
  pipelines: {}
  langflow-postgres: {}
  langflow-data: {}
Once it’s running (docker compose up -d), you can access:
-
Langflow:
http://localhost:7860 -
Open WebUI:
http://localhost:3000
2. Create and Identify Your Workflow in Langflow
Create a basic workflow in Langflow – for example, something that accepts a prompt and outputs a simple chat reply using a model or chain.
📌 Tip: You can grab the workflow_id from Langflow’s deployment example or directly from the UI/project files after creating the flow. This is the ID you’ll reference in the pipeline code.
Example Workflow ID:
b3185asdfb-072e-4easdf-a8aa-31c89f14f073
3. The Pipeline Script
Here’s the quick-and-dirty POC script that connects Open WebUI to your Langflow flow via the Pipelines system. It makes a simple HTTP request to the Langflow API with the user’s prompt.
from typing import List, Union, Generator, Iterator
from pydantic import BaseModel, Field
import httpx, os, time
from datetime import datetime
from logging import getLogger

logger = getLogger(__name__)
logger.setLevel("DEBUG")

class Pipeline:
    class Valves(BaseModel):
        LANGFLOW_BASE_URL: str = Field(default="http://host.docker.internal:7860")
        WORKFLOW_ID: str = Field(default="b3185asdfb-072e-4easdf-a8aa-31c89f14f073")
        RATE_LIMIT: int = Field(default=5)

    def __init__(self):
        self.name = "Langflow Pipeline"
        self.valves = self.Valves(**{k: os.getenv(k, v.default) for k, v in self.Valves.model_fields.items()})

    async def on_startup(self): logger.debug(f"on_startup:{self.name}")
    async def on_shutdown(self): logger.debug(f"on_shutdown:{self.name}")

    def rate_check(self, dt_start: datetime):
        diff = (datetime.now() - dt_start).total_seconds()
        buffer = 1 / self.valves.RATE_LIMIT
        if diff < buffer: time.sleep(buffer - diff)

    def pipe(self, user_message: str, model_id: str, messages: List[dict], body: dict) -> Union[str, Generator, Iterator]:
        logger.debug(f"pipe:{self.name}")
        dt_start = datetime.now()
        return "".join([chunk for chunk in self.call_langflow(user_message, dt_start)])

    def call_langflow(self, prompt: str, dt_start: datetime) -> Generator:
        self.rate_check(dt_start)
        url = f"{self.valves.LANGFLOW_BASE_URL}/api/v1/run/{self.valves.WORKFLOW_ID}?stream=false"
        payload = {"input_value": prompt, "output_type": "chat", "input_type": "chat"}
        try:
            with httpx.Client(timeout=30.0) as client:
                response = client.post(url, json=payload)
                response.raise_for_status()
                data = response.json()
                text = (
                    data.get("outputs", [{}])[0]
                        .get("outputs", [{}])[0]
                        .get("results", {})
                        .get("message", {})
                        .get("text", "No text found.")
                )
                yield text
        except Exception as e:
            logger.error(f"Langflow error: {e}")
            yield f"Error: {e}"
4. Hook Up & Restart
Once your pipeline script is in place:
- Place it in your mounted pipelines directory.
- Edit the environment variables or hardcode your
WORKFLOW_ID. - Restart the Pipelines-Container:
- Inside Open WebUI make sure your pipelines are connected
5. You should see the “Langflow Pipeline” as selectable model in the new chats.
Results & Takeaways
This pipeline sends any message from the WebUI straight into your Langflow workflow, then relays the response back in the chat – just like a custom plugin would.
⚠️ This is a fast-built POC – basic error handling, no streaming, no caching, and hardcoded workflow IDs. But it’s a functional start and can be easily extended.
Final Thoughts
This integration bridges two powerful open-source tools – Langflow and Open WebUI – to create a local-first, highly customizable chatbot with rich workflow logic under the hood.
It’s still early, but if you’re experimenting with Langchain-style agents or building LLM-based tooling, this setup is a great sandbox.


