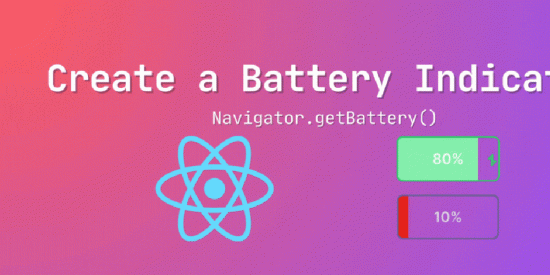
In this article, we’re going to build a fun project — a battery indicator component using React. This component will show you the current battery level and whether your device is charging.

However, our battery indicator will rely on the Navigator.getBattery() method to retrieve battery information which is not supported by Mozilla and Safari browsers. And also it’s available only in secure contexts (HTTPS).
This means that our component will only work on Chrome and other Chromium-based browsers like Edge.

So, that’s why it’s more of a fun project than a practical one.
Let’s get started!
1. Create a new React project using Vite and the React template.

Run the following commands to create a new React project using Vite and the React template.
npm create vite@latest battery-indicator - - template react
cd battery-indicator
npm install
2. Install Tailwind CSS.

We’ll use Tailwind CSS to style our battery indicator component. Run the following commands to install Tailwind CSS and its dependencies.
npm install -D tailwindcss postcss autoprefixer
npx tailwindcss init -p
Update the tailwind.config.js file to include the following:
/** @type {import('tailwindcss').Config} */
export default {
  content: ['./index.html', './src/**/*.{js,ts,jsx}'],
  theme: {
    extend: {},
  },
  plugins: [],
}
Then add @tailwind directives on top of the src/index.css file.
@tailwind base;
@tailwind components;
@tailwind utilities;
3. Create the battery indicator component.
Create a new file called BatteryIndicator.jsx in the src/components folder. This file will contain the battery indicator component.
Let’s start with the battery info state and a function to update the battery info.
// Initial battery info: battery level: 0-100, charging status: true/false, supported by the browser: true/false
const initialBatteryInfo = { level: 0, charging: false, supported: true };

// Battery info state
const [batteryInfo, setBatteryInfo] = useState(initialBatteryInfo);

// Update the battery info
const updateBatteryInfo = (battery) => {
  setBatteryInfo({ level: battery.level * 100, charging: battery.charging, supported: true });
};
We have to be sure that the browser supports the Battery Status API before we can use it. To do this, we can check if the getBattery method is available in the navigator object by navigator.getBattery. If it’s available, we can use it to get the battery status. If it’s not, we set the supported property of the battery info state to false.
Then, we use the useEffect hook to check if the browser supports the Battery Status API and setup the event listeners for the battery status changes.
The function that provides the battery status is navigator.getBattery(). It’s an async function so we need to use await to resolve it.
useEffect(() => {
  // Check if the browser supports the Battery Status API and setup the event listeners
  const checkBatteryAPIAndSetup = async () => {
    if (navigator.getBattery) {
      try {
        // Get the battery status
        const battery = await navigator.getBattery();
        updateBatteryInfo(battery);

        // Setup the event listeners for the battery status changes
        battery.addEventListener('chargingchange', () => updateBatteryInfo(battery));
        battery.addEventListener('levelchange', () => updateBatteryInfo(battery));
      } catch (error) {
        console.error('Battery status is not supported.');
        setBatteryInfo((prev) => ({ ...prev, supported: false }));
      }
    } else {
      console.error('Battery status is not supported.');
      setBatteryInfo((prev) => ({ ...prev, supported: false }));
    }
  };

  checkBatteryAPIAndSetup();
}, []);
Now, let’s create the UI for the battery indicator component. It will consist of the battery level bar, the battery level text, and the charging icon.
// Component to display the battery info
const BatteryInfo = ({ batteryInfo }) => (
    <div className={`w-32 h-14 border-2 ${batteryInfo.charging ? 'border-green-500' : 'border-gray-500'} rounded-lg flex items-center justify-start overflow-hidden relative`}>
      {/* Battery level bar */}
      <div
        className={`${batteryInfo.level > 20 ? 'bg-green-300' : 'bg-red-500'} h-full`}
        style={{ width: `${batteryInfo.level}%` }}
      ></div>
      {/* Battery level text */}
      <div className="absolute w-full h-full flex items-center justify-center text-lg font-semibold">
        {batteryInfo.level.toFixed(0)}%
      </div>
      {batteryInfo.charging && <ChargingIcon />}
    </div>
);
The battery level bar has width that corresponds to the battery level. We use the style attribute to set the width of the bar based on the battery level. We use the toFixed method to round the battery level to the nearest whole number.
Simple logic is used to determine the color of the battery level bar based on the battery level. If the battery level is greater than 20%, the bar will be green, otherwise, it will be red.
We also show the charging icon if the device is charging:
const ChargingIcon = () => (
    <svg className="absolute right-0 mr-[-6px] w-6 h-6 text-green-500" fill="none" viewBox="0 0 24 24" stroke="currentColor">
    <path strokeLinecap="round" strokeLinejoin="round" strokeWidth={2} d="M11 7L6 12h4v8l5-5h-4v-8z" />
  </svg>
);
Now, let’s put it all together in the BatteryIndicator component:
import { useState, useEffect } from 'react';

// Initial battery info: battery level: 0-100, charging status: true/false, supported by the browser: true/false
const initialBatteryInfo = { level: 12, charging: true, supported: true };

export function BatteryIndicator() {
  const [batteryInfo, setBatteryInfo] = useState(initialBatteryInfo);

  // Update the battery info
  const updateBatteryInfo = (battery) => {
    setBatteryInfo({ level: battery.level * 100, charging: battery.charging, supported: true });
  };

  useEffect(() => {
    // Check if the browser supports the Battery Status API and setup the event listeners
    const checkBatteryAPIAndSetup = async () => {
      if (navigator.getBattery) {
        try {
          // Get the battery status
          const battery = await navigator.getBattery();
          updateBatteryInfo(battery);

          // Setup the event listeners for the battery status changes
          battery.addEventListener('chargingchange', () => updateBatteryInfo(battery));
          battery.addEventListener('levelchange', () => updateBatteryInfo(battery));
        } catch (error) {
          console.error('Battery status is not supported.');
          setBatteryInfo((prev) => ({ ...prev, supported: false }));
        }
      } else {
        console.error('Battery status is not supported.');
        setBatteryInfo((prev) => ({ ...prev, supported: false }));
      }
    };

    checkBatteryAPIAndSetup();
  }, []);

  return (
    <div className="flex items-center justify-center h-screen">
    <div className="text-center">
      {batteryInfo.supported ? (
        <div className="flex flex-col items-center justify-center space-y-2">
          <BatteryInfo batteryInfo={batteryInfo} />
        </div>
      ) : (
        <div className="p-4 rounded-md bg-gray-200 text-gray-700">
          Battery status is not supported in this browser.
        </div>
      )}
    </div>
  </div>
  );
}
So, our component is ready. Now, let’s import it into the App component, remove anything else, and see it in action.
import { BatteryIndicator } from './components/BatteryIndicator';

function App() {
  return (
    <div>
      <BatteryIndicator />
    </div>
  );
}

export default App;
Now, run the following command to start the development server and open the app in your browser.
npm run dev
Open localhost:5173 in your browser. You should see the battery indicator component showing the current battery level and whether your device is charging.
If your device is charging you should see a charging icon on the right side of the battery level bar.
If the battery level is less than 20% the battery level bar will be red:

If the battery status is not supported in your browser, you should see a message saying “Battery status is not supported in this browser.”

That’s it! You’ve created a battery indicator component using React. It’s a fun project that works only in Chrome and other Chromium-based browsers like Edge. It’s not practical, but it’s a fun way to learn about the Battery Status API and how to use it in a React app.
References
-
Originally posted on Medium
I’m always looking to meet new people in tech. Feel free to connect with me on LinkedIn!