Maintaining clean and efficient code is crucial for project success. Rector PHP emerges as a powerful tool, offering developers a seamless path to code transformation and enhancement.
Rector PHP is an open-source automation tool for PHP, and it simplifies the process of code upgrades, refactoring, and modernization, bringing significant benefits to developers and their projects.
Why Rector PHP Matters
Before to show how to install, how to configure and how to execute Rector PHP, let’s see why using Rector PHP is crucial in writing PHP Code.
Code Refactoring
Rector PHP automates tedious code refactoring tasks, allowing developers to focus on building new features and improving functionality. It transforms legacy code into modern, maintainable structures, enhancing readability and reducing technical debt.
Some examples are:
- removing unused assigns to variables;
- splitting
ifstatement, whenifcondition always break execution flow; - adding return type
voidto function like without any return; - changing the return type based on strict scalar returns –
string,int,floatorbool - adding typed property from assigned types
- … and more …

Standardization Across Projects
If you maintain multiple Open Source projects, consistency across them is crucial in software development.
Rector PHP ensures the uniform application of coding standards across projects, fostering a cohesive and easily understandable codebase. This standardization streamlines collaboration among developers and facilitates a smoother onboarding process for new team members.
The configuration of Rector and the list of rules you want to apply in your code are detailed in the rector.php configuration file. You can create a configuration file using the rector command, either starting from scratch or by copying it from another project. In my case, I have a rector.php file that I reuse across multiple projects.
Efficient Upgrades
Adapting to the latest PHP versions and adopting new language features can be time-consuming. Rector PHP streamlines this process by automatically handling the necessary code changes, making upgrades more efficient and reducing the risk of errors.
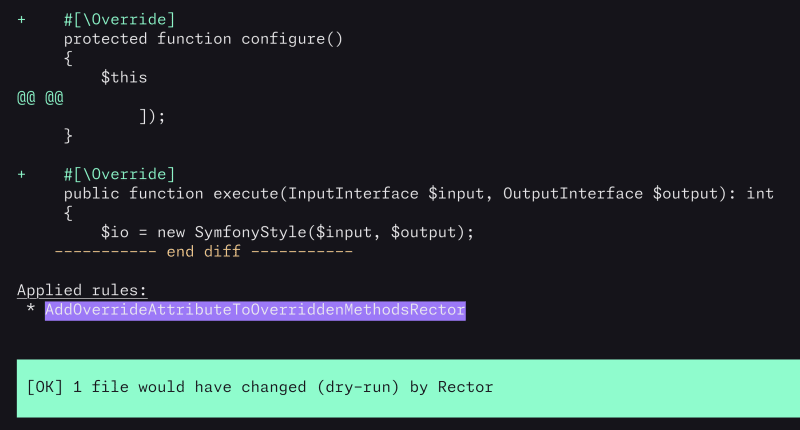
For example, if you want to ensure the utilization of new PHP 8.3 features, you can set the LevelSetList::UP_TO_PHP_83 in the configuration. Rector will then update your code to incorporate the new features provided by PHP 8.3. This includes actions such as adding types to constants, introducing the override attribute to overridden methods, and more.
Enhanced Code Quality
Rector PHP actively contributes to improved code quality by addressing common issues, enforcing best practices, and identifying potential weaknesses in the code. This results in a more robust and secure codebase, aligning with the ever-evolving standards of modern PHP development.
Time and Cost Savings
Automating repetitive tasks not only increases development speed but also reduces costs associated with manual code maintenance. Rector PHP allows developers to allocate their time more strategically, focusing on higher-value tasks that contribute to project success.
Adding Rector PHP to your project
For installing Rector PHP you can use the composer command.
Because Rector is a development package, you must use the `–dev’ option.
composer require rector/rector --dev
Once you have installed Rectory PHP you can execute it, launching the command locate in vendor/bin directory:
vendor/bin/rector
The first time you launch Rector PHP in your project, it is detected if the rector.php exists. Unluess you already created the rector.php file, and it doesn’t exist, the rector.php command will automatically create the rector.php configuration file.
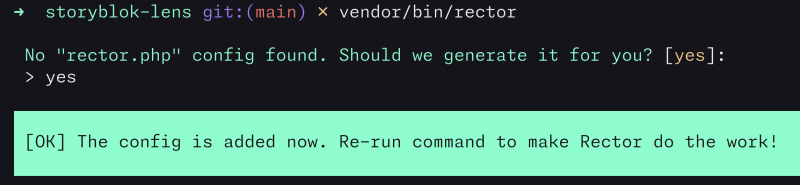
Rector will auto-magically define a basic configuration based on the directory found in your project and the version of the PHP used in the composer.json file.
With the configuration file you can define the path (or paths) to analyze:
$rectorConfig->paths([
    __DIR__ . '/src',
]);
With the configuration file you can also set one rule like:
$rectorConfig->rule(InlineConstructorDefaultToPropertyRector::class);
Or setting a set of rules:
$rectorConfig->sets([
    LevelSetList::UP_TO_PHP_82
]);
If you want to explore more the rules, you can take a look at this page:
https://github.com/rectorphp/rector/blob/main/docs/rector_rules_overview.md
As you can see, we have a lot of rules that we can choose.
So to make it easy to start using Rector, you can start from some sets. I usually use these sets:
$rectorConfig->sets([
    SetList::DEAD_CODE,
    SetList::EARLY_RETURN,
    SetList::TYPE_DECLARATION,
    SetList::CODE_QUALITY,
    SetList::CODING_STYLE,
    LevelSetList::UP_TO_PHP_82
]);
In the configuration above, I’m using rules for fixing:
- Dead Code: like removing recasting of the same type, removing
ifcondition that is alwaystrue, removing dead condition above return, simplify useless double assigns etc… (more info https://github.com/rectorphp/rector/blob/main/docs/rector_rules_overview.md#deadcode) - Early return: like changing
if/elsevalue to early return, changing nestedifto multiple flatifwithcontinue, splittingifstatement whenifcondition always break execution flow etc… (more info https://github.com/rectorphp/rector/blob/main/docs/rector_rules_overview.md#earlyreturn) - Type declaration: like adding known return type to arrow function, adding parameter types where needed, adding exact fixed array type in known cases (in PHPDoc), adding missing return type declaration based on parent class method , etc… (more info https://github.com/rectorphp/rector/blob/main/docs/rector_rules_overview.md#typedeclaration)
- Code quality: like changing
boolval()to faster and readable(bool) $value(and in the same way for string and int and float), changingarray_push()to direct variable assign, merging nestedifstatements etc… (more info https://github.com/rectorphp/rector/blob/main/docs/rector_rules_overview.md#codequality) - Coding style: like changing
array_merge()to spread operator, changing count array comparison to empty array comparison to improve performance, converting escaped{$string}to more readablesprintforconcat, if no mask is used, etc… (more info https://github.com/rectorphp/rector/blob/main/docs/rector_rules_overview.md#codingstyle)
My whole basic rector.php file is:
declare(strict_types=1);

use RectorConfigRectorConfig;
use RectorSetValueObjectLevelSetList;
use RectorSetValueObjectSetList;

return static function (RectorConfig $rectorConfig): void {
    $rectorConfig->paths([
        __DIR__ . '/src',
    ]);

    $rectorConfig->sets([
        SetList::DEAD_CODE,
        SetList::EARLY_RETURN,
        SetList::TYPE_DECLARATION,
        SetList::CODE_QUALITY,
        SetList::CODING_STYLE,
        LevelSetList::UP_TO_PHP_82
    ]);
};
In a daily usage, I would like to suggest to remove the
UP_TO_PHP_82ruleset, and use theUP_TOrule when you want to perform an upgrade of the Ruleset as explained here: https://getrector.com/blog/5-common-mistakes-in-rector-config-and-how-to-avoid-them
Now we’ve installed Rector PHP and setup a minimal configuration, we can execute Rector PHP.
Launching Rector PHP
Now, you can launch the rector command, locate in the vendor/bin directory:
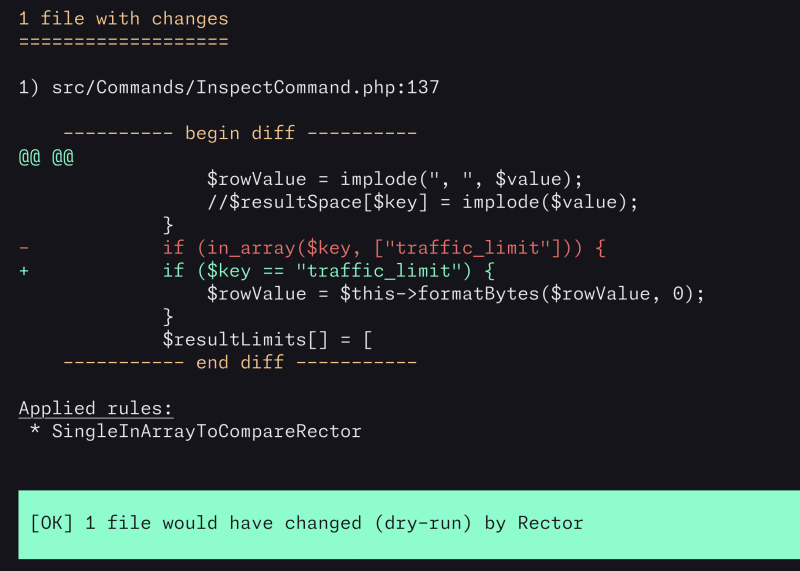
vendor/bin/rector --dry-run
We are using the --dry-run option just to see the potential changes, according to the rules defined in the configuration file. If we want to apply the changes on the source code files, we can execute rector by omitting the --dry-run option:
vendor/bin/rector
The files will be changed according to the defined rules.

If we want to obtain the execution report in JSON format we can use the --output-format=json option:
vendor/bin/rector --output-format=json --dry-run
You can combine the output-format option with the dry-run option.
If you’re using other quality management tools like a static code analyzer and a code style fixer, you’d probably want to orchestrate and manage the execution configuration in a centralized place like the scripts section in the composer file.
Setting the execution in the composer
If you want, you can create a script in the composer file.
This is useful for other people who want to be onboarded into the project and see which command are usually executed.
Here is an extracted section from the composer.json file:
"scripts": {
    "cs-fix": "pint",
    "rector-fix": "rector",
    "rector-preview": "rector --dry-run",
    "rector-ci": "rector --dry-run --no-progress-bar"
},
"scripts-descriptions": {
    "cs-fix": "Fixing the Code Style according to PER standards",
    "rector-fix": "Fixing the code according to the Rector Rules",
    "rector-preview": "Showing the suggested changes from Rector",
    "rector-ci": "Executing Rector in a CI workflow"
}
So now you can execute the composer run rector-fix command to launch rector.

Recap
In summary, Rector PHP stands as a game-changer in PHP development, automating tasks, improving code quality, and simplifying migrations. With its focus on efficiency and best practices, Rector PHP is an invaluable tool for developers seeking streamlined workflows and enhanced codebases. Experience the benefits of automated code transformation with Rector PHP:
- Website: https://getrector.com/
- Documentation: https://getrector.com/documentation
- Rector Playground: https://getrector.com/demo
See you on X https://twitter.com/RmeetsH or see you on Mastodon.