TL;DR
We have all seen what ChatGPT can do (it’s not new to anybody).
So many articles are being written over and over using ChatGPT.
Actually, half of the articles on DEV are written with ChatGPT.
You can use some AI content detector to see.
The thing is that ChatGPT will never produce some extraordinary content except for the one it already has (trained/fine-tuned) inside.
But there is a way to go beyond the currently trained content using RAG (OpenAI assistants).
In the last article, we talked about “training” ChatGPT on your documentation; today, let’s see how we can make a lot of content from it. We will:
- Create a new blogging system with the use of Docusaurus.
- Question ChatGPT to write us a blog post connected to the documentation.

Your background job platform 🔌
Trigger.dev is an open-source library that enables you to create and monitor long-running jobs for your app with NextJS, Remix, Astro, and so many more!

Please help us with a star 🥹.
It would help us to create more articles like this 💖
Star the Trigger.dev repository ⭐️
Recap from the last time ⏰
- We have created a job to take a documentation XML and extract all the URLs.
- We scraped each website URL and extracted the titles and content.
- We saved everything into a file and sent it to the ChatGPT assistant.
- We created a ChatBot screen to question ChatGPT about the documentation.
You can find the complete source code of the previous tutorial here.

A slight modification ⚙️
Last time, we created an assistant for documentation. We wrote:
You are a documentation assistant, loaded with documentation from ' + payload.url + ', return everything in an MD format.
Let’s change it to a blog writer, head over to jobs/process.documentation.ts line 92, and replace it with the following content:
You are a content writer assistant. You have been loaded with documentation from ${payload.url}, you write blog posts based on the documentation and return everything in the following MD format:
---
slug: [post-slug]
title: [post-title]
---

[post-content]
It’s essential to use the slug and the title because that’s the format Docusaurus – our blogging system can accept (of course, we also send all the output in an MD format)

Docusaurus 🦖
You can use many types of blogging systems!
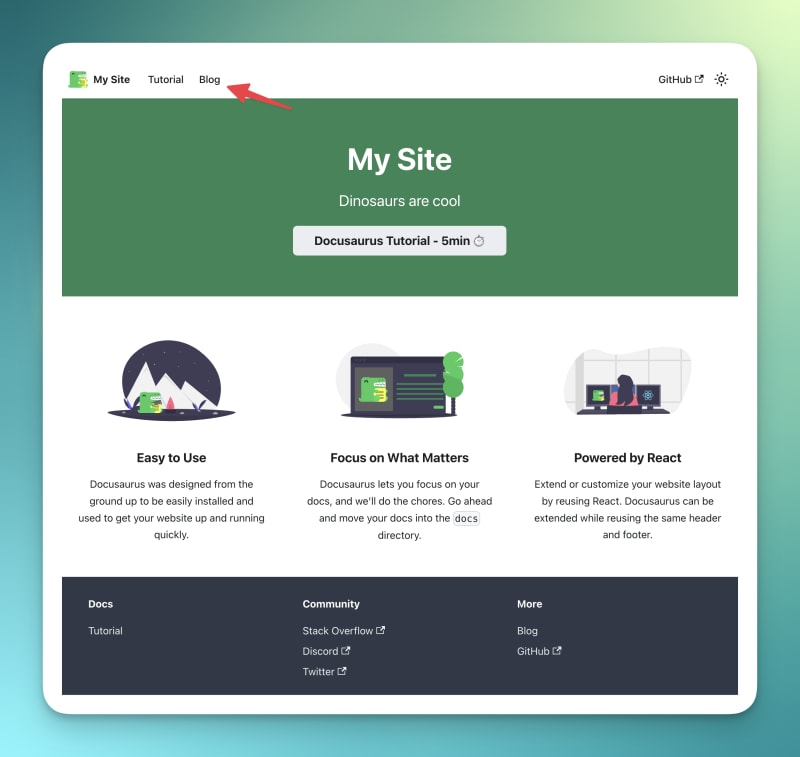
For our use case, we will use Docusaurus, which can read MD-based formatting (the output we requested from ChatGPT). We can install Docusaurus by running:
npx create-docusaurus@latest blog classic --typescript
Next, we can go into the created directory and run the following:
npm run start
That will start Docusaurus. You can pay attention. There is an additional directory called blog with all the blog posts; that’s where we will save ChatGPT-generated blog posts.

Generating blogs 📨
We need to create a job that
- Get the blog title
- Generate an entire blog post using ChatGPT
- Save it to an MD file on our blog
We can easily use ChatGPT for that!
Go to the jobs folder and add a new file called process.blog.ts. Add the following code:
import { eventTrigger } from "@trigger.dev/sdk";
import { client } from "@openai-assistant/trigger";
import {object, string} from "zod";
import {openai} from "@openai-assistant/helper/open.ai";
import {writeFileSync} from "fs";
import slugify from "slugify";

client.defineJob({
  // This is the unique identifier for your Job, it must be unique across all Jobs in your project.
  id: "process-blog",
  name: "Process Blog",
  version: "0.0.1",
  // This is triggered by an event using eventTrigger. You can also trigger Jobs with webhooks, on schedules, and more: https://trigger.dev/docs/documentation/concepts/triggers/introduction
  trigger: eventTrigger({
    name: "process.blog.event",
    schema: object({
      title: string(),
      aId: string(),
    })
  }),
  integrations: {
    openai
  },
  run: async (payload, io, ctx) => {
      const {title, aId} = payload;
      const thread = await io.openai.beta.threads.create('create-thread');

      await io.openai.beta.threads.messages.create('create-message', thread.id, {
          content: `
           title: ${title}
          `,
          role: 'user',
      });

      const run = await io.openai.beta.threads.runs.createAndWaitForCompletion('run-thread', thread.id, {
          model: 'gpt-4-1106-preview',
          assistant_id: payload.aId,
      });

      if (run.status !== "completed") {
          console.log('not completed');
          throw new Error(`Run finished with status ${run.status}: ${JSON.stringify(run.last_error)}`);
      }

      const messages = await io.openai.beta.threads.messages.list("list-messages", run.thread_id, {
          query: {
              limit: "1"
          }
      });

      return io.runTask('save-blog', async () => {
          const content = messages[0].content[0];
          if (content.type === 'text') {
              const fileName = slugify(title, {lower: true, strict: true, trim: true});
              writeFileSync(`./blog/blog/${fileName}.md`, content.text.value)
              return {fileName};
          }
      });
  },
});
- We added some required variables:
-
titlethe blog post title -
aIdthe assistant ID added in the previous article.
-
- We created a new thread for the assistant(
io.openai.beta.threads.create)- we can’t question it without any thread. Unlike the previous tutorial, here, we make a new thread on every request. We don’t want the context of the last messages in the conversation. - We then add a new message to the thread(
io.openai.beta.threads.messages.create) with the blog’s title. We don’t need to provide additional instructions – we have done that part in the first section 😀 - We run the
io.openai.beta.threads.runs.createAndWaitForCompletionto start the process – usually, you would need some kind of recursion that runs every minute to check if the job is completed, but Trigger.dev already added a way to run the process and wait for it at the same time 🥳 - We run the
io.openai.beta.threads.messages.listwith alimit: 1in the query body to get the first message from the conversation (in the ChatGPT result, the first message is the last message). - Then, we save the newly created blog with the value we got from ChatGPT using
writeFileSync– make sure you have the right path to the blog.
Go to jobs/index.ts and add the following line:
export * from "./process.blog";
Now, let’s create a new route to trigger the job.
Go to app/api, create a new folder called blog, and within a new file called route.tsx
add the following code:
import {client} from "@openai-assistant/trigger";

export async function POST(request: Request) {
    const payload = await request.json();
    if (!payload.title || !payload.aId) {
        return new Response(JSON.stringify({error: 'Missing parameters'}), {status: 400});
    }

    // We send an event to the trigger to process the documentation
    const {id: eventId} = await client.sendEvent({
        name: "process.blog.event",
        payload
    });

    return new Response(JSON.stringify({eventId}), {status: 200});
}
- We check that the title and assistant ID exist.
- We trigger an event in Trigger.dev and send the information.
- We send the event ID back to the client so we can track the progress of the job.

The frontend 🎩
There’s not much to be done!
Inside our components directory, let’s create a new file called blog.component.tsx and the following code:
"use client";

import {FC, useCallback, useEffect, useState} from "react";
import {ExtendedAssistant} from "@openai-assistant/components/main";
import {SubmitHandler, useForm} from "react-hook-form";
import {useEventRunDetails} from "@trigger.dev/react";

interface Blog {
    title: string,
    aId: string;
}

export const BlogComponent: FC<{list: ExtendedAssistant[]}> = (props) => {
    const {list} = props;
    const {register, formState, handleSubmit} = useForm<Blog>();
    const [event, setEvent] = useState<string | undefined>(undefined);

    const addBlog: SubmitHandler<Blog> = useCallback(async (param) => {
        const {eventId} = await (await fetch('/api/blog', {
            method: 'POST',
            headers: {
                'Content-Type': 'application/json'
            },
            body: JSON.stringify(param)
        })).json();

        setEvent(eventId);
    }, []);

    return (
        <>
        <form className="flex flex-col gap-3 mt-5" onSubmit={handleSubmit(addBlog)}>
            <div className="flex flex-col gap-1">
                <div className="font-bold">Assistantdiv>
                <select className="border border-gray-200 rounded-xl py-2 px-3" {...register('aId', {required: true})}>
                    {list.map(val => (
                        <option key={val.id} value={val.aId}>{val.url}option>
                    ))}
                select>
            div>
            <div className="flex flex-col gap-1">
                <div className="font-bold">Titlediv>
                <input className="border border-gray-200 rounded-xl py-2 px-3" placeholder="Blog title" {...register('title', {required: true})} />
            div>
            <button className="border border-gray-200 rounded-xl py-2 px-3 bg-gray-100 hover:bg-gray-200" disabled={formState.isSubmitting}>Create blogbutton>
        form>
        {!!event && (
            <Blog eventId={event} />
        )}

    )
}

export const Blog: FC<{eventId: string}> = (props) => {
    const {eventId} = props;
    const { data, error } = useEventRunDetails(eventId);

    if (data?.status !== 'SUCCESS') {
        return <div className="pointer bg-yellow-300 border-yellow-500 p-1 px-3 text-yellow-950 border rounded-2xl">Loadingdiv>
    }
    return (
        <div>
            <a href={`http://localhost:3000/blog/${data.output.fileName}`}>Check blog posta>
        div>
    )
};
- We use
react-hook-formto control our inputs easily. - We let users choose the assistant they want to use.
- We create a new input containing the title of the article.
- We send everything to our previously created route and get back the
eventIdof the job. - We create a new
Add the component to our components/main.tsx file:
{assistantState.filter(f => !f.pending).length > 0 && <BlogComponent list={assistantState} />}
And we are done!

Now, let’s add the blog title and click generate.


Let’s connect! 🔌
As an open-source developer, you can join our community to contribute and engage with maintainers. Don’t hesitate to visit our GitHub repository to contribute and create issues related to Trigger.dev.
The source for this tutorial is available here:
https://github.com/triggerdotdev/blog/tree/main/openai-blog-writer
Thank you for reading!