
As Visual Studio Code is one of the most used code editor, beginner in C and C++ programming have difficulty setting up this editor for C and C++ programming
Here I would like to help by setting up VSCode with Clangd
Clangd is an LSP that helps coding in C or C++ a easier
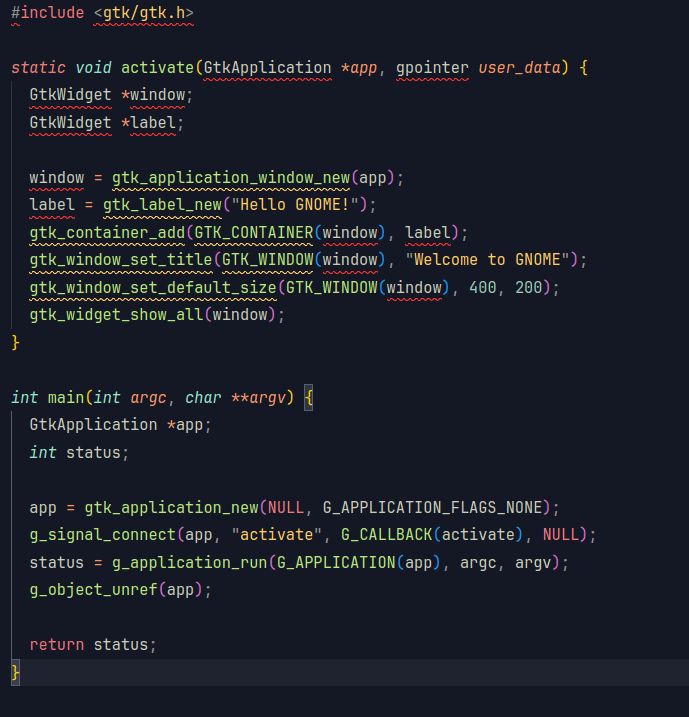
We would be setting up our C project for writing a simple window using the GTK libraries
// main.c
#include This code is from the mesonbuild #site which is the build system we would be using for the project
What is an LSP?
An LSP(Language Server Protocol) is a program that looks through your code for syntax errors and in some cases linting errors depending on the linter provided
Clangd Setup
First we would need the Clangd extension as well as the LSP itself
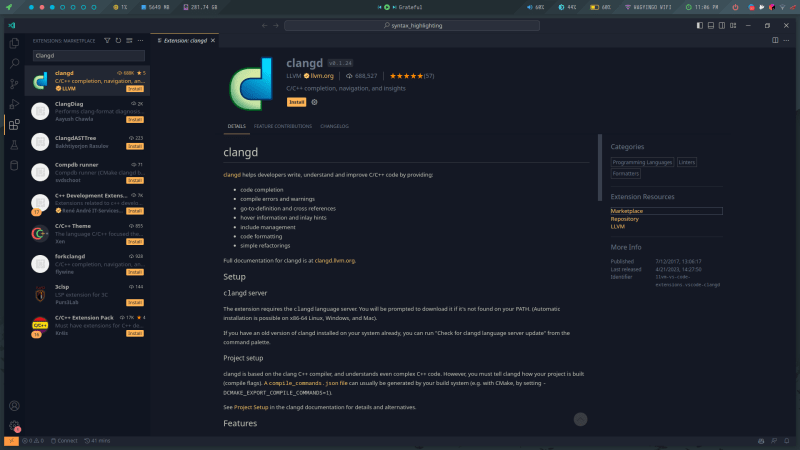
You can download the extension from #here
The extension provides its own Clangd LSP but in case of issues with that we would like to download and setup the clangd package from the official site for both Windows and Linux
I daily drive Linux on my laptop, thus this guide works well for linux users, Windows users can use programs like Cygwin to replicate the process
We can download and install the clangd LSP using the available package manager and installer like apt for Debian/Ubuntu, dnf or yum for Red Hat distributions and pacman or yay for Arch
- I use Arch so the command I am more familar with is
yay
yay -S clangd-opt # This downloads and builds the latest clangd available from the Arch User Repository
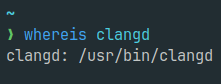
Then inside our VSCode settings we set path to where our clangd would be located

We try to find the path to clangd using whereis clangd or which clangd
Building the project
- Clangd would work for most cases however when involving non-standard libraries like our GTK library, we would start to see a lot of errors
-
First we need to know if the library’s files are available, we can download them and include them to our project but to make this short we would just use pkg-config and grep command to find the necessary GTK+ library for our little demo which I have installed in my system

-
Then we would include this as a dependency to our project through our build tool such as make, CMake or Meson, we would be using meson which is simpler and easy to use.

So we install meson using our package manager
sudo pacman -S meson
We setup our meson.build with the project, this lays out the project for compilation
We write the following code for our demo’s meson.build
project('demo', 'c')
gtk = dependency('gtk+-3.0')
executable('demo' 'main.c', dependencies: [gtk])
What our meson.build file will tell the build system is that
our project name is demo and it uses the C programming language we have included the gtk+-3.0 as a dependency and we would build an executable with the name demo from our main.c file
This generates the necessary files and parameters for our compilation
A json file with that name compile_commands.json is generated and allows us to quickly use our build system to compile our code, this is also needed by clangd to know our dependency files
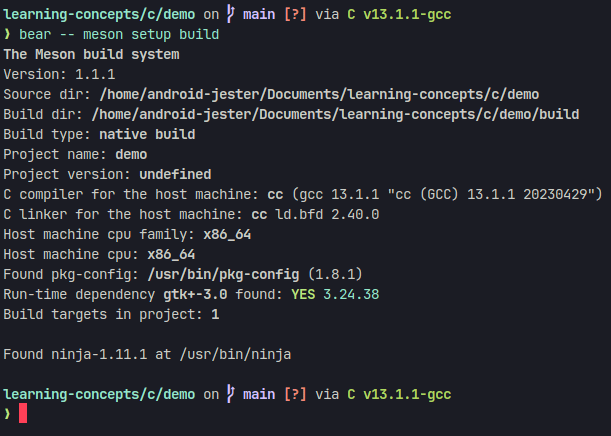
In our project directory, we setup our build folder using meson but we would need our compile_commands.json to be within the root of the project for clangd to work properly with so we download bear for that purpose and use it along meson to get our compile_commands.json
sudo pacman -S bear
bear -- meson setup build
With that done our compile_commands.json would contain the following code
[
  {
    "arguments": [
      "https://dev.to/usr/bin/cc",
      "-c",
      "-D_FILE_OFFSET_BITS=64",
      "-o",
      "sanitycheckc.exe",
      "sanitycheckc.c"
    ],
    "directory": "https://dev.to/home/android-jester/Documents/learning-concepts/c/demo/build/meson-private",
    "file": "https://dev.to/home/android-jester/Documents/learning-concepts/c/demo/build/meson-private/sanitycheckc.c",
    "output": "https://dev.to/home/android-jester/Documents/learning-concepts/c/demo/build/meson-private/sanitycheckc.exe"
  }
]
This however doesn’t contain the include files for that we need to compile our project using meson
bear -- meson compile -C build
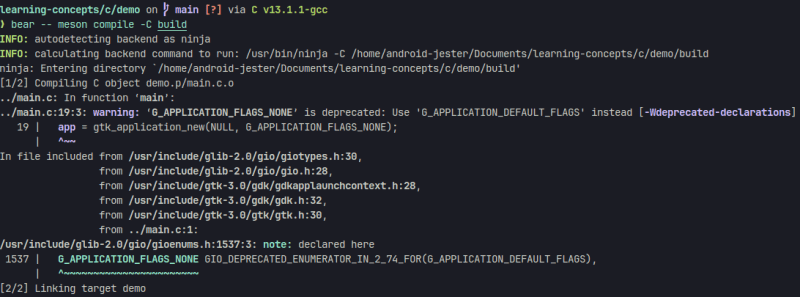
Funny to say there is some depreciated code in the source file but it will work out
With that done our compile_commands.json look like this
[
  {
    "arguments": [
      "https://dev.to/usr/bin/cc",
      "-Idemo.p",
      "-I.",
      "-I..",
      "-I/usr/include/gtk-3.0",
      "-I/usr/include/pango-1.0",
      "-I/usr/include/glib-2.0",
      "-I/usr/lib/glib-2.0/include",
      "-I/usr/include/sysprof-4",
      "-I/usr/include/harfbuzz",
      "-I/usr/include/freetype2",
      "-I/usr/include/libpng16",
      "-I/usr/include/libmount",
      "-I/usr/include/blkid",
      "-I/usr/include/fribidi",
      "-I/usr/include/cairo",
      "-I/usr/include/pixman-1",
      "-I/usr/include/gdk-pixbuf-2.0",
      "-I/usr/include/gio-unix-2.0",
      "-I/usr/include/cloudproviders",
      "-I/usr/include/atk-1.0",
      "-I/usr/include/at-spi2-atk/2.0",
      "-I/usr/include/at-spi-2.0",
      "-I/usr/include/dbus-1.0",
      "-I/usr/lib/dbus-1.0/include",
      "-fdiagnostics-color=always",
      "-D_FILE_OFFSET_BITS=64",
      "-Wall",
      "-Winvalid-pch",
      "-O0",
      "-g",
      "-pthread",
      "-c",
      "-o",
      "demo.p/main.c.o",
      "../main.c"
    ],
    "directory": "https://dev.to/home/android-jester/Documents/learning-concepts/c/demo/build",
    "file": "https://dev.to/home/android-jester/Documents/learning-concepts/c/demo/main.c",
    "output": "https://dev.to/home/android-jester/Documents/learning-concepts/c/demo/build/demo.p/main.c.o"
  }
]
This shows how my code with compile using the gcc compiler installed on my system, I can change anything in this file manually but more importantly we need to see if the clangd extension has recognized our header files

As we can see the error lines are gone and we can run our executable in the build folder
./build/demo

I hope this was a short and informative guide as this is my first post, please if there are any issues or suggestions for improvements with the process, please let me know in the comments


