We’ve all used AI “Copilots.” They are great at finishing our sentences or writing a quick function. But let’s be honest — sometimes it feels like you’re still doing 90% of the heavy lifting.
Enter Google Antigravity.
Released as an “agentic” development platform, Antigravity isn’t just another IDE (Integrated Development Environment). It’s a mission control centre where AI agents don’t just suggest code — they plan, execute, and verify it for you.
As someone who spends a lot of time with Gemini and Agentic AI, I wanted to see if this lived up to the hype. Here is everything you need to know to get started.

1. What exactly is Google Antigravity?
Think of Antigravity as a fork of VS Code that has been “supercharged” for agents. While traditional editors have a chat sidebar, Antigravity introduces two main views:
- The Editor View: This looks familiar (it’s based on VS Code). It’s where you and the agent code together.
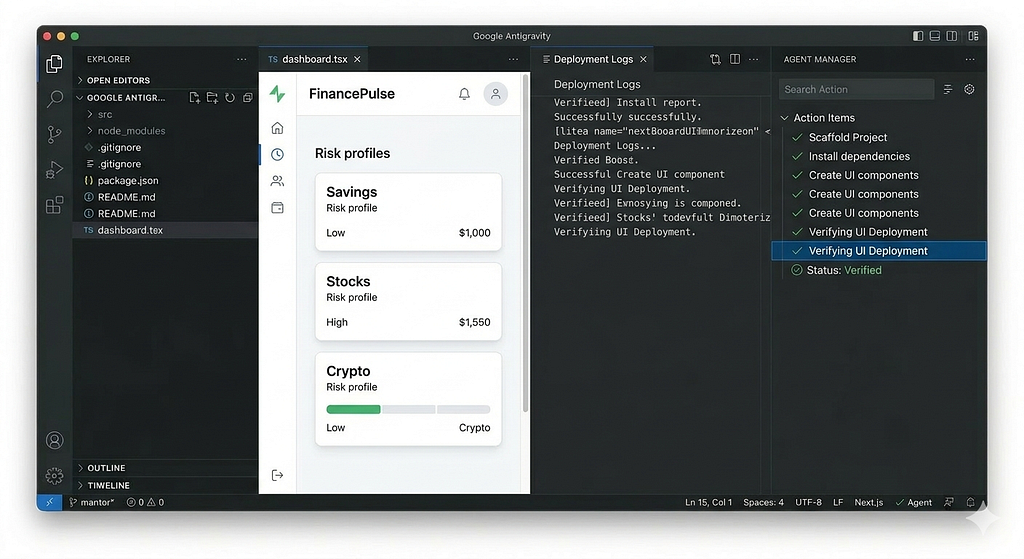
- The Manager View: This is the “Mission Control.” Here, you can watch multiple agents working in parallel. One agent might be refactoring your database while another is building a UI component.
The “magic” is that these agents can use the terminal, browse the web to find documentation, and even open a built-in Chrome browser to test the UI they just built.

2. How to Install It (Step-by-Step)
Getting “liftoff” is surprisingly easy.
- Download: Head over to antigravity.google and download the installer for your OS (Windows, macOS, or Linux).
- Initial Setup: When you first launch it, you’ll have the option to import your settings from VS Code or Cursor. If you want a clean experience, I recommend “Start Fresh.”
- Choose Your “Agent Mode”: You’ll be asked how much autonomy you want to give the AI. I suggest “Agent-Assisted Development.” This allows the agent to run terminal commands but keeps you in the loop to approve major changes.
- Connect Your Account: Sign in with your Google account to unlock the power of Gemini 3 Pro, which serves as the “brain” of the editor.
3. Best Use Case: Building a “Personal Finance Dashboard”
Let’s look at a real-world example of how this changes your workflow. Instead of writing code line-by-line, you delegate the entire feature.
The Prompt
In the Agent Panel, I gave it this high-level goal:
“Build a Next.js app called ‘FinancePulse’. It needs a dashboard showing risk profiles for Savings, Stocks, and Crypto. Use Tailwind CSS and shadcn/ui. Make it look professional and responsive.”
How the Agent Responds:
- Planning: The agent doesn’t just start typing. It generates a Plan Artifact (a checklist). It says: “First, I’ll scaffold the project, then install dependencies, then create the UI components.”
- Execution: Once you click “Accept,” it opens the terminal, runs npx create-next-app, installs your libraries and starts creating files.
- Self-Correction: If the agent hits an error during installation, it doesn’t stop. It reads the error, searches for a fix, and tries again.
- Verification: The agent opens its built-in browser, navigates tolocalhost:3000, and checks if the dashboard looks right. It even takes a screenshot for you to review!
4. Why this is a “Game Changer”
As someone who works closely with Gemma and other open LLMs, I’m particularly impressed by how Antigravity handles Context. Because it’s built on Gemini 3, it can “see” your entire codebase (up to 1 million tokens). You don’t have to keep copy-pasting code into a chat box; the agent already knows where everything is.
It’s not perfect — it’s still in preview — but it represents a shift from coding to orchestrating.
Limitations (Important)
To use it effectively, you should know:
- It’s still in early stage / preview
- Output is not always perfect — supervision is required
- Clear instructions are critical
- Complex architecture still needs human design thinking
Antigravity is powerful, but not autonomous enough to replace engineering judgment.
Best Practices
To get better results:
- Be specific in your prompt
- Break complex problems into smaller goals
- Review agent output frequently
- Guide the agent instead of restarting
![]()
Google Antigravity: Beginner Guide to the New Agentic IDE (Step-by-Step + Real Use Case) was originally published in Google Developer Experts on Medium, where people are continuing the conversation by highlighting and responding to this story.