When I began learning Spring MVC, one of the hurdles I encountered was rendering .jsp (Java Server Pages) in a Spring Boot project using IntelliJ IDEA Community Edition. Unlike other IDEs that may offer built-in support for enterprise features like JSP rendering, the Community Edition requires some extra configuration.
After countless attempts and piecing together various resources, I finally figured out a working solution, and I’m here to share it with you in a step-by-step guide.
✅ Step 1: Create a New Maven Web Project
- Open IntelliJ IDEA Community Edition
- Create a new Project
- Select Maven Archetype (from the left corner)

- Name your project – e.g., GetJSPWorking

- Choose Maven as your build tool (if not already selected)
- Select the archetype: maven-archetype-webapp

- Click Create
At this point, you should see the following structure:

✅ Step 2: Setup the Project Structure
- Create a directory named java inside
src/main/. - Inside java, create your base package, e.g.,
com.example.

✅ Step 3: Configure the pom.xml File
- Replace the default
pom.xmlcontent with the following:
  4.0.0


    org.springframework.boot
    spring-boot-starter-parent
    3.4.6


  com.example
  GetJSPWorking
  1.0-SNAPSHOT
  war


      org.springframework.boot
      spring-boot-starter-web


      org.apache.tomcat.embed
      tomcat-embed-jasper
      provided


      jakarta.servlet.jsp.jstl
      jakarta.servlet.jsp.jstl-api
      3.0.0


      org.springframework.boot
      spring-boot-devtools
      runtime
      true


      org.springframework.boot
      spring-boot-starter-test
      test


    TestWebApplicationJSP


        org.springframework.boot
        spring-boot-maven-plugin
NB: Don’t forget to update your groupId and artifactId to match your own.
✅ Step 4: Create the Application Entry Point
- Inside your
com.examplepackage, create the main application class:
package com.example;

import org.springframework.boot.SpringApplication;
import org.springframework.boot.autoconfigure.SpringBootApplication;

@SpringBootApplication
public class GetJSPWorkingApplication {
    public static void main(String[] args) {
        SpringApplication.run(GetJSPWorkingApplication.class, args);
    }
}

✅ Step 5: Create a Controller
- Also inside
com.example, create a controller:
package com.example;

import org.springframework.stereotype.Controller;
import org.springframework.web.bind.annotation.RequestMapping;

@Controller
public class GetJSPWorkingController {

    @RequestMapping("https://dev.to/get-jsp")
    public String getJsp() {
        return "index"; // Refers to index.jsp
    }
}

✅ Step 6: Add Your JSP File
- Inside
src/main/webapp/WEB-INF/, create a folder named jsp. - Inside jsp, create a file named index.jsp.
- Paste this simple HTML code:
Hello JSP!

✅ Step 7: Configure View Resolver
- Create a file named
application.propertiesinsidesrc/main/resources/with the following contents:
spring.mvc.view.prefix=/WEB-INF/jsp/
spring.mvc.view.suffix=.jsp
spring.web.resources.static-locations=classpath:/static/
✅ Step 8: Build and Run the Application
- Open the Maven tab in IntelliJ.


- Run the following commands:
mvn clean install

mvn spring-boot:run

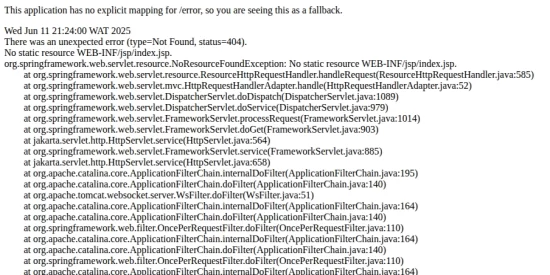
- Visit http://localhost:8080/get-jsp in your browser.
If everything was set up correctly, you should see:

Conclusion
Getting JSP to work with Spring Boot in IntelliJ Community Edition can feel tricky, but it’s totally doable. If you’re like me and got stuck along the way, I hope this guide clears up the confusion and helps you render your JSP views without a hitch.
N.B: This setup is ideal for learning purposes. In production, it’s recommended to use Thymeleaf or another modern template engine, as JSP is gradually being phased out of modern Spring applications. However, understanding how to configure JSP is valuable for legacy systems and academic projects.