
Hey fellow devs! 👋 If you’re looking to get started with Docker on Windows, you’ve come to the right place. I remember how confusing it was when I first tried to set everything up, so I’ve created this guide to help you avoid the headaches I encountered.
📋 Table of Contents
- Before We Begin
- Preparing Windows
- Checking Virtualization
- Quick WSL Version Check
- Installing Docker Desktop
- Setting Up Ubuntu with WSL
- Final Step: Connect Docker with WSL
- Testing Your Setup
- Troubleshooting Tips
- Conclusion
🛠️ Before We Begin
Let’s ensure your Windows PC is ready for Docker. Here are a few things to check and enable.
System Requirements:
- Windows 10/11 Pro, Enterprise, or Education (64-bit)
- 4GB RAM minimum (8GB recommended)
- UEFI firmware with Secure Boot capability
- Virtualization support in your CPU
- Administrator access to your Windows machine
1. Preparing Windows
Search for Turn Windows features on or off in the Start Menu, and enable the following:
- ✅ Hyper-V
- ✅ Windows Subsystem for Linux (WSL)
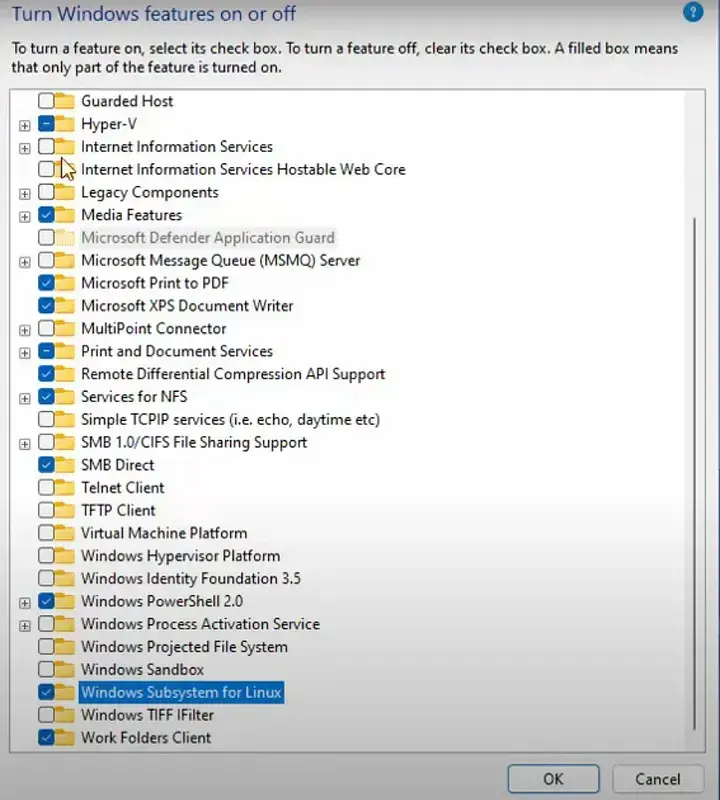
🔄 Restart your computer after enabling these features.
2. Checking Virtualization
To verify virtualization is enabled:
- Open Task Manager → go to the Performance tab.
- Look at the bottom right for Virtualization.

If it says “Disabled”:
- Restart and enter BIOS (usually
F2orDel). - Enable virtualization (
Intel VT-xorAMD-V). - Save and exit.
🔍 Quick WSL Version Check
Open PowerShell and run:
wsl --status
If it shows Version 1, upgrade with:
wsl --set-default-version 2
📦 Installing Docker Desktop
- Download Docker Desktop for Windows from the official site.
- Use AMD64 version (works for both Intel & AMD CPUs).
- Install with default settings and agree to the license.
✅ Once installed, open PowerShell and run:
docker run hello-world
If you see Hello from Docker! — you’re all set!
🐧 Setting Up Ubuntu with WSL
- Open Microsoft Store.
- Search Ubuntu.
- Install any LTS version (I recommend Ubuntu 22.04 LTS).
- Launch Ubuntu → Set a username and password.
To check WSL version:
wsl -l -v
✅ Ensure it says VERSION 2 next to Ubuntu.
🔗 Final Step: Connect Docker with WSL
- Open Docker Desktop.
- Go to:
Settings > Resources > WSL Integration. - Enable integration with your Ubuntu version.
✅ Testing Your Setup (From Ubuntu)
In your Ubuntu terminal, run:
docker run hello-world
You should see the Docker success message.
🧯 Troubleshooting Tips
- Restart your PC after enabling WSL and Hyper-V.
- Check BIOS virtualization settings.
- Upgrade to the latest WSL 2 version.
🙌 You’re Ready!
That’s it! Docker is now running on your Windows system with WSL2 integration. If you run into any issues, feel free to comment below.
Happy containerizing 🐳