Hi Devs👋
Do you ever get frustrated for forgetting your passwords, and clicking on “Forgot Password“,The struggle is real😬, but what if the application uses Facial Recognition Authentication system instead of Email/Password Authentication to login? No more forgotten passwords instead, your face becomes the key to unlocking the digital realm.
In today’s post we will see how we can implement Facial Recognition Authentication in our web application using FACEIO by following few easy steps.
But let’s first understand,
What is FACEIO?
FACEIO is a cross-browser, Cloud & On-Premise deployable,
facial authentication framework that can be implemented on any website via with a client-side JavaScript library (fio.js) that integrates seamlessly with any website or web application desiring to offer secure facial recognition experience to their users.
Put it simply, FACEIO is the easiest way to add Password-less authentication to your web based applications. It works with regular Webcams or smartphones front camera on all modern browsers, does not require biometric sensors to be available on the client side, and works seemingly with all websites and web-based applications regardless of the underlying front-end JavaScript framework or server-side language or technology.
What makes it special?

- It Authenticates and confirms identity of users instantly without FIDO keys, OTP codes, or security questions.
- It supports full cross-browser compatibility (Chrome, Firefox, Safari, Edge & Chromium derived).
- It has Zero external dependency. Only standard technology implemented in plain JavaScript & CSS.
- Cloud & On-premise deployment on your own infrastructure for complete control over biometrics hashes and users data.
Now let’s get started with the implementation💻

How to add FACEIO to your website or web-based application?
Implementing FACEIO on your website or web application is straightforward approach. Follow these below given steps
Step 1: Create an account on FACEIO CONSOLE
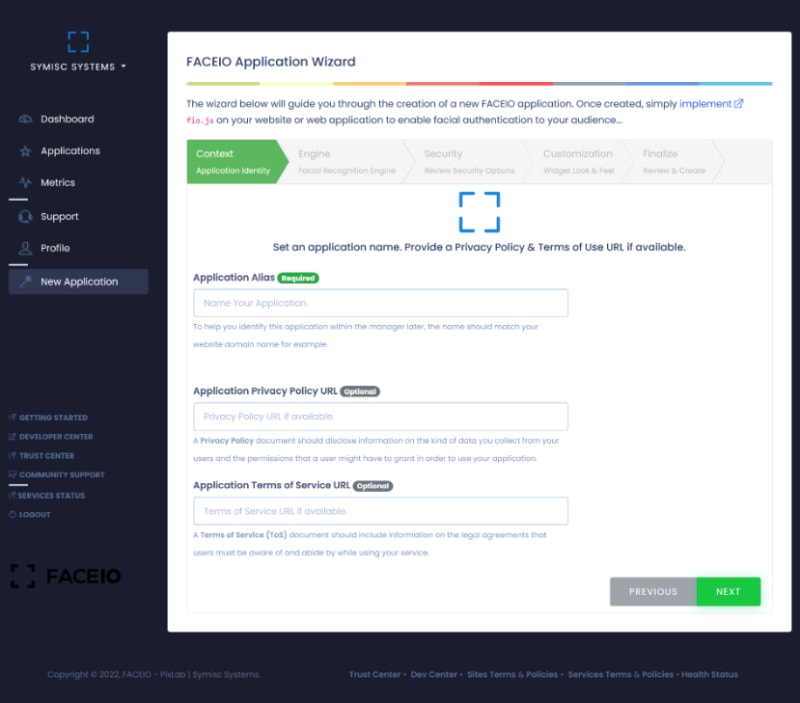
Step 2: Head to Application Wizard and create your application by providing application name, privacy policy URL, selecting a Facial Recognition Engine, cloud storage region or on-premise deployment, reviewing security options, etc. Once your application successfully created, you should be redirected to the Application Manager where you can manage this new application and get your Public ID.
Step 3: Now you need to Integrate fio.js
- Import fio.js to your site: Paste the snippet on HTML page(s) you want to instantiate fio.js
<div id="faceio-modal"></div>
<script src="https://cdn.faceio.net/fio.js"></script>
- Instantiate a new faceio object: to initialize fio.js, simply instantiate a new faceIO() object and provide your application Public ID as follows.
<script type="text/javascript">
   /* Instantiate fio.js with your application Public ID */
    const faceio = new faceIO("app-public-id");
</script>
- Invoke the widgets: Now fio.js is Up & Running but to start the Facial Recognition process, we need to call enroll() or authenticate(), the only two exported methods of the faceIO() class you instantiated earlier.
The enroll() is for enrollment or on-boarding new users, This will trigger the FACEIO Widget, ask for user’s consent (if not yet authorized), request access (if not yet granted) to the browser’s Webcam/Frontal camera stream, and finally extract & index the facial features of the enrolled user for future authentication purposes.
The authenticate() is for authenticating previously enrolled users. This will trigger the authentication process after requesting camera access permission (if not yet granted) by the end user.
Example:
<html>
  <head>
    <title>Sign-In or Enroll via Face Recognition</title>
  </head>
  <body>
    <button onclick="enrollNewUser()">Enroll New User</button>
    <button onclick="authenticateUser()">Authenticate User</button>
    <div id="faceio-modal"></div>
    <script src="https://cdn.faceio.net/fio.js"></script>
    <script type="text/javascript">
        // Instantiate fio.js with your application's Public ID
        const faceio = new faceIO("app-public-id");
        function enrollNewUser(){
           // call to faceio.enroll() here will automatically trigger the on-boarding process
        }
        function authenticateUser(){
           // call to faceio.authenticate() here will automatically trigger the facial authentication process
        }
        function handleError(errCode){
            // Handle error here
        }
    </script>
  </body>
</html>
The enrole() and authenticate() takes optional parameters also. You can see full doc here
Here is the full HTML Integration Boilerplate for your reference
Replace the dummy field on the boilerplate with your real application Public ID when you instantiate fio.js.
Congratulations🎉 You have successfully included Facial Recognition Authentication to your application and FACEIO is up & running!
Example Preview:

If you want to know more about faceIO and detailed explanation, please visit the official documentation page.
Thanks for reading❤